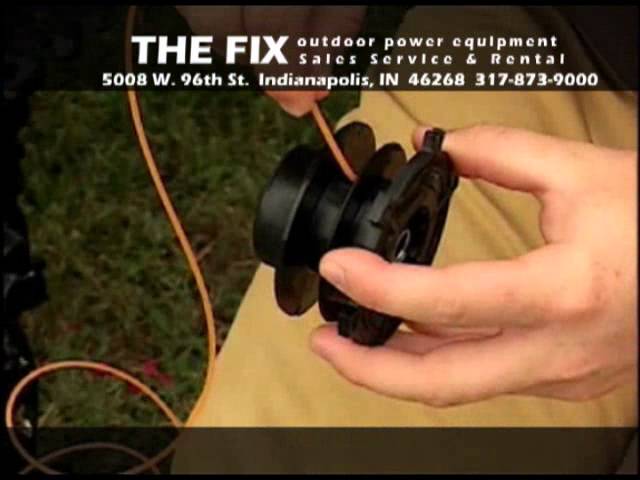
Ever wondered why your trimmer line keeps breaking or doesn’t feed correctly? Properly loading a Stihl trimmer line can significantly enhance efficiency and longevity, making your gardening tasks smoother. Let’s delve into how even the slightest misstep can impact performance and how mastering this simple skill can save you time and frustration.
It’s fascinating to note that the introduction of Stihl’s AutoCut and SuperCut systems revolutionized the way we tackle lawn care. By inserting the line into the designated eyelets and winding it evenly, you ensure a balanced and smooth operation. Today, a well-loaded trimmer not only cuts better but also extends the life of the trimmer head, reflecting the perfect synergy between tool and technique.
- Remove the trimmer head cap by pressing the side tabs.
- Prepare approximately 25 feet of new trimmer line.
- Insert each end of the line into the eyelets on the trimmer head.
- Wind the line onto the spool in the direction indicated by arrows.
- Replace the cap, ensuring it clicks firmly into place.

How to Load Stihl Trimmer Line
Loading a Stihl trimmer line isn’t as complex as it seems. First, you need to remove the trimmer head cap, which usually clicks off easily with a press of the tabs. Once the cap is off, pull out any old line still inside the spool. This step is crucial to ensure smooth operation. According to this post, keeping your tools in good condition ensures their longevity.
Next, prepare the new trimmer line. Measure about 25 feet of line to start. This might seem like a lot, but it’s necessary for a full load. Cut the line using a pair of sharp scissors. Now you’re ready to insert the line into the trimmer head.
Look for the small holes on the sides of the trimmer head. Insert the line into these holes until the ends come out the other side. Pull the line through until you have equal lengths on both sides. This step helps in maintaining a balanced operation.
Finally, wind the line onto the spool by turning it in the direction indicated on the trimmer head, usually indicated by arrows. Make sure to wind it evenly to avoid tangles. Once wound, replace the cap and you’re set. For more details on maintaining your trimmer, check out here is the article.
Step 1: Removing the Trimmer Head Cap
Removing the trimmer head cap is the first step in loading the line. Locate the tabs on the sides of the cap, which are usually easy to press. Use your thumb and forefinger to squeeze these tabs together. When you press the tabs, the cap should pop off effortlessly. According to this post, keeping your trimmer line fresh and replacing it when necessary can prevent damage.
If the cap is stuck, avoid using excessive force. Instead, gently wiggle it while pressing the tabs to loosen it. Sometimes dirt and debris can make the cap harder to remove. Cleaning the area around the cap with a brush can help. This will make the process smoother and prevent damage to your trimmer.
After removing the cap, take note of the way the old line is positioned inside. This visual reference can be useful when inserting the new line. Set the cap aside in a safe place where it won’t get lost. It’s a small piece but essential for the trimmer’s functionality.
Next, inspect the spool and the trimmer head interior. Look for any leftover bits of old line or debris and clean these out. This step ensures that the new line will wind smoothly. Now you’re ready to move on to preparing your new trimmer line.
Step 2: Preparing the Trimmer Line
Start by measuring the appropriate length of trimmer line. Typically, 25 feet is a good amount to work with. Make sure the line is straight and not curled up. If it’s curled, you might have trouble feeding it into the trimmer head. Cut the line with sharp scissors to ensure clean ends.
The next step involves aligning the line. Make sure both ends are even after cutting. Holding both ends, stretch the line out to remove any twists or kinks. These steps ensure a smoother operation when winding it onto the spool. This will help in making the trimming efficient.
Now, find the midpoint of the cut line by bringing the two ends together and folding it in half. Hold the loop in one hand and the two loose ends in the other. Some trimmer heads have a small notch where this loop goes. Hook the loop into this notch, which helps in securing the line in place.
Before you start winding the line onto the spool, double-check your work to ensure there are no tangles. This attention to detail will save you from potential frustration later. Once everything looks good, you are ready to insert the line into the trimmer head and start winding it. Proper preparation is key to a hassle-free experience.
Step 3: Inserting the Line into the Trimmer Head
Inserting the line into the trimmer head is straightforward once you’ve prepared it. Begin by gently inserting each end of the trimmer line into the eyelets on the trimmer head. Make sure the line is even on both sides. Pull the ends through until the lengths are equal. This balance is essential for proper operation.
Once the line is inserted, you’ll need to wind it onto the spool. Follow the direction of the arrows on the trimmer head to avoid tangling. Wind the line tightly but don’t overlap it. Keeping it even will make it function smoothly. Take your time to do this step carefully.
After winding the line, recheck its positioning. Ensure both lines are still equal in length and securely positioned in the eyelets. If everything looks good, replace the cap onto the trimmer head. Press it firmly until it clicks into place. This step locks the line and secures the system.
Next, give the trimmer a quick test. Pull on the lines gently to make sure they’re feeding correctly. If they release smoothly, you’re all set. If not, you may need to adjust the line or cap. Finally, start your trimmer to verify everything is working well. This ensures you’re ready for efficient trimming.
Sometimes, even with careful preparation, issues can arise. According to this expert opinion, old or curled trimmer line may need replacement to work properly. Keep spare lines handy for such situations. Being prepared can save you time.
Significance of Properly Loading a Stihl Trimmer Line
Properly loading a Stihl trimmer line is vital for its performance. When the line is loaded correctly, it ensures a consistent and effective cut. This efficiency translates to less time spent on lawn maintenance. Additionally, an evenly loaded line prevents your trimmer from working harder than necessary, extending its lifespan. It’s a simple yet crucial step in trimmer upkeep.
A poorly loaded trimmer line can lead to numerous issues. The line may break more frequently, causing interruptions. This not only wastes time but also consumes more line. Moreover, an inconsistent load can create an imbalance, which might affect the motor. These problems highlight the importance of taking the time to load the line properly.
Correctly loading the line also has safety benefits. A mismanaged line can snap back unexpectedly, posing risks. Ensuring the line is secure and evenly distributed minimizes these hazards. Regularly checking and maintaining the line can prevent accidents. Safety should always be a priority when handling power tools.
The quality of the cut is another reason to focus on proper loading. A well-loaded line provides a cleaner and more precise trim. This results in a better-looking lawn or garden. Achieving a professional finish becomes easier. Ensuring the line is properly loaded contributes to both the trimmer’s performance and the final appearance of your work.
Proper loading practices also lead to cost savings. Using the line effectively means you won’t need to replace it as often. This can save you money in the long run. Economically, it makes sense to spend a few extra minutes ensuring everything is set up correctly. Efficient use of resources benefits both your wallet and the environment.
Common Problems When Loading a Stihl Trimmer Line and Their Solutions
One common issue is the trimmer line breaking too quickly. This often happens if the line isn’t wound tightly or evenly. To fix this, ensure that the line is wound in the direction of the arrows on the spool. Also, make sure it’s tight and even. This can prevent frequent breaks and prolong the life of the trimmer line.
Another frequent problem is the line getting stuck inside the spool. If the line isn’t fed correctly, it can jam while you’re trimming. To solve this, always make sure the line is straight and not twisted before winding it. Use a clean spool to avoid debris buildup. Keeping the spool clean can also help the line feed smoothly.
Sometimes the trimmer line might feed out improperly, causing uneven trimming. This may happen if the line ends are not equal or if the cap isn’t secured tightly. Double-check that both ends of the line are the same length before closing the cap. Also, press the cap until you hear it click. Ensuring a tight fit will help the line feed evenly.
It’s also possible to encounter problems with the line getting too short too quickly. This can be due to using a line that’s too thin for your trimmer. Refer to your trimmer’s manual to use the recommended line size. Replacing the line with the correct thickness can improve performance and reduce the need for frequent replacements.
Another issue could be the line curling up and not feeding properly. According to this resource, a curled line often indicates that it’s old and needs replacing. Keeping spare, properly-stored lines can prevent this problem. Fresh lines typically perform better and lead to smoother operation.
Frequently Asked Questions
Here are some commonly asked questions related to using and maintaining a Stihl trimmer line. These answers aim to provide clear, concise information for both beginners and experienced users.
1. How often should I replace the trimmer line on my Stihl trimmer?
The frequency of replacing the trimmer line depends on usage and the thickness of the vegetation being cut. Generally, for regular home use, you might need to replace it every few weeks. For heavy-duty usage, more frequent replacement may be necessary. Signs that indicate it’s time for a change include fraying and loss of efficiency.
If you notice the trimming quality diminishing or if the line breaks frequently, it’s a good indicator to replace it. Always have extra lines available to avoid interruptions in your work. Your user manual will also offer guidelines tailored to your specific model, ensuring optimal performance.
2. What type of trimmer line is best for thick grass?
For thick grass, a thicker trimmer line is generally more effective. Lines that are 0.095 inches or larger provide better durability and can handle tougher vegetation without breaking easily. Spiral-shaped lines are also recommended as they reduce noise while maintaining cutting power.
Using high-quality commercial-grade lines can significantly improve performance when dealing with dense grass or weeds. Always check compatibility with your Stihl trimmer model before choosing a thicker line to ensure efficient operation and safety.
3. Why does my trimmer line keep getting tangled?
Tangling can occur if the trimmer line isn’t properly loaded onto the spool or if it’s too long and overlaps while winding. Ensuring an even distribution of the line during loading can prevent tangling issues. Following the arrows on the spool for correct winding direction also helps minimize these problems.
Dirt and debris inside the spool compartment can also contribute to tangling, so keeping it clean is essential for smooth operation. Regularly checking your equipment for wear and tear can help identify any potential issues before they lead to tangles.
4. Can I use any brand of trimmer line with my Stihl trimmer?
While many brands produce compatible trimmer lines, it’s generally best to use Stihl-approved lines designed specifically for their models. Using different brands might affect performance or cause damage over time due to incompatibility in material quality or thickness specifications.
Your user manual typically lists recommended types of lines that match your specific model’s requirements perfectly, ensuring optimal functionality. If you choose another brand, make sure it meets these recommendations closely.
5.What maintenance tips will prolong the life of my trimmer head?
Regular maintenance includes cleaning debris from around the spool area after each use and inspecting parts like eyelets and caps for signs of wear or damage.Timely replacement of worn-out components prevents more significant failures down the road.. Ensure proper lubrication where needed according personnel instructions provided by manufactures purposeful maintenance messages found within manuals explicitly alive care instructionals given assortment yet consis interpretations ideal accordingly however actualize necessaries thoroughly rendering said equipment functional extended lifespans usually entrenched maintenances adhered dependencies altogether remain perpetually effective healthy maintained regards operational longevity
ConclusionProperly loading a Stihl trimmer line enhances both performance and longevity. Addressing common problems with simple solutions can save time and avoid frustration. Regular maintenance and choosing the right type of line are key factors in achieving efficient trimming. Remember, a well-maintained tool is safer and yields better results.
Additionally, staying informed about best practices ensures you get the most out of your equipment. By following the guidelines outlined, experts and beginners alike can maintain optimal tool performance. Investing a bit more time in preparation and upkeep pays off in effective and hassle-free trimming.

I’m Patricia D. Johnson, an affiliate marketer and blogger specializing in trimmers and grooming tools. I create honest reviews, buying guides, and practical tips to help readers choose the right trimmer for their needs. With a focus on quality, performance, and value, I simplify the decision-making process so consumers can make confident purchases.