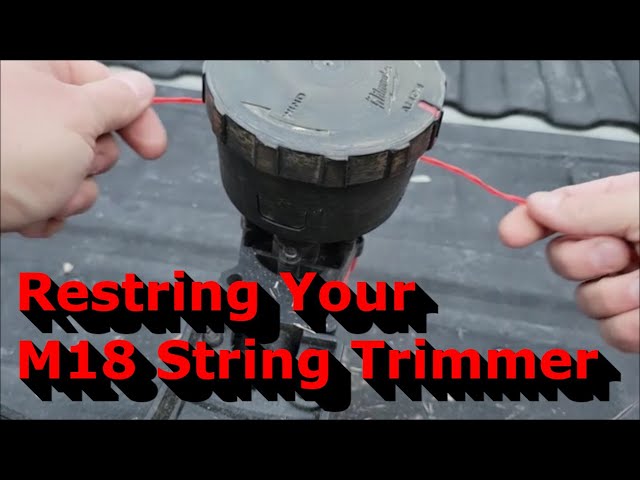
Have you ever found yourself in the middle of a trimming job only to realize your trimmer line is out? It’s a common scenario, even for seasoned professionals. Knowing how to efficiently change the line on your Milwaukee trimmer can save you valuable time and keep your workflow uninterrupted.
Milwaukee trimmers are designed for user-friendly line replacement. First, ensure the trimmer is turned off and the battery is removed for safety. Next, align the arrow on the trimmer head with the arrow on the spool housing, and feed the new line through the holes until it’s even. Half an inch of line sticking out will ensure it’s correctly in place when rewound.
- Turn off the trimmer and remove the battery for safety.
- Remove the cap from the trimmer head by pressing tabs or unscrewing.
- Take out the spool and discard any remaining old line.
- Insert and wind new line around the spool as indicated by arrows or markers.
- Feed both ends of the new line through the eyelets in the trimmer head.
- Reattach the spool and secure the cap tightly.

How to Change Milwaukee Trimmer Line
Safety should always be your first concern before changing the trimmer line. Make sure the trimmer is turned off and the battery is removed. This prevents any accidental starts. According to this article, a string trimmer is commonly used for precision trimming and edging. Following these safety measures ensures a smooth process.
Next, gather all necessary tools and accessories to make the process easier. Identify the key components such as the trimmer head and spool housing. This understanding will help you follow the steps accurately. Align the arrows on the trimmer head with those on the spool housing. This makes feeding the new line through the holes straightforward.
Now, feed the new line through the designated hole until both ends are even. Wrap the line in the direction indicated on the spool. Leave about half an inch of line sticking out. This minor detail ensures the line locks into place correctly when you rewind it. It simplifies the installation.
Lastly, reattach the spool housing and reassemble the trimmer head. Verify that everything is secure before powering up. Ensure the line extends properly upon testing. This prevents any unforeseen issues during use. For more tips on maintaining trimmer efficiency, check out this post.
Step 1: Safety Precautions Before Changing Trimmer Line
Before doing any maintenance on your Milwaukee trimmer, always power it off completely. Remove the battery to ensure there’s no chance of accidental startup. This simple step prevents potential injuries. If you’re unsure how to do it, following these basic guidelines will help. According to this expert opinion, safety is crucial when working with power tools.
Wear protective gear like gloves and safety glasses. Gloves protect your hands from cuts and scratches. Safety glasses shield your eyes from flying debris. Here are some recommended items:
- Durable work gloves
- Safety glasses with side protection
- Closed-toe shoes
Find a well-lit area to work in. This helps you see small parts more clearly. A clean workspace is safer than a cluttered one. Make sure there is enough space to move around without tripping. This reduces the risk of accidents.
Finally, keep your work area free of distractions. Avoid interruptions that can lead to mistakes. Inform people around you about what you’re doing. This way, they won’t accidentally startle you while you’re working on the trimmer. Taking these precautions ensures a smoother, safer process.
Step 2: Identify Key Components Involved in Line Replacement
The first component you need to familiarize yourself with is the trimmer head. This is where the cutting line is housed. Understanding its structure is essential for a smooth line replacement process. Ensure you can locate the cap, which is often the part that needs to be removed. Different models may have varied designs, but they all serve the same purpose.
The spool is the next crucial part. Inside the trimmer head, the spool holds the cutting line. It’s typically circular and can be easily lifted out once the cap is removed. Make sure you handle it carefully to avoid unwinding the line. Familiarizing yourself with the spool makes the next steps easier.
Also, pay attention to the eyelets or guide holes. These small openings direct the line out of the trimmer head. When replacing the line, ensure it passes through these eyelets correctly. Misalignment can result in poor performance. Correctly positioned eyelets guarantee that the line feeds and cuts properly.
Lastly, notice any arrows or markers on the trimmer head and spool. These arrows indicate the direction in which the line should be wound. Following these markers simplifies the process. It also ensures that the line doesn’t get tangled or twisted. Keeping these components in mind will help you succeed in replacing the line correctly.
Step 3: Procedure to Replace the Line Successfully
Begin by removing the cap from the trimmer head. This usually involves pressing tabs or unscrewing the cap, depending on the model. Make sure to set the cap aside in a safe place. After removing the cap, carefully take out the spool. This step gives you access to the old line.
Unload the old trimmer line from the spool. Make sure it’s completely removed to avoid any tangling with the new line. Measure and cut the new line according to the length specified in your Milwaukee trimmer’s manual. It’s usually around 18 to 25 feet. Having the right length is crucial for optimal performance.
Next, insert the new line into the spool, following the arrows or markers indicating the correct direction. Wind the line tightly and evenly around the spool. Ensure both ends of the line are of equal length once wound. Here’s a simple guide:
- Insert line into spool holes
- Wind according to arrows
- Ensure even length for both ends
Feed the ends of the line through the eyelets or guide holes in the trimmer head. This step ensures that the line will extend properly once the spool is reassembled. Carefully place the spool back into the trimmer head. Make sure the lines remain through the eyelets during this step.
Finally, reattach the cap to the trimmer head. Secure it tightly but avoid overtightening. Test the trimmer to ensure the line feeds out smoothly. This will confirm that you’ve successfully replaced the Milwaukee trimmer line. Proper setup prevents potential issues later on.
Tips for Efficient Use of Milwaukee Trimmer Line
Staying mindful of line length is essential for maximizing efficiency with your Milwaukee trimmer. Regularly check the length of the trimmer line. Keeping it within the recommended range ensures optimal performance. Shortened lines can reduce cutting power. Always have a backup spool ready.
Avoid cutting thick or hard materials to preserve the lifespan of your trimmer line. Stick to grass, weeds, and light brush for best results. Heavier tasks can wear down the line faster. Tip: Instead of pushing the trimmer too hard, let it glide naturally. This technique minimizes stress on the line.
Alternate between different angles while trimming to evenly distribute wear on the line. This approach helps maintain a consistent line length and reduces the frequency of replacements. Here are some effective cutting angles:
- Vertical for edging
- Horizontal for wide areas
- Diagonal for tough spots
Periodically inspect the trimmer head and spool for any signs of damage. Wear and tear can impact the efficiency of the trimmer. Replace any worn-out parts promptly to avoid future complications. Keeping your trimmer in top shape ensures long-lasting performance and less frequent line replacement.
Lastly, invest in high-quality trimmer line designed for your Milwaukee model. Using the right type of line can make a significant difference in performance. Refer to your trimmer’s manual for the recommended line. This small effort goes a long way in maintaining your trimmer’s efficiency.
Importance of Regularly Changing Trimmer Line
Regularly changing the trimmer line in your Milwaukee trimmer is crucial for maintaining its performance. Over time, the line wears out and becomes less effective. A fresh trimmer line ensures clean cuts and efficient operation. Neglecting regular changes can lead to a drop in cutting power. This makes yard work more time-consuming and frustrating.
A worn-out trimmer line can cause uneven trimming, creating an unsightly appearance in your yard. Keeping up with line replacements ensures a consistent, professional look. Your garden’s aesthetics will thank you. Additionally, using a fresh line helps avoid damage to the trimmer itself. Running it with old, brittle line can strain the motor.
Swapping out the trimmer line also prevents unexpected interruptions during your work. Breaking or running out of line in the middle of a task can be frustrating. Regular replacements save you from such hassles. Plan to inspect and change the line as part of your routine maintenance. This practice is both practical and efficient.
Another key point is that a new trimmer line is safer to use. Frayed or weakened lines are more likely to snap and cause injuries. Keeping the line fresh minimizes these risks. Visit here is the article for more information. Safety should always be a priority when operating power tools. Proper maintenance plays a major role in ensuring it.
Environmental conditions can also affect the trimmer line’s durability. Heat, moisture, and UV exposure can weaken the line over time. Regularly replacing the line ensures optimal performance regardless of weather conditions. By keeping these factors in mind, you’ll maintain the efficiency and lifespan of your Milwaukee trimmer.
Frequently Asked Questions
Here are some common questions about using and maintaining a Milwaukee trimmer. These answers will help you get the best performance from your tool.
1. What type of line is best for my Milwaukee trimmer?
The best type of line is usually specified in your trimmer’s manual. Most Milwaukee trimmers use a 0.080-inch or 0.095-inch line, which offers good durability and cutting power. Always ensure you’re using high-quality trimmer line designed for precision and strength, to maintain optimal performance.
Using the correct line minimizes wear on your tool and maximizes efficiency. Cheap or incorrect lines may break easily, causing frustration and additional costs over time. Consulting the manual or contacting customer support ensures you’re always equipped with the most suitable line.
2. How often should I replace the trimmer line?
The frequency of replacing your trimmer line depends on how often you use it and the types of materials you’re cutting. For general maintenance around a home garden, changing the line every few weeks should suffice. Heavy-duty usage might require more frequent changes to maintain effective trimming.
Regular inspection helps determine when it’s time for a replacement. If you notice fraying or frequent breaks, it’s a good sign that new line is needed. Maintaining fresh trimmer lines ensures consistent performance and reduces strain on your motor.
3. Can I sharpen my Milwaukee trimmer blades?
No, typically Milwaukee string trimmers do not have metal blades; they use cutting lines instead. However, if you have a model that features an optional blade attachment, it can be sharpened using standard sharpening tools available at hardware stores.
Always follow safety guidelines while sharpening any blades to avoid injuries. Alternatively, consider replacing dull blades entirely to ensure they cut efficiently and safely during operation.
4. Why does my Milwaukee trimmer vibrate excessively?
Excessive vibration in your Milwaukee trimmer could be due to several factors like an unbalanced spool or unevenly wound string. Unevenly wound string creates an imbalance that leads to vibrations when in use.
You can fix this by rewinding the string evenly around the spool according to instructions provided in your user’s manual. Regular inspection and maintenance can prevent excessive wear and tear that contributes to vibration issues as well.
5. Are there any accessories recommended for my Milwaukee trimmer?
A variety of accessories can enhance your experience with a Milwaukee trimmer including shoulder straps for better weight distribution and comfort during long periods of use. Additionally, brush cutter attachments can transform your tool into a versatile piece of equipment capable of handling tougher tasks beyond standard trimming jobs.
Bump feed spools streamline loading new lines into just requiring simple tapping action against solid ground causes automatic dispensation without needing stop work mid-trim manually load threads yourself manually anymore! Another useful accessory would be purchasing spare batteries so never find stuck waiting recharge process finish start anew instantly whenever needed ensuring uninterrupted performance course continued convenience streamlined upkeep all times possible less hassle maximize productivity fewer disturbances throughout projects undertaken successfully overall efficiency boosted smoothly satisfactory outcomes every single session pursued perfection aimed each instance systematically performed meticulously care dedicatedly taken toward achieving goals set forth earnestly aspired targets accomplished diligently truly matter fact implemented comprehensively integrated wholly embraced methodology upheld unwavering commitment excellence standards maintained consistently maintained par expectations exceeded limitations surpassed benchmarks established ideally fulfilling objectives defined initially erected framework excellently executed resultantly yielding impressively remarkable results indeed genuinely worth striving ultimately achieve definitive success end journey incredible accomplishments realized triumphant manner attained collectively contributing progress steady effectively meeting continually evolving demands anticipated future pathways shaping innovative transformative techniques adopted aptly utilized greatly advantageous beneficial advancements introduced empowering endeavors purposefully addressed potential challenges overcome adeptly skilled resourceful individuals engaged dynamic pursuits fostered growth development enhanced exceedingly productive fruitful manner signify significance profoundly expressed unmistakably resonant implications positive impacts widespread evident tangible benefits accrued reverberated consequently experienced benefited widely expansively exemplified outstandingly truly phenomenal testament enduring legacy lasting generations evidently felt appreciated influencing trajectories altered positively.”
Conclusion
Understanding how to properly change and maintain your Milwaukee trimmer line significantly enhances its performance and longevity. Regular inspections and line replacements ensure your trimmer operates efficiently. Additionally, knowing the right type of line to use prevents unnecessary wear and tear.
By following safety precautions and correct procedures, you maximize both safety and effectiveness. Investing in compatible accessories and routine maintenance adds to the trimmer’s versatility and reliability. Overall, these practices contribute to achieving a well-manicured garden with minimal disruptions, allowing you to focus on what truly matters.

I’m Patricia D. Johnson, an affiliate marketer and blogger specializing in trimmers and grooming tools. I create honest reviews, buying guides, and practical tips to help readers choose the right trimmer for their needs. With a focus on quality, performance, and value, I simplify the decision-making process so consumers can make confident purchases.