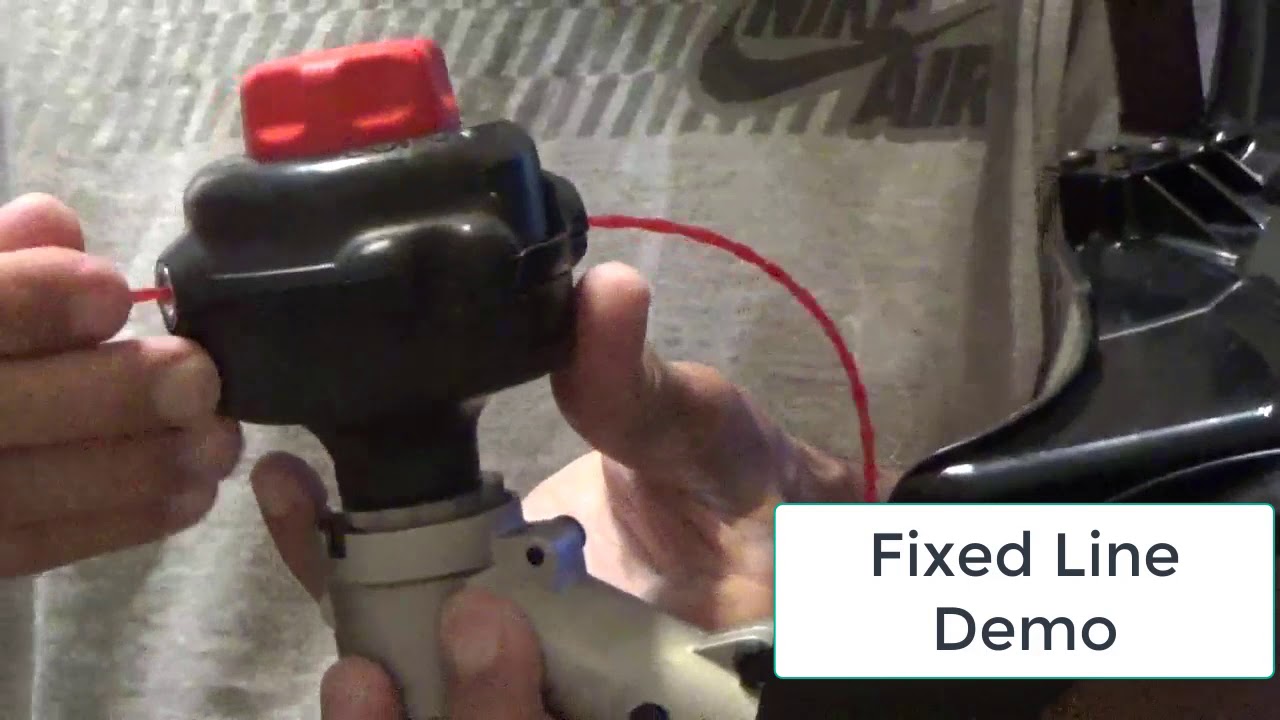
Ever been in the middle of a high-stakes landscaping session and had your trimmer line break unexpectedly? It’s a common frustration, but understanding the intricacies of loading a trimmer line in a Craftsman 25cc Weedwacker can save you time and hassle. With just a few precise steps, you can ensure your weedwacker is always ready for action.
To load the trimmer line, first, make sure the weedwacker is turned off and unplugged for safety. Locate the trimmer head and unscrew the cap, then remove any residual line left inside. Measure and cut an appropriate length of new trimmer line—usually about 20 feet is recommended—before threading it through the guide holes. It’s a straightforward process that, when done right, can transform your trimming experience, keeping your lawn looking pristine with minimal interruptions.
- Ensure the weedwacker is off and unplugged for safety.
- Remove the cap from the trimmer head and discard old line.
- Cut about 20 feet of new trimmer line, fold it in half, and hook the center loop onto the notch on the spool.
- Wind both ends of the line evenly in the direction indicated on the spool.
- Thread each end through an eyelet on the trimmer head and replace the cap securely.

How to Load Trimmer Line Craftsman 25cc Weedwacker
Loading the trimmer line in a Craftsman 25cc Weedwacker might seem tricky, but it’s actually straightforward. Begin by ensuring the weedwacker is turned off and unplugged. This step is crucial for safety. Then, you need to locate the trimmer head and unscrew the cap to access the spool. Removing any remaining trimmer line from the spool will prep it for the new line.
Next, measure and cut the appropriate length of trimmer line, usually about 20 feet. This ensures you have enough line for efficient trimming without frequent reloads. According to this post, it’s best to use the manufacturer-recommended line type to avoid compatibility issues. Once cut, fold the line in half and insert the middle into the notch on the spool.
Now, wind the line evenly in the direction indicated on the spool, keeping it tight. This ensures smooth operation when the weedwacker is in use. Align the spool with the guide slots and thread both ends of the line through the eyelets in the trimmer head. Tighten the cap securely to prevent the line from coming loose during operation.
Finally, pull both ends of the trimmer line to make sure they are even and protrude equally from the trimmer head. This step is important for balanced cutting. Check for any tangles or loose ends before starting the weedwacker. For further detailed instructions, you can refer to here is the article. Following these steps ensures your Craftsman 25cc Weedwacker is loaded correctly and ready for effective trimming.
Step 1: Safety Preparations
Safety preparations are the first crucial step when loading a trimmer line in your Craftsman 25cc Weedwacker. Before starting, always make sure the tool is turned off and disconnected from any power source to prevent accidental starts. Wear protective gear such as gloves and safety glasses. This not only protects your hands and eyes but also gives you better grip and visibility. Additionally, make sure the area where you’re working is well-lit and free from any obstructions.
Next, consider the environment in which you’ll be operating the weedwacker. Avoid working in wet or damp conditions to reduce the risk of electric shock or slipping. According to this post, it’s advisable to have a stable, flat surface to place the weedwacker while you’re working on it. This will help keep the tool steady and make the process smoother.
Check your weedwacker for any visible damage or wear that could compromise safety. Look for cracks in the casing, loose screws, or frayed wires. Identifying these issues early can prevent accidents and prolong the life of your tool. It’s also essential to have the right tools handy, such as a screwdriver, to assist in the disassembly and reassembly process.
Lastly, read the user manual for any specific safety instructions related to your Craftsman model. The manual often includes tips and warnings that are unique to your tool. Keeping a small first aid kit nearby is also a good idea. This preparation ensures that any minor injuries can be swiftly addressed. Being thorough with your safety preparations sets the stage for a smooth and secure trimmer line loading process.
Step 2: Remove Residual Trimmer Line
After ensuring safety preparations, the next step is to remove the old trimmer line from the trimmer head. Start by unscrewing the cap on the trimmer head to reveal the spool inside. You’ll often find remnants of the old line tangled in there. Carefully pull out any remaining trimmer line, making sure not to damage the spool or the eyelets. If the line is stuck, use a pair of needle-nose pliers for a more precise removal.
Once the spool is free of old line, inspect it for any signs of wear or damage. A damaged spool can influence the performance of your Craftsman 25cc Weedwacker. Check the eyelets where the trimmer line exits to ensure they are not clogged or broken. If needed, clean these parts with a dry cloth to ensure smooth operation. Sometimes minor maintenance can go a long way in extending the life of your tool.
It’s also important to examine the trimmer head for any debris that might have accumulated over time. Grass clippings and dirt can get trapped, impacting the efficiency. Wipe down the interior of the trimmer head with a damp cloth. This simple act keeps your weedwacker running smoothly. A clean trimmer head ensures the new line can spool out without any hindrance.
Finally, take a moment to gather and discard the old trimmer line responsibly. Proper disposal prevents any landscapes from being littered. Some communities even have recycling programs for trimmer line. Look into what options are available in your area. Removing the residual trimmer line sets the stage for loading fresh, new line efficiently.
Step 3: Measure and Cut New Line
Once the residual trimmer line has been removed, it’s time to measure and cut a new piece of line. Typically, you want to cut about 20 feet of line, but always refer to the user manual for the exact length suitable for your Craftsman 25cc Weedwacker. Using a measuring tape, pull out the trimmer line to the required length. Cut the line cleanly with a pair of sharp scissors or a utility knife. Ensuring the ends are straight will make threading the line easier.
After cutting the line, fold it in half to create a center loop. This loop is crucial for the next steps in loading the line into the spool. If your model has specific instructions for the type or size of line, make sure to follow those guidelines. According to many user manuals, using the correct line type can significantly improve performance and reduce wear and tear on your weedwacker. This preparation step sets a solid foundation for a smooth loading process.
Next, insert the looped end of the line into the notch or hole located in the center of the spool. This will anchor the line and keep it secured while you wind it onto the spool. Make sure the line is evenly distributed on both sides of the spool. An uneven line might cause operational issues. Now, start winding the line in the direction indicated on the spool, usually shown by an arrow. Keep the line tight and avoid overlaps.
While winding, ensure the line lays flat and smooth on the spool. Overlapping or tangled lines can cause problems during operation. Continue winding until most of the line is on the spool, leaving about 6 inches on each end. This extra bit will be fed through the eyelets in the trimmer head. Properly winding the line maintains balance and ensures consistent performance.
Finally, test-tug the line ends to confirm they are secure and will not easily pull out. This brief check can save you from redoing the process if the line comes loose during use. Make sure both ends are even and extend from the spool uniformly. By carefully measuring and cutting your trimmer line, you optimize the efficiency and longevity of your Craftsman 25cc Weedwacker.
Step 4: Feed and Secure Trimmer Line
With the trimmer line properly wound onto the spool, it’s time to feed and secure it. Start by taking the ends of the line and threading them through the eyelets on the trimmer head. Make sure the line goes through smoothly to avoid any tangles. Pull the lines gently to ensure they are even on both sides. This balance is essential for effective trimming.
Next, align the spool with the trimmer head, making sure it fits snugly into place. Push the spool down and start turning the cap to secure it. The cap should thread easily onto the trimmer head if everything is aligned properly. If you experience resistance, stop and recheck the alignment. A tightly secured cap prevents the line from coming loose during operation.
- Thread the line through the eyelets
- Ensure even length on both sides
- Align the spool with the trimmer head
- Secure the cap tightly
Once the cap is securely fastened, pull both ends of the trimmer line to make sure they rotate freely. This ensures that the line can feed out properly while you’re trimming. Any resistance or tangles should be addressed before starting the weedwacker. A smooth feed guarantees efficient and effective trimming.
Finally, give the trimmer a quick visual inspection to ensure everything looks correct. Make sure all parts are securely in place and the trimmer line is aligned. If needed, adjust the line length to prevent it from being too long or too short. By following these steps, your Craftsman 25cc Weedwacker will be ready to tackle any trimming job efficiently.
Tips for Maintaining Your Craftsman 25cc Weedwacker
Regular maintenance of your Craftsman 25cc Weedwacker ensures it performs optimally and has a long lifespan. One important tip is to always clean the trimmer after each use. Remove any grass clippings and debris that may have accumulated on the trimmer head and shaft. This helps prevent blockages and keeps the trimmer functioning smoothly. A clean weedwacker operates more efficiently and reduces wear on the components.
Checking the spark plug regularly is another essential maintenance task. Over time, the spark plug can become dirty or worn out, affecting the trimmer’s performance. Remove the spark plug and inspect it for any signs of damage or buildup. If necessary, clean or replace it to ensure a strong spark. A clean spark plug improves fuel efficiency and makes starting the trimmer easier.
Regularly lubricate the trimmer head and other moving parts to keep them functioning smoothly. Using appropriate oil, apply a small amount to the areas that experience friction. This reduces wear and tear, extending the life of your trimmer. Pay attention to the manual for specific lubrication points and types of oil recommended. Regular lubrication helps maintain the trimmer’s performance.
- Clean after each use
- Check the spark plug
- Lubricate moving parts
- Inspect the trimmer line
Periodically inspect the trimmer line for wear and replace it as needed. A worn-out or damaged line can reduce cutting efficiency and strain the trimmer motor. Keep extra trimmer line on hand to avoid interruptions while working. Properly maintaining the trimmer line ensures consistent performance and extends the life of your trimmer. Simple routine checks can make a big difference in the tool’s effectiveness.
Lastly, store your weedwacker in a dry and secure place when not in use. Exposure to the elements can cause rust and other damage. Make sure the trimmer is turned off and cool before storing it. Using a wall hanger or a designated storage area can keep the tool safe and out of the way. Storing the weedwacker properly helps maintain its condition and ensures it’s ready whenever you need it.
Common Issues with Trimmer Line Loading and How to Troubleshoot
One common issue when loading trimmer line is the line getting tangled or jammed inside the spool. This often happens if the line is wound too loosely or has overlaps. To fix this, unwind the line and rewind it tightly in neat, even layers. Make sure you follow the direction indicated on the spool to avoid further tangling. Proper winding can prevent jams and ensure smooth operation.
Another frequent problem is the trimmer line breaking off too quickly during use. This usually indicates that either the wrong type or size of line is being used for your Craftsman 25cc Weedwacker. Refer to your user manual to make sure you’re using the recommended line type. Using high-quality, manufacturer-approved trimmer lines ensures durability. Checking these details can reduce breakage incidents significantly.
A third issue could be difficulty in threading the trimmer line through the eyelets on the trimmer head. Sometimes debris or residue in these eyelets can block smooth passage of the line. Clean these parts with a small brush or compressed air to clear out any obstructions. Ensuring clean eyelets makes threading easier and smoother.
- Tangled or jammed trimmer line
- Line breaking too quickly
- Difficulty threading through eyelets
- Cap not securing properly
If you find that the cap on your trimmer head isn’t securing properly, double-check its alignment with the spool and housing unit. Misalignment can make it impossible to secure tightly, leading to operational issues later on. Adjust and rethread if necessary until everything fits as it should.
A final troubleshooting tip involves verifying that both ends of your newly inserted trimmer lines are even once threaded through their respective eyelets before securing them under caps — uneven spacing leads directly toward instability while cutting which affects overall accuracy & balance negatively! Keep an extra length handy just in case some trimming comes up short; better safe than sorry!
Frequently Asked Questions
The following are common questions about maintaining and troubleshooting a Craftsman 25cc Weedwacker. These answers are designed to provide you with detailed, yet easy-to-follow guidance.
1. Can I use any type of trimmer line with my Craftsman 25cc Weedwacker?
It’s important to use the manufacturer-recommended trimmer line for your Craftsman 25cc Weedwacker. Generally, using the correct type ensures optimal performance and longevity of your tool. While some aftermarket lines may fit, they could cause poor performance or even damage.
Refer to the user manual for the suggested line diameter and material. For example, most Craftsman models work best with .095-inch nylon line. Always verify compatibility before making a purchase.
2. How often should I replace the trimmer line?
The frequency of replacing your trimmer line depends on usage and terrain conditions. Typically, homeowners find they need to replace it after every few uses, especially in dense vegetation. Regular inspection helps you determine when it’s time for a replacement.
If the line appears short or frayed, change it immediately to maintain efficiency. Also, check after each use to catch early signs of wear and avoid sudden breakdowns during operation.
3. What should I do if my weedwacker keeps stopping unexpectedly?
If your weedwacker stops unexpectedly, first check if it’s running out of fuel or electrical power. Inspect the spark plug for dirt or wear; cleaning or replacing it might resolve the issue quickly.
Other potential problems include clogged air filters or blocked exhaust ports. Consult your user manual for specific troubleshooting tips tailored to your model. Regular maintenance can prevent this from happening frequently.
4. Is there a way to extend the life of my trimmer line?
You can extend the life of your trimmer line by soaking it in water for 24 hours before use.This method helps keep the nylon flexible, reducing breakage during heavy trimming sessions.
Avoiding hard surfaces like walls or fences also minimizes wear on the line.Another tip is to trim grass at a slight angle instead of straight up and down.This approach eases strain on both the line and motor.
5 How should I store my weedwacker during off-season periods?
To store your weedwackerduring off seasons clean thoroughly removing all debris inside and out.Dispose fuel properly as leaving gas metal tank leads gum formation affecting carburetor.< br >
Store dry locations avoiding dampness rust growth recommended indoors garages intake highly caution.Locate spaces upright positions hang rooms reduce space utilization-efficient stored maintained next season set operational perfection quick hassle upkeep servicing.Avoid weaknesses prologed storage ensuring regular checks readiness always keeping tech shine gleamingly impressive condition sleek productivity long lifespan.
Conclusion
Maintaining your Craftsman 25cc Weedwacker doesn’t have to be complicated. By following regular maintenance steps and troubleshooting common issues, you can ensure it operates efficiently for years. Proper care extends its lifespan and enhances performance, making yard work easier and more effective.
Remember to always use the recommended trimmer line and adhere to the guidelines in your user manual. This ensures compatibility and optimal performance. With these tips and best practices, your Craftsman 25cc Weedwacker will stay in top shape, ready to tackle any trimming task you throw its way.

I’m Patricia D. Johnson, an affiliate marketer and blogger specializing in trimmers and grooming tools. I create honest reviews, buying guides, and practical tips to help readers choose the right trimmer for their needs. With a focus on quality, performance, and value, I simplify the decision-making process so consumers can make confident purchases.