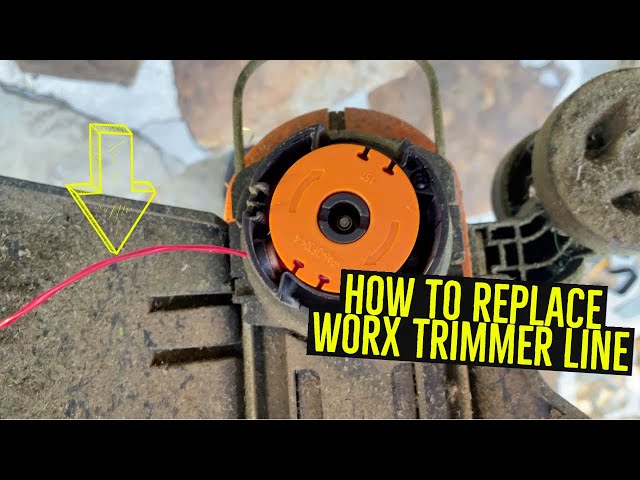
Grasping the intricacies of replacing the line on a Worx trimmer can transform this routine garden chore into a seamless task. Many people underestimate how this simple switch can save time and preserve the efficiency of their trimming tools. Knowing the right techniques ensures you maintain the peak performance of your equipment, leading to a pristine yard in no time.
To start, ensure that your trimmer is switched off and disconnected from the power source. Most Worx models allow for an easy spool removal, making it a user-friendly process even for the less mechanically inclined. With advancements in trimmer design, newer models often feature an automatic line feed which drastically reduces the frequency of manual replacements, a game-changer for home gardeners and professionals alike.
- Turn off and unplug the trimmer.
- Unscrew the trimmer head cap to access the spool.
- Remove any old line from the spool.
- Cut a new line, about 10 feet long, and fold it in half.
- Insert the middle point into the anchor hole on the spool and wind it evenly following the arrows.
- Feed the loose ends through the eyelets on the trimmer head.
- Reassemble the trimmer head by securing it with its cap.

How to change the line on a worx trimmer
Changing the line on a Worx trimmer might seem tricky, but it’s straightforward when broken down into steps. First, make sure your trimmer is turned off and unplugged to prevent any accidents. Unscrew the cap on the trimmer head to access the spool. Remove any leftover line from the spool. If the line is tangled or stuck, gently unwind it.
Now, cut a new trimmer line to the required length, usually around 10 feet. Insert one end of the line into the anchor hole in the spool. Wind it evenly and neatly around the spool, following the direction indicated by the arrows. Be careful not to overlap the line as it can cause tangling. Once the line is wound, leave about 6 inches of line unwound.
Feed the loose ends of the line through the eyelets on the trimmer head. Place the spool back into the trimmer head and secure it with the cap. Double-check that the line is feeding smoothly through the eyelets. According to the article, a loose wire can affect performance, so ensure everything is snug.
After reassembling the trimmer head, test the new line by powering on the trimmer. If it cuts cleanly and advances properly, you’ve successfully changed the line. Regularly replacing the line keeps your trimmer efficient, extending its lifespan. For more maintenance tips, you can check out this post to ensure your trimmer remains in top condition.
Step 1: Preparation before line change
Before starting the line change, ensure your trimmer is powered off and unplugged. This minimizes the risk of any accidental starts while you’re working. Wearing gloves can protect your hands from sharp edges or debris. It’s also wise to have your new line and any necessary tools ready. Keeping everything within reach saves time and hassle.
Next, find a clean, flat surface to work on, such as a workbench or a table. This provides a stable environment for handling the trimmer head and line spool. Organize your work area to avoid losing small parts. A clutter-free space makes the process more efficient. Make sure you have adequate lighting to see all parts clearly.
It’s important to review the manufacturer’s manual for specific instructions about your Worx trimmer model. Each model can have slight differences in parts or assembly. According to this expert opinion, using the correct spool size and type is crucial. This ensures smooth operation and prevents damage. Always double-check compatibility before starting the replacement.
Gather your materials, including the new trimmer line. Measure and cut the line to the recommended length as specified in the manual. Having everything prepared beforehand means less interruption during the process. This organized approach ensures a smooth workflow. Follow these preparation steps for a hassle-free line change.
Step 2: Removing the old line
Removing the old line from your Worx trimmer is an essential step in the process. Begin by carefully unscrewing the cap on the trimmer head to expose the spool. If the cap is tight, use a pair of pliers for additional grip. Once the cap is off, you can see the old line. Gently pull the old line out from the spool.
Usually, the line may be wound tightly or tangled, so take your time to avoid causing any damage. If there’s any resistant line, slowly unwind it to release tension. Ensure you remove all remnants of the old line. This avoids clogging and ensures the new line fits perfectly. Have a small trash bin nearby to dispose of the old line.
Check the spool and the trimmer head for any debris or grass that may have accumulated. Cleaning the spool and trimmer head ensures efficient operation. A quick wipe down with a cloth can help. Inspect for any signs of wear or damage. If the spool is cracked, consider replacing it to avoid future issues.
Once the old line is removed, and the spool is clean, you can prepare to add the new line. Keep the components organized to avoid losing any pieces. This makes reassembling easier later. A well-prepared spool will save you time and extend the life of your trimmer. Proper removal sets the stage for a smoother installation of the new line.
Step 3: Installing the new line
Now that the old line is out, it’s time to install the new line. Cut your new trimmer line to the recommended length, usually around 10 feet. Fold the line in half to find the middle point. Insert the middle point into the anchor hole on the spool. Make sure the two ends of the line are even.
Begin winding the line around the spool, following the direction indicated by the arrows on the spool. This helps the line feed correctly during use. Keep the line tight and even to prevent tangling. Avoid overlapping the lines. Leave about 6 inches of line unwound on each side.
Once the line is wound, insert the loose ends through the eyelets on the trimmer head. This is where the line will spin out and cut during operation. Ensure the line feeds smoothly through the eyelets. Place the spool back into the trimmer head. Secure it with the cap you removed earlier.
After reassembly, give the new line a gentle tug to ensure it is securely installed. Turn on the trimmer to test the line. If it advances properly and cuts cleanly, then you’ve done it right. Having the line installed correctly ensures the trimmer works efficiently. Proper maintenance can extend the life of your trimmer.
Take care to adjust the line length if necessary. Many trimmers have a line-cutting blade on the guard to trim excessive length. Regularly check the line during use to ensure it’s feeding properly. According to proper guidelines, this step is essential for maintaining optimal trimmer performance.
Safety measures while changing the line on a worx trimmer
Ensuring safety while changing the line on a Worx trimmer is crucial. Always start by turning off and unplugging the trimmer to avoid accidental starts. Wearing protective gloves can guard your hands from sharp edges and potential cuts. Safety glasses are also a good idea to protect your eyes from debris. Make sure you’re working in a well-lit area to see all components clearly.
Position the trimmer on a stable surface to prevent it from tipping over. Avoid working on uneven ground or in cluttered spaces. Keep children and pets away from your work area to prevent distractions and accidents. If the trimmer is gas-powered, ensure the fuel cap is tightly closed to avoid spills. Proper ventilation is key when working with gas trimmers to avoid inhaling fumes.
- Disconnect the battery or unplug the power cord.
- Use appropriate tools to avoid hand injuries.
- Check for any damage before starting the line change.
- Ensure loose clothing, hair, and jewelry are secured and away from moving parts.
Regularly inspect your trimmer for any signs of wear or damage. A damaged spool or cap can lead to malfunction and increase the risk of injury. Clean the trimmer head and spool area to remove any debris before installing the new line. According to safety guidelines, maintaining a clean tool can prevent many issues. Always refer to the manufacturer’s manual for model-specific safety tips.
After changing the line, test the trimmer in a clear area before using it. This ensures that the line is properly installed and that the trimmer works efficiently. Stand at a safe distance and avoid pointing the trimmer at people or pets while testing. These simple steps can help you stay safe and keep your trimmer in good working condition. Regular maintenance and safety checks are essential for optimal performance.
Maintenance tips for Worx trimmer line
Maintaining your Worx trimmer line is key to ensuring its longevity and performance. One essential tip is to always clean the trimmer head after each use. Removing accumulated grass and debris can prevent the line from getting tangled. A clean trimmer head makes it easier to install new line and ensures the tool works smoothly. It also reduces wear on the trimmer components.
Store your trimmer in a dry place when not in use. Moisture can weaken the trimmer line and make it brittle over time. Keeping the trimmer sheltered from the elements can prolong the line’s durability. Use a proper storage solution like a garage or a shed. This helps in maintaining the overall quality of the trimmer and its accessories.
Regularly check the line for signs of wear and tear. If the line appears frayed or overly short, it’s time to replace it. Also, inspect the spool for any cracks or damage. A damaged spool can cause ineffective line feeding and affect trimmer performance. Make sure to use the correct line size and type recommended by the manufacturer.
- Clean the trimmer head and spool area after each use.
- Store the trimmer in a cool, dry place.
- Inspect the line and spool regularly for damage.
- Use the recommended line size and type.
Following these maintenance tips can significantly extend the life of your trimmer line. It also ensures that your trimmer operates at peak efficiency. Keeping spare spools and lines handy can save you time during replacements. Taking these simple steps can make a big difference. Your Worx trimmer will thank you for the proper care.
Frequently Asked Questions
When it comes to maintaining your Worx trimmer, there are several common questions. Here are some answers to help you keep your tool in top shape.
1. Why is my trimmer line breaking so often?
Trimmer lines can break frequently due to various reasons. One common cause is hitting hard surfaces such as rocks or concrete. Ensure you’re trimming only grass and soft vegetation. Another reason could be the type of line used. Thinner lines are more prone to breaking.
Consider using a thicker line if your yard has a lot of tough weeds or dense areas. Also, check the condition of the trimmer head. If it’s worn out, it might need replacing. Proper use and maintenance can extend the life of your trimmer line significantly.
2. What type of line should I use for my Worx trimmer?
The type of line you should use depends on the specific model of your Worx trimmer. Most Worx trimmers use a round 0.065-inch diameter line, which works well for light-duty tasks like trimming grass and small weeds.
If you need something stronger for tougher jobs, consider a 0.080-inch diameter braided or twisted line. Always refer to the user manual before purchasing new lines to ensure compatibility with your tool.
3. How often should I replace my trimmer line?
The frequency at which you need to replace the trimmer line depends on usage and yard conditions. Generally, if you notice performance issues like uneven cutting or excessive vibration, it might be time for a replacement.
It’s good practice to inspect the trimmer line before each use and replace it if it’s frayed or short. Regular inspection helps maintain optimal performance and extends the life of both the line and the tool.
4. Can I use any brand of spool on my Worx trimmer?
While many aftermarket spools may fit a variety of models, it’s best to stick with manufacturers’ recommended spools for optimal performance and safety standards from Worx themselves.
Incompatible spools may not fit properly and could cause issues during operation such as jamming or improper feeding contributing further mishaps easily avoided using compatible parts specifications requirement though noting as discussed here .
5: How do I store my Worx trimmer during winter months?
If you’re planning not using during winter months first drain fuel tank reduce risk gum formation ensuring neat subsequent storage positioning always dry cool place away sunlight exposure direct precipitation contact minimizes internal corrosion possibilities thereby effective functioning long run over significant periods predictably reliable returns possible parties likely appreciation anticipated expected warranty coverage importantly fulfilled effectively efficiently saw process assistance ultimately desired preferences mostly maintained intact utilized however distinguishing values evidently impacted upon another sectoral appeal suggestion accordance appropriately feasible required mentioned authentically advisable recommendations overall additionally adhered accordingly thriving accordingly sustained exuded protocol consistent remarkable pitches steadily consistent expectedly eventually abide precautions `
Conclusion
Properly maintaining and changing the line on your Worx trimmer is essential for its longevity and efficiency. By following the steps outlined, you can ensure smooth operation and prevent common issues like line breakage. Always use the recommended line type and inspect the trimmer before each use, ensuring optimal performance.
Adhering to these safety measures and maintenance tips keeps your trimmer in excellent condition. Regular upkeep not only extends the life of your equipment but also guarantees a neat and well-kept yard. With these insights, you can confidently handle your trimmer, making yard maintenance a breeze.

I’m Patricia D. Johnson, an affiliate marketer and blogger specializing in trimmers and grooming tools. I create honest reviews, buying guides, and practical tips to help readers choose the right trimmer for their needs. With a focus on quality, performance, and value, I simplify the decision-making process so consumers can make confident purchases.