
How to Store a String Trimmer

Proper storage of a string trimmer can extend its lifespan. Good storage also improves its performance a lot. I think that is true for most garden tools. The key lies in adopting the right approach to store it.
The tradition of storing string trimmers traces back to years ago. Methods have improved a lot since those early days. I find hanging it by the handle in a dry, clean spot reliable. Hanging keeps the tool dry and ready for the next season.
This guide shows how to store a string trimmer step by step. You will learn to clean, inspect, and hang your tool with care. Follow each step, and your trimmer will stay ready for spring.
- Clean the string trimmer thoroughly to remove any residual grass or dirt.
- Check for damage or worn parts that could deteriorate during storage, and replace as necessary.
- Drain any remaining fuel to prevent the carburetor from becoming clogged during.
- Store in a cool, dry place away from harsh weather conditions.
- Finally, hang it from a hook or store it in a cabinet to prevent any damage to the mechanism.
Quick answer: Clean the trimmer, check it for damage, and drain the fuel first. Hang it on a sturdy wall hook in a dry, clean spot. Remove the battery from cordless models and store it cool and dry. Cover the tool with a breathable cloth to stop dust and rust.
- How to Store a String Trimmer: Best Tips for Safe & Long-Term Storage
- Inspect and Repair Your String Trimmer Before Storage
- How to Store a String Trimmer in a Dry, Safe Spot
- Prepare Your Trimmer for Long-Term Storage
- Cover Your String Trimmer and Check It Often
- Frequently Asked Questions
- More Questions About Storing a String Trimmer
- Conclusion: How to Store a String Trimmer for Next Season
How to Store a String Trimmer: Best Tips for Safe & Long-Term Storage
Proper storage is key to enhancing the longevity and efficient performance of your string trimmer. This detailed guide gives step-by-step instructions on how to store a string trimmer. It shows an organized and safe method for many seasons to come. For best results, read our guide to cleaning your string trimmer before you start.
Step 1: Clean Your String Trimmer
Before you store your string trimmer, it’s important to clean it thoroughly. This means removing dirt, grass, and debris from the body and head. Cleaning stops damage from stuck particles on the trimmer. It also keeps your string trimmer functional for next time.
Begin by grabbing a stiff bristle brush to scrub off the larger pieces of debris. Then, you can use a cloth moistened with soapy water to wipe clean the tool. The final cleaning step involves drying the trimmer completely to forestall any potential rust development.
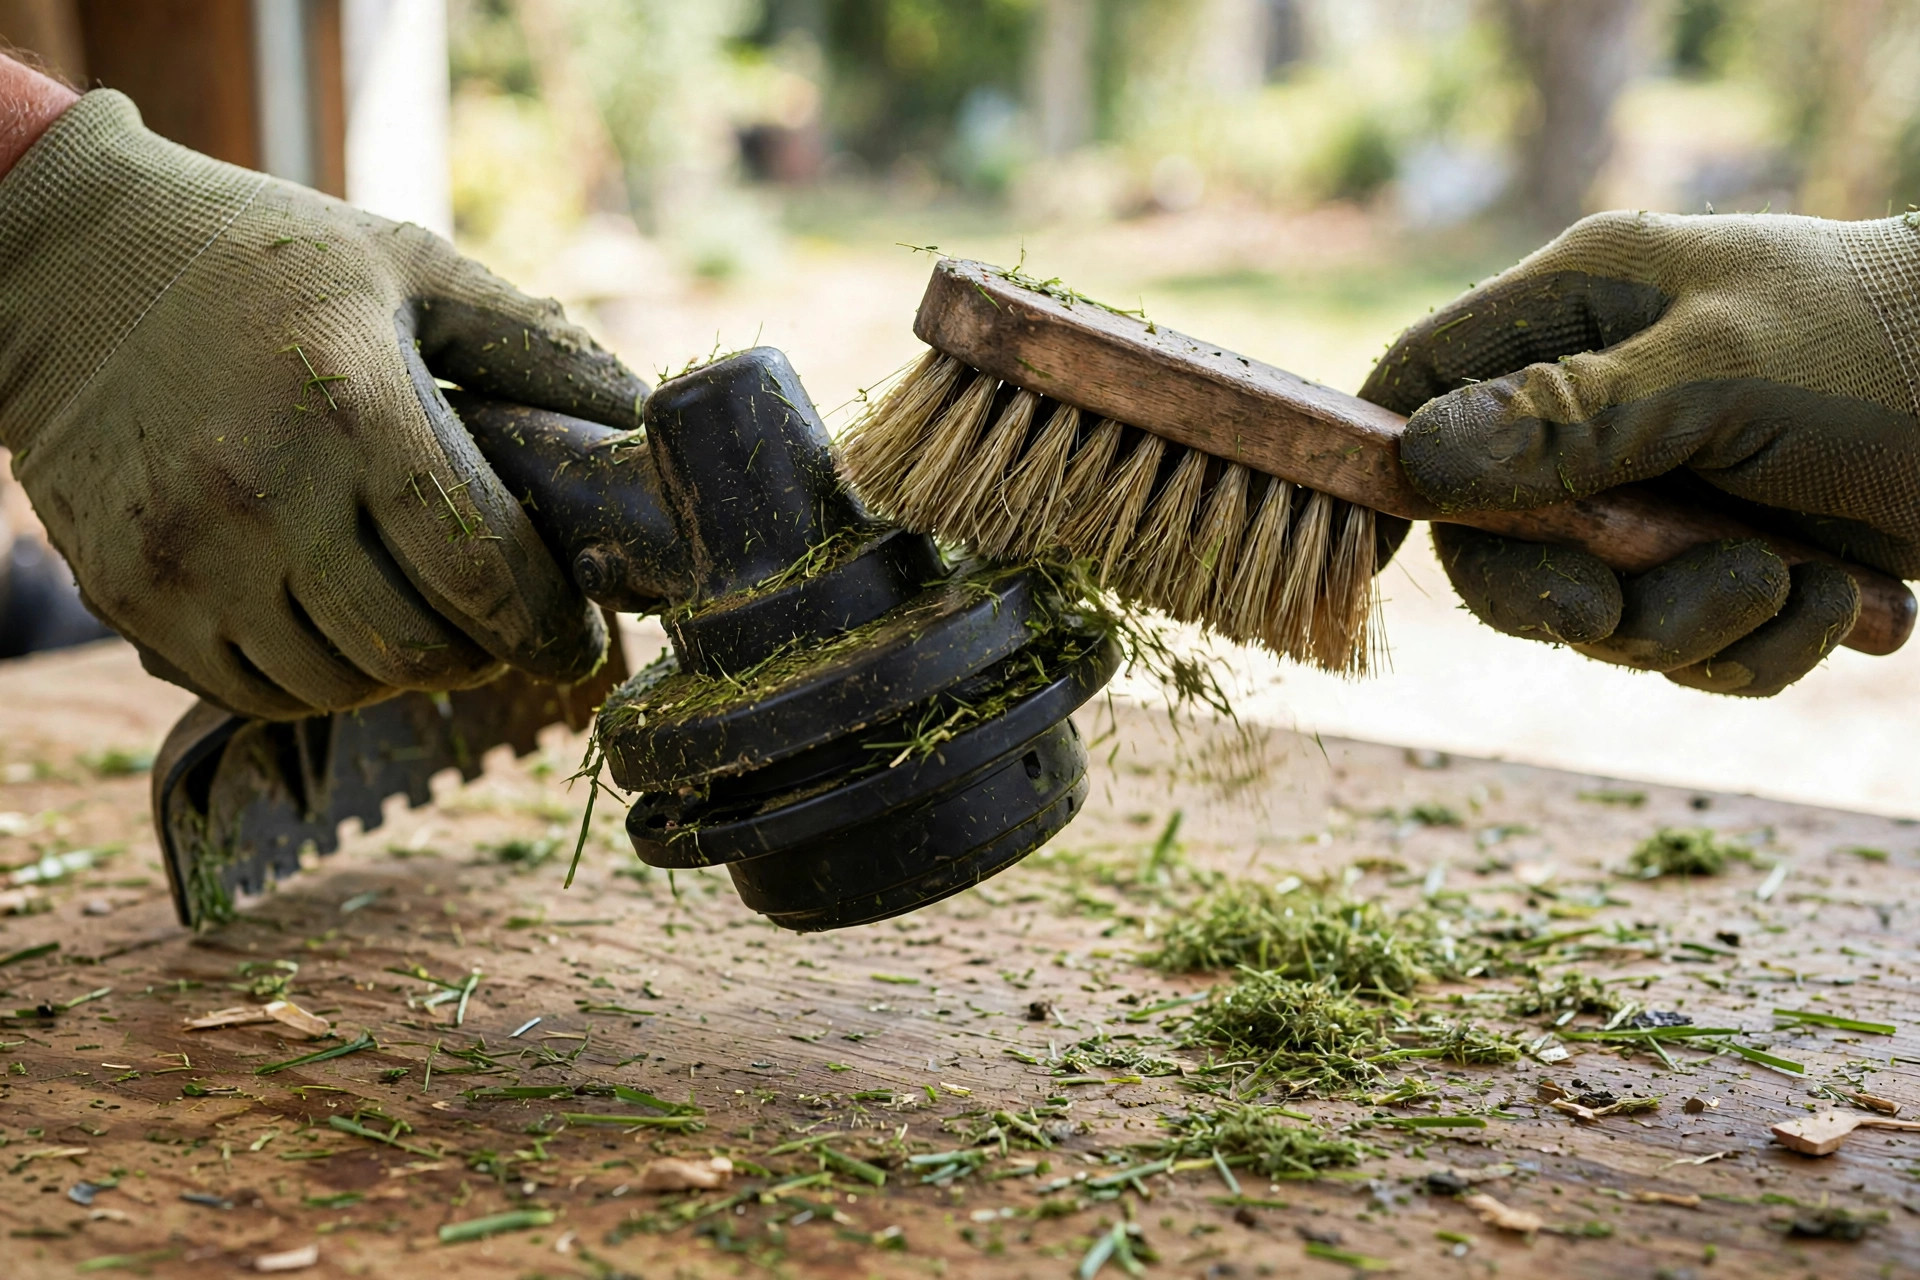
If trimmings stay lodged, use a putty knife to pry them out. You can also use pliers to pull them out with care. Handle your string trimmer gently while you clean its sensitive parts.
For electric or battery trimmers, avoid water near the motor. Water can damage the motor or electronic parts inside. Hence, while cleaning these types, a dry brush and cloth should suffice. For safe use, read our guide to using a trimmer before your next job.
Inspect and Repair Your String Trimmer Before Storage
Step 2: Do A Quick Inspection and Repair
Once your trimmer is clean, it’s time for a comprehensive inspection. Look for damaged parts like loose screws, broken strings, or cracks. Fixing these issues now saves hassle in the next gardening season.
A trimmer line that’s brittle or constantly breaking during use needs replacement. Typically, a fresh string spool installation can enhance the efficiency of the tool. Refer to your manual for line replacement steps for your model. These steps can differ between types and brands. Our guide to restringing a lawn trimmer shows the full swap steps.
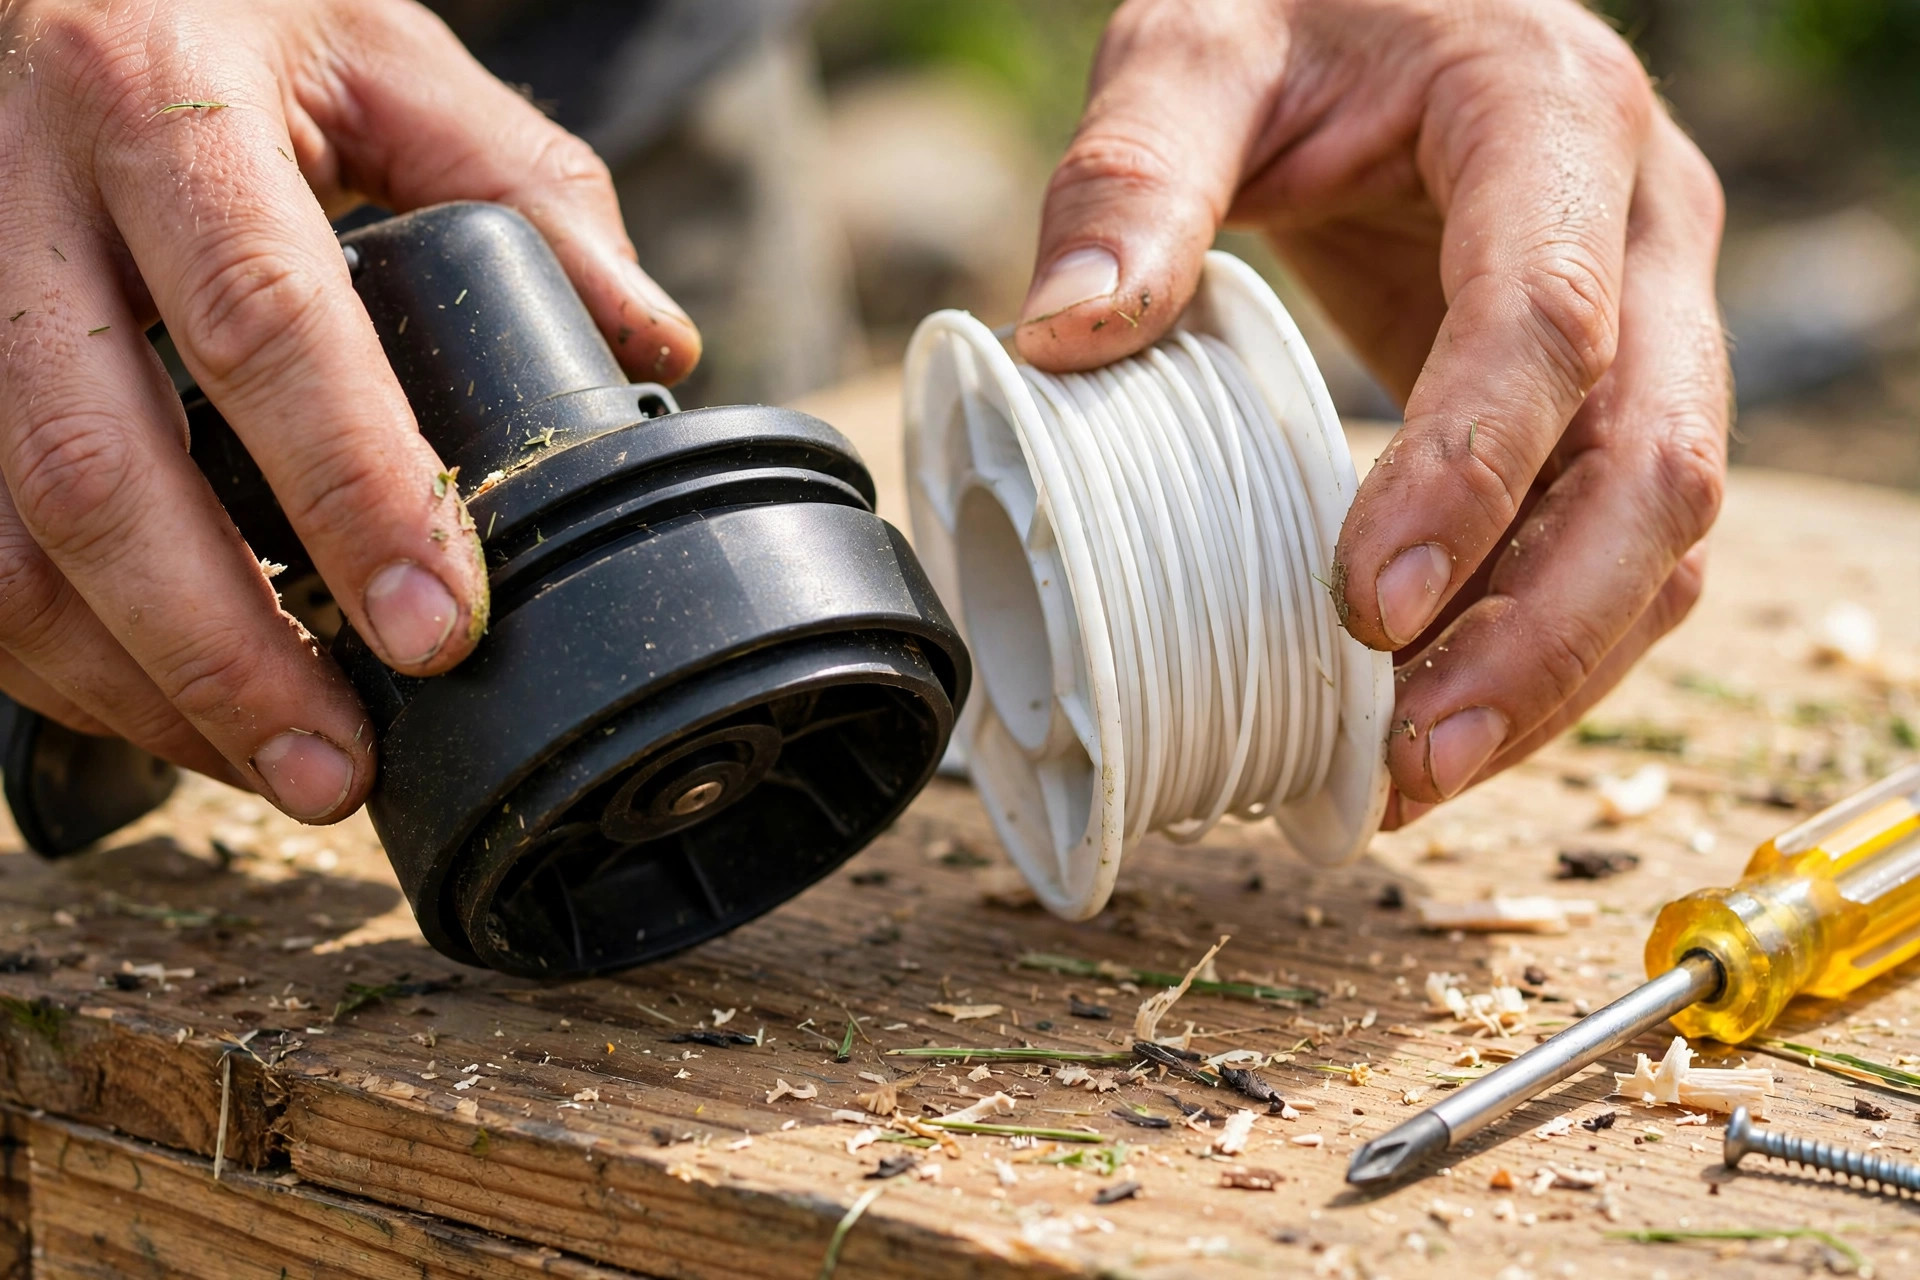
For gas-powered models, inspect the fuel lines for unexplained leaks or cracks. Replace damaged lines to maintain the functionality and safety of your trimmer. Also, make sure the spark plug is in good condition, and replace it if necessary.
If you spot major defects, seek help from a professional. Do not force a fix you cannot resolve on your own. Repair string trimmers in the offseason for best results. Then you can use it the moment you need it. For shaft care, read our guide to greasing a string trimmer shaft for smooth use.
| Storage Step | What to Do | Why It Helps |
|---|---|---|
| Clean the trimmer | Brush and wipe it dry | Stops rust and damage |
| Inspect for damage | Check screws, line, and cables | Catches faults before storage |
| Fix worn parts | Swap the line and broken parts | Keeps the tool ready |
How to Store a String Trimmer in a Dry, Safe Spot
Step 3: Store The Trimmer Properly
Storing your string trimmer correctly is crucial for preserving its condition. Choose a dry, clean, and covered space for storage. Garages, tool sheds, or basements usually make perfect storage areas. Keep your tool away from rain, snow, and excessive heat. Dry storage will prevent rusting and other forms of damage.
Hang the trimmer from a bracket or hook for best storage. Hanging avoids falls and tripping hazards in your space. Ensure the hook securely attaches to a wall and can withstand the tool’s weight. Ideally, hang your trimmer horizontally as it helps in maintaining the balance of all parts.
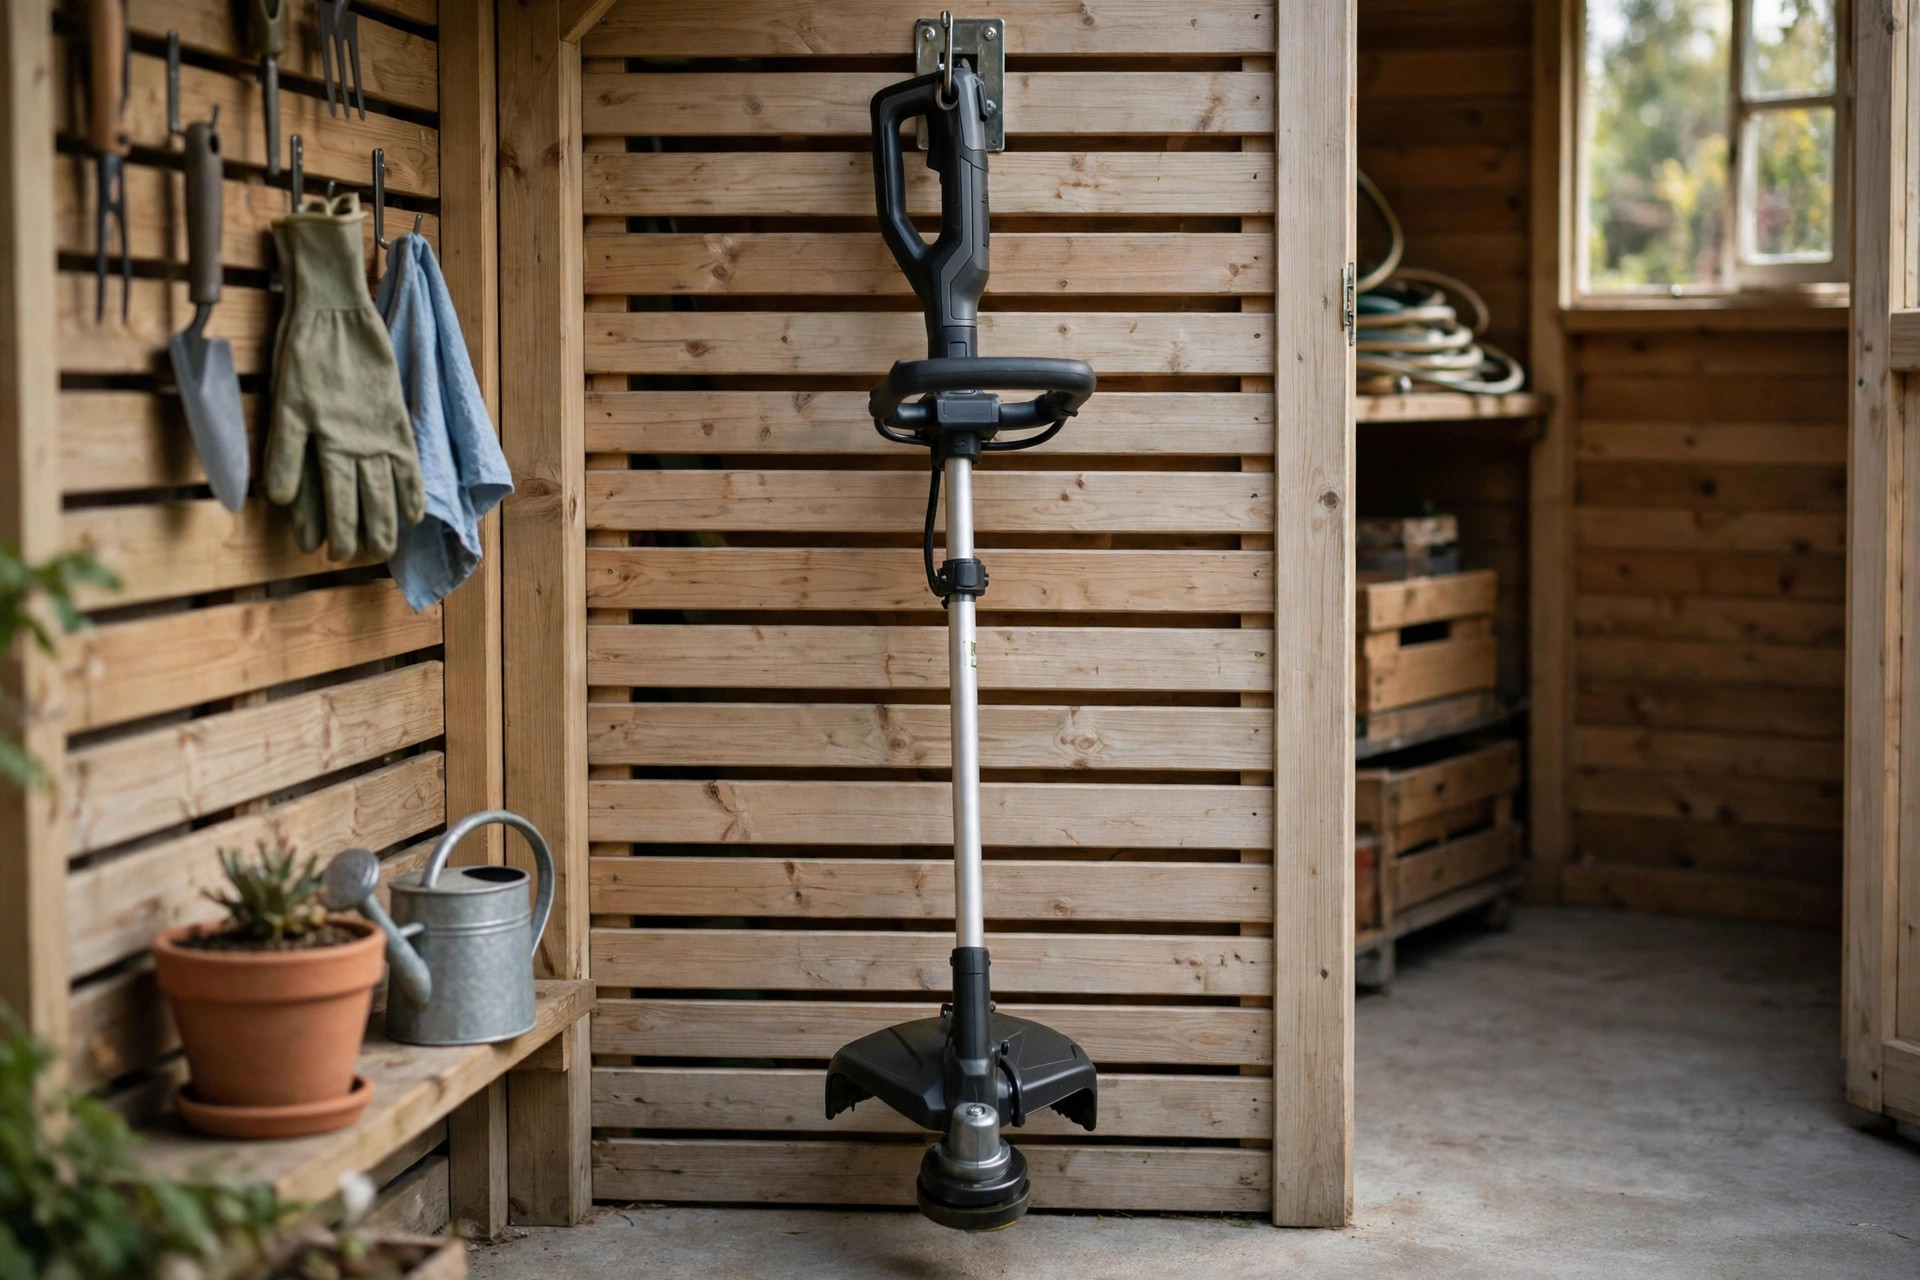
In small spaces, a shelf or cabinet works well for storage. Hanging is not always possible, so use what fits. Avoid storing the string trimmer on the ground. Ground storage can lead to damage in busy walkways.
If your string trimmer disassembles, consider storing the parts separately. This compact method can save you space and keep your trimmer safe. Label each part and store them together for easy assembly. This stops assembly from turning into a puzzle session. For clean edges later, learn how to edge with a string trimmer step by step.
Prepare Your Trimmer for Long-Term Storage
Step 4: Long-Term Storage Preparation
For long-term storage, a few extra steps can preserve your trimmer. Winter months call for extra care with your tool. If you own a battery trimmer, remove the battery first. Store the battery in a cool, dry place. This step enhances the battery’s longevity and prevents potential leakages.
For gas-powered models, it’s essential to take care of the fuel system. You can drain the fuel tank or add a fuel stabilizer instead. The stabilizer stops ethanol from breaking down in the fuel. It also stops sticky residue from clogging the carburetor and fuel lines. Our guide to changing string on a Weedeater trimmer covers line swaps too.
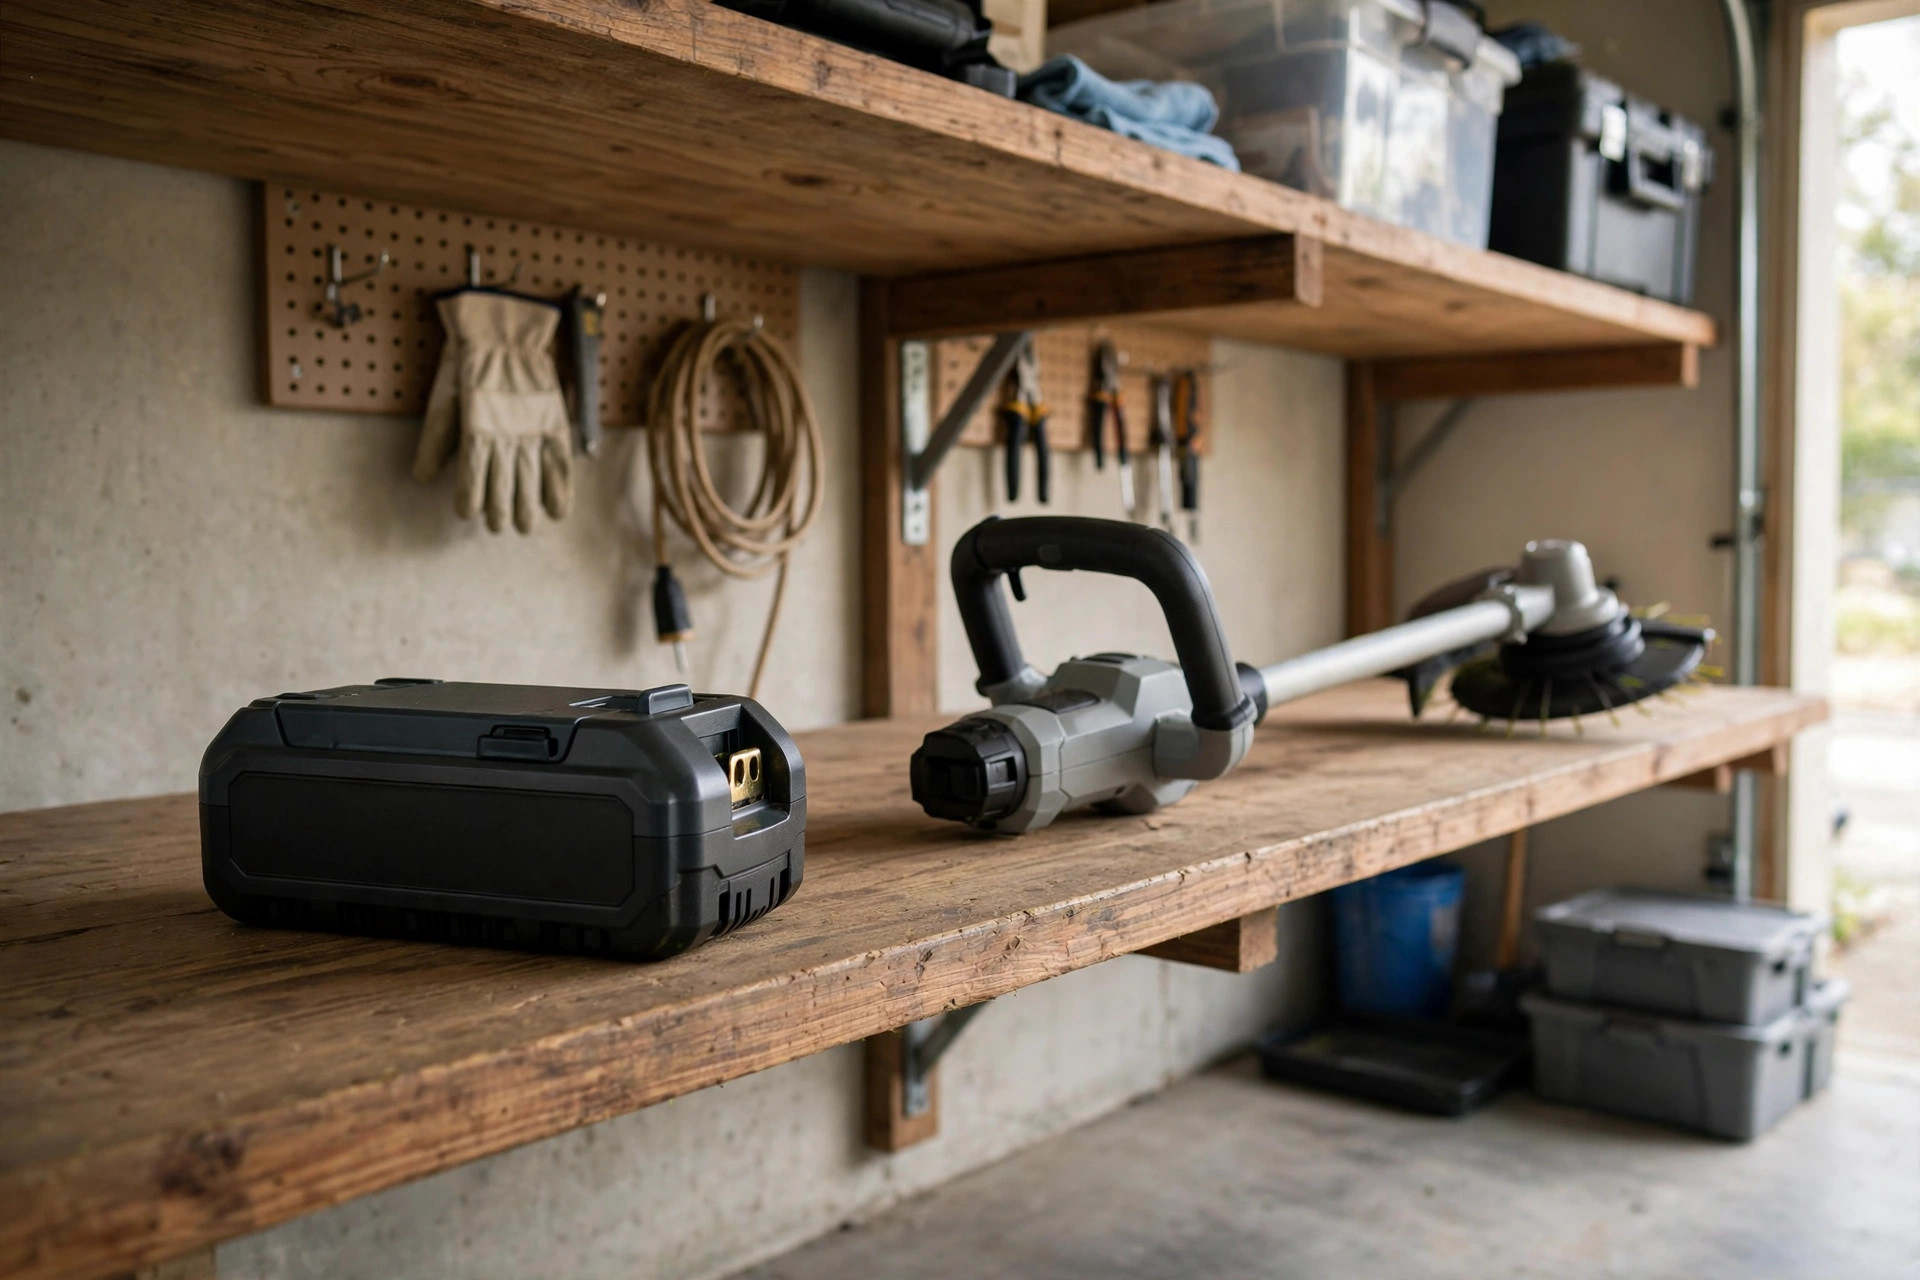
Run the trimmer for a few minutes after adding stabilizer. This spreads it through the whole fuel system. Always check your manual or ask a professional about fuel care. For battery care, the EPA guide to used lithium-ion batteries explains safe storage and recycling.
Moving parts of the trimmer like the cutting head can benefit from light oiling. A small amount of oil will help prevent rust. It also keeps parts moving smoothly for next use.
| Trimmer Type | Storage Step | Key Tip |
|---|---|---|
| Battery-powered | Remove the battery and store it cool and dry | Stops leaks and wear |
| Gas-powered | Drain fuel or add stabilizer | Stops clogs in the fuel lines |
| All types | Oil moving parts lightly | Stops rust and keeps parts smooth |
Cover Your String Trimmer and Check It Often
Step 5: Cover Your String Trimmer
The last step is to cover your string trimmer well. A cover protects your trimmer from dust, cobwebs, or accidental spills. You can use a bag or cloth to cover it. The material should breathe to stop moisture and rust.
Specific string trimmer covers are sold to keep your tool safe. These covers fit well and guard better than plain cloths or bags. Using them adds an extra layer of safeguarding your tool’s longevity. For battery models, our Ryobi 40V string change guide shows the line swap steps.

Regardless of the covering material, ensure that it securely encases the entire tool. A secure fit shields every part of the trimmer well. If the trimmer disassembled during storage, cover each part individually before storage.
Beyond these steps, consider checking your stored trimmer periodically to ensure everything remains in order. This keeps your tool ready for instant use next season. Regular checks cut the risk of surprise issues. The EPA lawn and garden guide shares more safe yard care tips.
Now you know how to store a string trimmer with care. Good storage helps you maintain your tool more efficiently. A ready trimmer saves your time and avoids last-minute repair costs. Take that extra step and enjoy an untroubled gardening season.
Frequently Asked Questions
String trimmers help maintain your garden, ensuring it’s neat and tidy. But, proper storage of these tools is crucial to extend their longevity. We compiled these common questions to guide your storage steps. They show how to store a string trimmer the safe way.
1. Why should I empty the fuel before storing my string trimmer?
Draining the fuel before storing your string trimmer prevents issues associated with stagnant fuel. Over time, old fuel may turn stale and form varnish-like substances. That buildup could clog the carburetor and damage the engine.
For short storage, add a fuel stabilizer instead of draining fuel. This keeps the fuel fresh for a short rest. This will preserve the fuel’s freshness preventing the components from corroding.
2. Should the strings be removed before storage?
Removal of strings before storing the trimmer isn’t necessarily a requirement. Still, it can help for long storage of your tool. That’s because the strings may become brittle and break easily on the next usage.
If the trimmer is to be stored in a cold environment, definitely remove the strings. Cold temperatures can damage these plastic or nylon strings making them brittle faster. Warm strings last longer and cut more cleanly next season.
More Questions About Storing a String Trimmer
3. Can I hang my string trimmer while storing it?
Yes, you can store your string trimmer by hanging it on a wall. Hanging stops mishandling and keeps the machine safe from harm. It also guards against unexpected damage during storage. Ensure the wall mount you use provides sturdy support.
However, you should always consult your string trimmer’s user manual. Some models specifically state not to hang due to fuel or oil leakage possibilities. You want to avoid these potential hazards.
4. Should I clean my string trimmer before storage?
Yes, cleaning before storage is always worth the effort. It’s crucial to clean your string trimmer before storing it. Removing dirt and debris cuts the risk of corrosion. Clean tools run smoothly when you use them next.
Consider lightly oiling metal parts to guard against rust. But be cautious not to over-oil as it may attract dirt and debris. Wipe off extra oil so it will not trap dust.
5. Will moisture affect my string trimmer if I store it in my garage?
Moisture can significantly affect your string trimmer, especially if it’s stored without a cover. The atmospheric moisture can facilitate rusting or corrosion of any metallic parts over time. It’s vital to cover your trimmer or store it in a dry, low-humidity environment.
In humid winters, use a dehumidifier in your storage area. Silica gel packets can also absorb extra moisture there. These precautions will help extend the life of your string trimmer.
Conclusion: How to Store a String Trimmer for Next Season
Storing a string trimmer properly after use is crucial. A clean, dry spot off the ground keeps the trimmer safe. It also helps extend the tool’s lifetime a lot. Disconnect the spark plug and drain any fuel before long storage. Also remove and clean the cutting head to stop jams and rust.
A wall hanger can prevent damage and keep your trimmer out of the way. Lastly, store it where children cannot reach it for safety. These basic steps keep your device in good shape for next use.

I’m Patricia D. Johnson, an affiliate marketer and blogger specializing in trimmers and grooming tools. I create honest reviews, buying guides, and practical tips to help readers choose the right trimmer for their needs. With a focus on quality, performance, and value, I simplify the decision-making process so consumers can make confident purchases.