Yes, a trimmer can become flooded if not used correctly. Flooding typically occurs when there is an excessive amount of fuel in the engine, leading to difficulty starting or running the trimmer.
Flooding can be resolved by following specific steps to unflood the trimmer. A flooded trimmer can be a frustrating issue to deal with. Whether you’re a professional landscaper or a homeowner trying to maintain your lawn, a trimmer that won’t start or run properly due to flooding can be a major hindrance.
Understanding why a trimmer becomes flooded and how to fix it is essential for ensuring smooth operation and efficient trimming. We will explore the causes of a flooded trimmer and the steps you can take to unflood it. By following these guidelines, you’ll be able to get your trimmer up and running in no time, saving you both time and frustration.
Signs of water damage in trimmers
Before we dive into the steps to revive your soaked trimmer, it’s important to identify the signs of water damage. Here are a few indicators that your trimmer may have been affected by water:
Lack of power:
If your trimmer struggles to start or lacks power when running, it could be a sign of water damage to the engine or electrical components.
Rust and corrosion:
Inspect the trimmer for any visible signs of rust or corrosion on metal parts. This can indicate prolonged exposure to water.
Unusual noises:
If your trimmer produces strange noises or vibrations after getting wet, it could be due to water damage affecting the internal mechanisms.
Electrical issues:
Look out for flickering lights or erratic behavior of the trimmer’s electrical components. Water damage can disrupt the electrical connections.
Identifying these signs early on will help you take immediate action to prevent further damage.
Immediate steps to take when your trimmer gets wet
When your trimmer gets wet, it’s crucial to act quickly to minimize the potential damage. Here are the immediate steps you should take to rescue your soaked trimmer:
Power off and disconnect:
Immediately turn off the trimmer and disconnect it from any power source. This will prevent any electrical short circuits and minimize the risk of shock.
Remove the battery or unplug:
If your trimmer is battery-powered, remove the battery. For corded trimmers, unplug them from the power outlet. This step is essential to prevent any electrical mishaps.
Wipe off excess moisture:
Use a dry cloth or towel to carefully wipe off any excess moisture from the exterior of the trimmer. Be gentle and avoid rubbing vigorously, as it may push water further into the internal components.
By following these steps, you can mitigate further damage and prepare your trimmer for the drying process.
Drying out your soaked trimmer
After taking immediate action, the next crucial step is to thoroughly dry out your soaked trimmer. Here’s what you should do:
Disassemble if possible:
If you’re comfortable with disassembling your trimmer, remove any detachable parts such as the cutting head, guards, or other accessories. This will allow better airflow during the drying process.
Air drying:
Find a well-ventilated area, preferably outdoors, and place your trimmer on a clean, dry surface. Allow it to air dry naturally for at least 24 to 48 hours. Avoid using heat sources, such as hairdryers or ovens, as they can damage the internal components.
Silica gel packets:
If available, place some silica gel packets near the trimmer. Silica gel absorbs moisture and can expedite the drying process.
Rotate the trimmer:
To ensure even drying, rotate the trimmer every few hours. This will help prevent any water pooling in specific areas.
Remember, patience is key during the drying process. Rushing to use the trimmer before it is completely dry can lead to further damage.
Cleaning and inspecting the trimmer after it dries
Once your trimmer has thoroughly dried, it’s time to clean and inspect it for any remaining moisture or damage. Follow these steps:
Inspect for moisture:
Carefully examine the trimmer’s internal components for any signs of remaining moisture. Use a flashlight to check hard-to-reach areas. If you spot any moisture, continue the drying process until it is completely dry.
Clean the trimmer:
Use a soft brush or compressed air to remove any dirt, debris, or residue that may have accumulated during the drying process. Pay close attention to the air vents, cutting head, and other hard-to-reach areas.
Check for damage:
Inspect all parts of the trimmer for signs of damage or corrosion. If you notice any issues, such as rusted blades or damaged wires, it may be necessary to replace those components.
Cleaning and inspecting your trimmer after it dries will ensure that it is in optimal condition before you attempt to use it again.
Troubleshooting common issues after water damage
Even after following the steps to revive your soaked trimmer, you may encounter some common issues. Here’s how you can troubleshoot them:
Lack of power:
If your trimmer still lacks power or struggles to start, check the battery or power source. It may need to be replaced, as water damage can affect electrical connections.
Rust or corrosion:
Use a rust remover or a mixture of vinegar and water to clean rusted parts. Gently scrub the affected areas and rinse thoroughly. Dry the parts before reassembling the trimmer.
Electrical problems:
If you’re experiencing electrical issues, such as flickering lights or erratic behavior, consult a professional. Attempting to repair electrical components yourself can be dangerous and may cause further damage.
If troubleshooting these issues doesn’t resolve the problem, it may be time to consider professional repair options.
Preventing future water damage to your trimmer
To avoid the hassles of reviving a soaked trimmer in the future, here are some preventive measures you can take:
Store your trimmer properly:
When not in use, store your trimmer in a dry and secure location. Avoid leaving it outdoors or in areas prone to water exposure.
Protect against rain:
If you need to use your trimmer during wet conditions, consider using a waterproof cover or a makeshift canopy to shield it from direct exposure to rain or moisture.
Regular maintenance:
Schedule regular maintenance for your trimmer, including cleaning and lubricating the cutting blades, tightening loose screws, and checking for any signs of wear or damage. This will help identify potential issues before they become major problems.
By adopting these preventive measures, you can prolong the life of your trimmer and reduce the risk of water damage.
Professional repair options for severely damaged trimmers
In some cases, water damage to your trimmer may be severe, requiring professional repair. If your trimmer exhibits persistent issues or extensive damage, consider these options:
Manufacturer’s service center:
Contact the manufacturer’s service center for guidance on repair options. They may offer specialized services and have access to genuine replacement parts.
Certified repair technicians:
Seek assistance from certified repair technicians who specialize in outdoor power equipment. They have the expertise to diagnose and repair complex issues caused by water damage.
Evaluate repair costs:
Before proceeding with professional repair, evaluate the cost of repair compared to the price of a new trimmer. In some cases, it may be more cost-effective to invest in a new trimmer rather than repairing an extensively damaged one.
Choosing the right repair option will depend on the extent of the damage and your budget.
Tips for maintaining your trimmer to prevent water damage
Prevention is always better than cure. Here are some additional tips to maintain your trimmer and prevent water damage:
Regular cleaning:
After each use, clean your trimmer thoroughly to remove grass clippings, dirt, and debris. This will prevent clogs and ensure optimal performance.
Inspect cords and cables:
Regularly inspect the power cords and cables for any signs of wear or damage. Replace them immediately if necessary.
Avoid submerging the trimmer:
Never submerge your trimmer in water or use it in excessively wet conditions. Water-resistant models are available if you require a trimmer for damp environments.
Read the user manual:
Familiarize yourself with the manufacturer’s recommendations and guidelines for using and maintaining your trimmer. This will help you make informed decisions and avoid potential pitfalls.
By following these maintenance tips, you can keep your trimmer in top shape and minimize the risk of water damage.
Alternative Solutions for a Flooded Trimmer
If your trimmer is flooded and the previous steps didn’t work, don’t worry! There are still alternative solutions you can try to revive your soaked device. Here are a few options that might help:
- Use a blow dryer: After removing the spark plug, use a blow dryer on low heat to dry out the excess fuel in the cylinder. Be careful not to overheat the engine or melt any plastic parts.
- Clean or replace the air filter: A clogged or wet air filter can cause flooding. Take out the air filter and clean it thoroughly with soap and water. If it’s damaged beyond repair, consider replacing it with a new one.
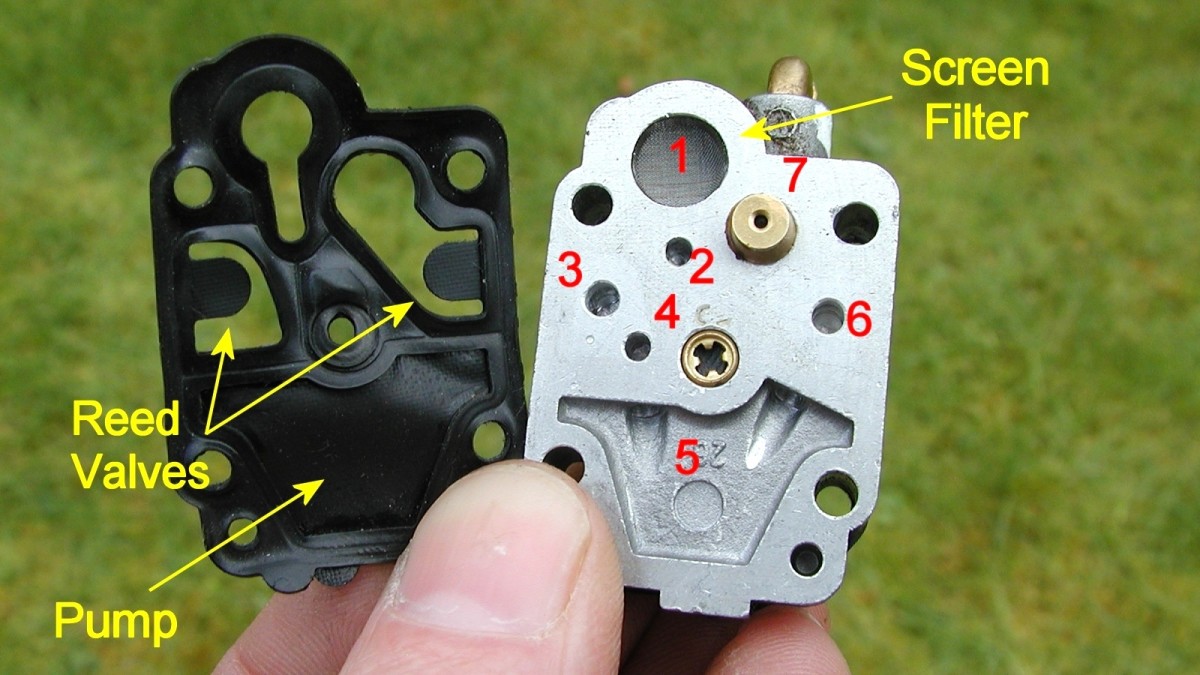
- Check the carburetor: The carburetor may need cleaning if it’s clogged with debris or old fuel residue. Remove it carefully and soak it in carburetor cleaner overnight before reassembling.
- Seek professional help: If all else fails, don’t hesitate to bring your flooded trimmer to a professional technician who specializes in small engine repairs.
Remember, these alternative solutions may not guarantee success but they’re worth trying before giving up on your flooded trimmer altogether! Stay patient and persistent throughout this process as reviving a soaked device can sometimes be tricky.
Keep reading our blog for more helpful tips on maintaining and troubleshooting your gardening tools!

Credit: www.stihlusa.com
Frequently Asked Questions On Is Trimmer Flooded
Can You Flood A Strimmer?
Yes, a strimmer can be flooded. You can quickly unflood a strimmer without using any tools.
How Do You Unflood A Small Engine?
To unflood a small engine, follow these steps: 1. Remove the spark plug and let it dry. 2. Remove excess fuel by pulling the starter cord a few times. 3. Clean or replace the air filter. 4. Reinstall the spark plug and try starting the engine.
5. If it doesn’t start, repeat the process or seek professional help.
Which Way Do You Wind A Trimmer?
To wind a trimmer, wrap the line in the direction of the arrow on the reel. Look for a small arrow on the trimmer head, usually near the outside edge of the reel. Wrap the line following that arrow.
How Do You Rehydrate String Trimmer Line?
To rehydrate string trimmer line, soak it in water for a few minutes. This will soften the line and make it more flexible, preventing it from breaking easily. Make sure to dry the line before using it again to avoid clogs or damage to the trimmer.
Conclusion
Reviving a flooded trimmer can be a daunting task, but with the right knowledge and precautions, it is possible to bring your device back to life. By understanding the causes and symptoms of a flooded trimmer, taking safety precautions before attempting any repairs, following the step-by-step guide we provided, and implementing preventative measures for future incidents, you can ensure that your trimmer stays in good working condition.
Remember to always prioritize safety when dealing with electrical equipment and never hesitate to seek professional help if you are unsure or uncomfortable with performing these steps yourself. Taking the time to revive your soaked trimmer will not only save you money on purchasing a new one but also extend its lifespan.
So go ahead and give it a try! With our comprehensive guide at hand, you’ll be able to tackle this challenge head-on and have your trimmer up and running again in no time. Happy trimming!
