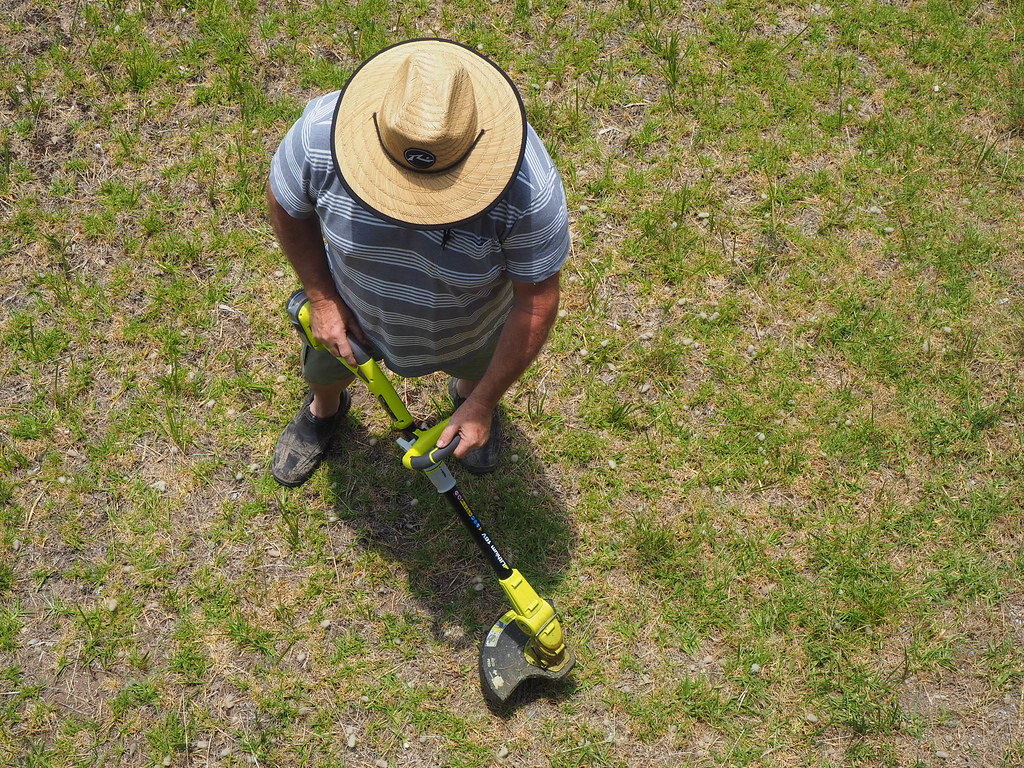
Ever wondered how your neighbours keep their garden edges uniformly neat and tidy? Odds are, they’re using a string trimmer as an edger. This nifty tool, which most of us already have in our sheds, can be repurposed to edge lawns with precision, offering an economical and efficient solution to garden maintenance.
The practice of repurposing string trimmers as edgers started in the ’70s, a testament to human ingenuity and resourcefulness. Recent studies suggest that using a string trimmer as an edger can cut down on gardening time by up to 25%. Imagine what you could do with all that extra time! Whether you’re a gardening novice or a seasoned horticulturist, adapting your string trimmer could save you time and keep your lawn pristine.
- Start by holding your trimmer at a slight angle away from the pavement.
- Move the trimmer left to right, cutting into the soil to create a clean edge.
- Remain slow and steady to maintain a consistent border.
- When finished, clean the trimmer to preserve its longevity.
 Source: staticflickr.com
How To Use A String Trimmer As An Edger
Despite the common conception, a string trimmer is far more versatile than simply trimming overgrown grass. With a little change in operation and technique, your reliable string trimmer can effectively serve as an edger, ensuring clean and uniform lawn edges. This guide will walk you through how to use a string trimmer as an edger, ensuring you extract maximum utility from your gardening power tool, and maintain an impeccably groomed landscape.
Step-1: Safety Measures before Using String Trimmer as an Edger
Prior to beginning any work with power tools, it’s critical to ensure safety. When functioning as an edger, your string trimmer will be ejecting dirt and small rocks, which could cause injury if you’re not adequately protected.
Therefore, always ensure to wear closed shoes, preferably with steel toes, to protect your feet from flying debris. Additionally, wear long pants and safety glasses. Gloves can give you a better grip on the trimmer, and also protect your hands.
Also having a clear idea about the layout of your property can prevent accidents. Identify areas where there are hidden rocks or cables before starting. These obstructions can lead to dangerous fly-off debris if struck with the string trimmer.
Lastly, ensure that no people or pets are close to the area where you’ll be working. The last thing you want is for someone to be struck by the fast-moving debris.
Step-2: Adjust the String Trimmer
The second step with how to use a string trimmer as an edger involves adjusting the string trimmer. This will depend on the type of trimmer you have. Some trimmers come with a twist and edge feature, which allows you to rotate the head of your trimmer 90 degrees to use it as an edger.
If your string trimmer does not have this feature, then you may need to adjust the angle in which you hold the trimmer instead. Hold it in such a way that the string is vertical to the ground rather than horizontal.
The length of the string is also important. Ensure it is of the right length. Too short, and you won’t reach the ground properly. Too long, and it could be difficult to control.
You may also need to adjust the handle or harness on your trimmer for better control and ease of use when you’re edging. Experiment until you find a comfortable position that gives you good control over the trimmer.
Step-3: Begin Edging
Once you have implemented all the required adjustments and safety measures, it’s time to proceed with the edging. The first thing you should note is the direction in which your trimmer spins. This could be either clockwise or counterclockwise, depending on your device.
If your trimmer spins clockwise, then you will want to edge on the right side of the sidewalks, driveways, or flower beds. This ensures that the debris is thrown away from the freshly cut edges.
For those with a counter-clockwise spin, start on the left hand side. This positioning allows the string to hit the grass at an angle, creating a cleaner cut and throwing the debris away from the edged area.
While you’re edging, move the trimmer in and out of the area between the cut edge and the overgrown grass. This back and forth motion will result in a clean edge while minimizing the mess.
Step-4: Refining your Edging Technique
While the processes mentioned can get you started, mastering how to use a string trimmer as an edger takes practice. You need to learn to control and balance the trimmer, especially when the string is vertical. Achieving a straight and clean edge is an art in itself.
Stand straight and avoid hunching over while you’re edging. Holding the trimmer too close to your body may result in an uneven edge. Instead, find a comfortable standing position where you can see the edging line clearly.
Don’t rush the process. Edging should be performed slowly and methodically. If you find the trimmer is getting away from you or jumping around, then you’re probably going too fast. Slow down and let the trimmer do its job.
Remember to take breaks if necessary. Handling a vibrating tool for an extended period can cause fatigue and loss of control, leading to poor results.
Step-5: Clean Up and Maintenance
After you’re done with using your string trimmer as an edger, take the time to clean it properly. Remove any grass, soil, and debris from the trimmer, especially around the head and spool areas. Dry it thoroughly before storing it to prevent rusting or battery damage.
Check the string levels to ensure they’re still adequate for your next trimming session. If necessary, replace the strings. Also, check the manual for any specific maintenance instructions, depending on your trimmer’s make and model.
Regular maintenance will not only keep your string trimmer working at its best, but will also prolong its lifespan, saving you the cost and inconvenience of frequent replacements.
Finally, clean up your yard or garden area. Remove any leftover debris and ensure your edged areas look neat and tidy. After all, the main goal of edging is to enhance the aesthetic appeal of your outdoor space.
Transforming your humble string trimmer into a competent edger is a practical and cost-effective strategy for yard maintenance. An edger creates clean, professional-looking lines that clearly delineate your garden beds, pathways, or driveways, adding definition and sophistication to your landscape. While it may take a bit of practice to perfect the art of edging with your string trimmer, it’s an investment in time that can significantly elevate the overall look of your garden.
5 Tips to Edge a Lawn with a String Trimmer Like a Pro
Frequently Asked Questions
As an amateur or professional landscaper, you might be wondering about innovative ways to use your string trimmer. One such way is to use it as an edger to provide a clean finishing touch to your lawn.
1. Can I use my string trimmer as an edger?
Yes, you can certainly use your string trimmer as an edger. Although specific tools like a lawn edger are designed to create a clean line between the lawn and the sidewalks, a string trimmer can effectively accomplish the same task with a bit of skill and technique.
If used appropriately, a string trimmer can be handy for edging in those tighter spaces where a regular edger might not reach or work effectively. Therefore, understanding the correct method of using a string trimmer as an edger ensures efficiency and versatility in your gardening tasks.
2. What is the correct position to hold a string trimmer for edging?
To use a string trimmer as an edger, maintain the correct posture by flipping it so that the string now rotates in a vertical plane, instead of the usual horizontal one. This change in position helps you move along the edge of the lawns and sidewalks, ensuring a clean cut.
You should always keep the head of the trimmer tilted towards the area that needs edging. Remember to keep safety in mind as well, putting on proper eye and body protection when using the string trimmer.
3. Is it essential to maintain a certain speed while edging with a string trimmer?
Yes. The speed of your actions matters when using a string trimmer as an edger. Moving too fast might cause an uneven cut, leading to a sloppy finish. This is why it is crucial to maintain a steady pace, ensuring the trimmer has adequate time to cut the grass effectively.
You should edge at a walking speed, letting the trimmer do its job efficiently. Bear in mind that frequent overlapping might be necessary for certain areas to achieve the desired result.
4. How often should I edge my lawn with a string trimmer?
The frequency of edging your lawn depends on a few factors. These include the rate of grass growth, the type of grass, and your aesthetic preferences. Generally, during the growing season, edging the lawn once every week or two is usually sufficient.
However, in colder months, you may only need to edge once a month as grass growth is relatively slow. Ultimately, maintaining consistency in attending to your lawn would help ensure a neat and clean look all year round.
5. Do I need a specific type of string trimmer to use it as an edger?
Not necessarily. Although some string trimmers come with an edger function, you don’t need a specific type to use as an edger. The critical factor is understanding how to use the tool correctly for edging.
Regardless of the type of string trimmer you have, whether it’s gas, electric, cordless or even a curved or straight shaft, you can use it for edging if you follow the right technique. Hence, with a bit of practice, you can transform any string trimmer into an effective edging tool.
How to Get Perfect Lawn Edges with a Weed Wacker
We’ve discussed the ins and outs of using a string trimmer as an edger, shedding light on some key points. We established that it’s all about holding the trimmer properly, pivoting it so the string is vertical, and edging along your desired line. Remember, safety measures like using safety goggle and gloves are not optional but mandatory.
Keep in mind that practice makes perfect. As a beginner, your lines may not be perfectly straight. But don’t get discouraged. With time and a little patience, you’ll get the hang of it. Be mindful of obstructions and take good care of your equipment. Now that you know how to edge using a string trimmer, your garden maintenance will be a piece of cake!

I’m Patricia D. Johnson, an affiliate marketer and blogger specializing in trimmers and grooming tools. I create honest reviews, buying guides, and practical tips to help readers choose the right trimmer for their needs. With a focus on quality, performance, and value, I simplify the decision-making process so consumers can make confident purchases.