
Your string trimmer line keeps breaking due to several reasons, such as improper line installation or using the wrong type of line for your trimmer. This can lead to increased wear and tear, resulting in frequent breaks.
String trimmers are valuable gardening tools, but dealing with constant line breaks can be frustrating. It disrupts productivity and adds to the overall maintenance costs. Understanding the root cause of this issue is essential to find a lasting solution. By examining common reasons for line breaks and implementing effective preventative measures, you can keep your string trimmer in top working condition.
This article will explore various factors that can contribute to line breakage and provide practical tips to help you troubleshoot and resolve this common issue.
Why Does My String Trimmer Line Keep Breaking?
String trimmer line breakage can be caused by several factors, including hitting hard surfaces, using the wrong type of line for the trimmer, or incorrect installation. Additionally, excessive wear and tear or using old, brittle line can also lead to frequent breakage.
Regular maintenance and proper usage can help prevent these issues.
Improper Line Installation
Improper line installation can lead to the trimmer line breaking prematurely. When the trimmer line is not installed correctly, it can cause it to become tangled or jammed, leading to breakage.
Worn or Low-Quality Trimmer Line
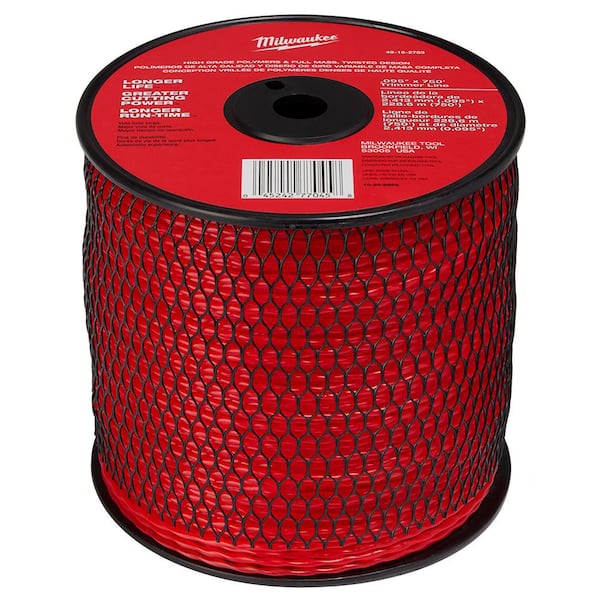
Using worn or low-quality trimmer line is a common cause of line breakage. Over time, trimmer line can wear down, becoming more prone to breakage. Additionally, low-quality trimmer line may not have the durability needed to withstand the demands of cutting dense vegetation.
Excessive Line Wear and Tear
Excessive wear and tear on the trimmer line can lead to breakage. Continuous contact with hard surfaces, such as concrete or rocks, can cause the trimmer line to wear down quickly, making it more susceptible to breaking during use.
Additionally, using the trimmer for extended periods without allowing the line to cool down can lead to overheating and breakage. In order to prevent trimmer line breakage, it’s important to ensure that the line is installed properly, use high-quality trimmer line, and avoid excessive wear and tear.
By addressing these common causes, you can extend the life of your trimmer line and improve the efficiency of your trimming tasks.
Credit: www.homedepot.com
Tips For Preventing String Trimmer Line Breakage
When it comes to using a string trimmer, dealing with line breakage is a common frustration for many homeowners and professionals alike. It can be both time-consuming and costly to continuously replace the trimmer line. However, by following some essential tips, you can reduce the occurrence of string trimmer line breakage and ensure a smoother, more efficient cutting experience.
Proper Line Installation Techniques
Proper installation of the trimmer line is crucial for preventing breakage. Ensure that the line is wound tightly and evenly on the spool, with no overlaps or loose areas. Inspect the spool housing for any signs of damage or wear, as this can cause the line to break prematurely during operation. Additionally, make sure to feed the line through the trimmer head according to the manufacturer’s guidelines, as improper installation can lead to increased wear and breakage.
Choosing The Right Trimmer Line
Selecting the appropriate trimmer line for your cutting needs is essential for reducing breakage. Consider the thickness and material of the line, as well as the type of vegetation you will be trimming. Thicker lines are more durable and less likely to break, while certain materials such as twisted or serrated lines offer enhanced cutting performance. Consult the trimmer’s manual or speak to a knowledgeable professional to determine the best line for your specific trimming requirements.
Regular Maintenance And Inspections
Maintaining your trimmer and inspecting the line regularly can help identify and prevent breakage issues. Keep the trimmer head and spool clean from dirt, debris, and grass buildup, as these can increase friction and lead to line wear. Inspect the line for signs of damage, fraying, or wear after each use, and replace it as needed. Regularly checking the trimmer head and spool for any signs of wear, cracks, or damage can proactively prevent line breakage during operation. Performing regular maintenance and inspections will help prolong the life of your trimmer line and reduce the frequency of breakage.
How To Properly Install String Trimmer Line
Using a string trimmer is an efficient and convenient way to keep your lawn tidy. However, it can be frustrating when the trimmer line consistently breaks. Understanding the reasons behind this issue and learning how to properly install the string trimmer line can significantly improve its performance and durability. In this section, we will discuss the steps to correctly install the string trimmer line, ensuring you can tackle your lawn maintenance tasks effectively.
Inspecting And Prepping The Trimmer Head
Before installing a new string trimmer line, it is essential to inspect the trimmer head to ensure it is in good condition. Any signs of wear, damage, or clogs should be addressed before proceeding. Follow these steps to inspect and prep your trimmer head:
- Carefully remove the trimmer head from the trimmer, following the manufacturer’s instructions.
- Inspect the head for any signs of wear or damage, such as cracks or breaks. Replace the head if necessary.
- If the head is clogged with debris, clean it thoroughly using a brush or compressed air. This will ensure proper line feeding.
- Once the head is clean and in good condition, it is ready for the new string trimmer line.
Choosing The Correct Line Diameter
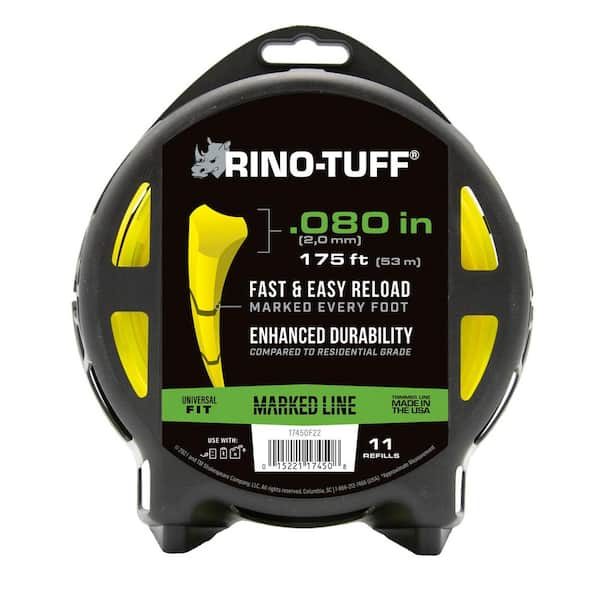
The diameter of the trimmer line plays a crucial role in its performance. Choosing the right diameter will allow the line to withstand the demands of your specific trimming tasks. Follow these guidelines to select the correct line diameter:
- Refer to your trimmer’s user manual or consult the manufacturer’s website for recommended line diameters.
- Consider the density of the vegetation you will be trimming. Thicker and tougher weeds or grass may require a thicker line diameter.
- Avoid using a line that is too thin, as it may break more easily and result in inefficient trimming.
- Once you have determined the appropriate diameter, it’s time to insert and secure the line.
Inserting And Securing The Line
Properly inserting and securing the string trimmer line is crucial for its optimal performance. Follow these steps to ensure a secure installation:
- Measure and cut a length of trimmer line according to the manufacturer’s instructions.
- Locate the line-loading holes on the trimmer head. Consult the user manual if needed.
- Insert one end of the trimmer line into the line-loading hole until it protrudes evenly from both sides.
- Wind the trimmer line in the direction indicated by the arrow on the trimmer head. This will ensure the line feeds properly during operation.
- Continue winding the line until the desired length is reached, leaving enough line to comfortably trim without strain.
- Secure the line by inserting its ends into the line-retaining slots or notches on the trimmer head.
- Ensure the line is tightly secured and doesn’t easily pull out of the head.
By following these steps to properly install the string trimmer line, you can reduce the chances of the line breaking prematurely. Regular inspection, choosing the correct diameter, and securely inserting the line will enhance the trimmer’s efficiency and ensure a smoother trimming experience.
Credit: www.homedepot.com
Factors to Consider When Choosing Trimmer Line
When it comes to selecting the right trimmer line for your string trimmer, there are several important factors to consider. By taking these factors into account, you can choose a trimmer line that not only fits your specific trimmer but also provides optimal performance and durability. Two key factors to consider when selecting trimmer line are impact resistance and cutting performance, line diameter and compatibility, and line material and durability.
Impact Resistance and Cutting Performance
The impact resistance and cutting performance of a trimmer line play a vital role in determining its effectiveness in tackling tough vegetation. A trimmer line with high impact resistance can withstand contact with rocks, fences, and other hard objects without easily breaking or wearing down. Additionally, a trimmer line with excellent cutting performance can quickly and effortlessly slice through thick grass, weeds, and brush.
Line Diameter and Compatibility
The line diameter determines the strength and cutting capacity of the trimmer line. It is crucial to select a line diameter that is compatible with your specific string trimmer. This compatibility ensures that the line fits perfectly into the trimmer head and operates smoothly without any issues. Using the correct line diameter also helps to maintain the trimmer’s balance and stability while in use. Consulting your trimmer’s user manual or contacting the manufacturer can help you determine the suitable line diameter for your trimmer.
Line Material and Durability
The material from which the trimmer line is made plays a significant role in its durability and longevity. Trimmer lines are available in various materials such as nylon, co-polymer, and titanium. Nylon trimmer lines are commonly used and offer good durability and flexibility. Co-polymer trimmer lines provide an even stronger resistance to wear and tear, making them ideal for heavy-duty trimming tasks. Titanium trimmer lines are the most durable and long-lasting but may be costlier. Consider your trimming needs and budget when selecting the appropriate material for your trimmer line.
In conclusion, when choosing a trimmer line, it is important to consider factors such as impact resistance and cutting performance, line diameter and compatibility, and line material and durability. By carefully evaluating these factors, you can select a trimmer line that is well-suited for your string trimmer, ensuring optimal performance and longevity.
Maintenance Practices For Extending Trimmer Line Lifespan
Regular maintenance is key to ensuring your string trimmer line lasts longer and performs effectively. By implementing a few simple practices, you can extend the lifespan of your trimmer line, reducing the frustration of constantly replacing it. Here are three important maintenance practices to consider:
Regular Line Replacement
1. Inspect and Replace
Regularly inspecting your trimmer line for wear and tear is crucial to avoiding unexpected line breaks. Check the line for any signs of fraying, splitting, or weakening, and replace it immediately if you notice any damages. Set a reminder to inspect and replace the line at least every 10 hours of usage or whenever you notice a significant decrease in performance.
2. Choose the Right Line
When replacing your trimmer line, be sure to choose the correct diameter and material for your specific trimmer. Different trimmers require different line thicknesses, so make sure to consult your trimmer’s manual or contact the manufacturer to ensure you select the appropriate line. Using the wrong line can lead to premature breakage and poor cutting performance.
Cleaning And Lubricating The Trimmer Head
1. Remove Debris
Frequent accumulation of grass and debris in the trimmer head can cause the line to break more easily. After each use, make it a habit to remove any dirt, grass clippings, or tangled vegetation from the trimmer head. Use a brush or compressed air to carefully clean the area, ensuring that no debris remains trapped inside.
2. Lubricate Regularly
Proper lubrication is essential for preventing excessive heat and friction, which can weaken the trimmer line. Apply a small amount of trimmer-safe lubricant to the trimmer head after cleaning it. This will help reduce wear and prolong the life of your trimmer line.
Avoiding Overworking The Trimmer
1. Avoid Excessive Force
Pushing your trimmer too hard or using it on thick vegetation can put undue strain on the line, causing unnecessary breakages. Instead, take your time and allow the trimmer to work at its own pace. Applying excessive force not only increases the likelihood of line breaks but can also lead to motor damage.
2. Take Breaks
String trimmers can overheat when used continuously for extended periods, leading to line breakages and affecting the trimmer’s overall lifespan. To prevent this, take short breaks every 15-20 minutes during prolonged use to allow the trimmer to cool down. This will not only prolong the life of your trimmer line but also protect the trimmer from potential damage.
By implementing these maintenance practices, you can significantly extend the lifespan of your trimmer line. Regular line replacement, cleaning and lubricating the trimmer head, and avoiding overworking the trimmer will ensure that you spend less time replacing broken trimmer lines and more time achieving a perfectly manicured lawn.

Credit: www.amazon.com
Troubleshooting Common String Trimmer Line Issues
When it comes to using a string trimmer, one common issue that many people face is the continual breaking of the trimmer line. This can be extremely frustrating, as it not only interrupts the trimming process but also increases the overall maintenance and cost. To help you troubleshoot and overcome this problem, below are the three most common string trimmer line issues: line tangling and spooling, excessive line breakage, and inefficient trimming performance. By understanding the causes and solutions for each of these problems, you’ll be able to get the most out of your string trimmer without the hassle of constantly replacing the line.
Line Tangling And Spooling
One of the primary causes of string trimmer line breakage is line tangling and improper spooling. When the line is not properly wound around the spool, it can become tangled and limit its ability to feed smoothly through the trimmer head. To address this issue:
- Ensure that the line is wound onto the spool tightly and evenly, following the manufacturer’s instructions.
- Check the trimmer head for any tangles or obstructions that may be preventing the line from feeding properly.
- Consider using a trimmer head with an automatic line feeding system, which eliminates the need for manual spooling and reduces the chances of tangling.
Excessive Line Breakage
Another common problem is the excessive breakage of the trimmer line. This may occur due to a variety of factors, including:
- Improper line thickness: Make sure you are using the correct line thickness for your trimmer. Thicker lines are generally more durable and suitable for heavier trimming tasks.
- Line wear and tear: Over time, the trimmer line can become worn and brittle, making it more prone to breakage. Regularly inspect the line for signs of wear and replace it as needed.
- Excessive line length: Using a longer line than necessary can increase the chances of breakage, as the extra length may become entangled or snagged on objects. Trim the line to an appropriate length to reduce the risk.
- Trimming near fences or obstacles: Trimming too close to fences, walls, or other obstacles can cause the line to repeatedly strike hard surfaces, leading to breakage. Maintain a safe distance to protect the line.
Inefficient Trimming Performance
In addition to line issues, an inefficient trimming performance can also contribute to the constant breakage of the trimmer line. This can occur if the trimmer is not properly adjusted or if the cutting technique is incorrect. Here are a few tips to improve trimming efficiency:
- Ensure that the trimmer head is properly attached and secured to the trimmer.
- Adjust the trimmer head angle to the appropriate position for the area you are trimming.
- Maintain a steady and uniform cutting motion, avoiding excessive force or jerky movements.
- Use a back-and-forth or side-to-side sweeping motion to trim grass and weeds evenly.
- Regularly clean the trimmer head to remove any grass clippings or debris that may be obstructing the cutting action.
Frequently Asked Questions For Why Does My String Trimmer Line Keep Breaking
Why Does My String Trimmer Line Keep Breaking?
When the string trimmer line keeps breaking, it could be due to several reasons. One common cause is excessive wear and tear. The line may also break if it hits hard objects, such as rocks or fences. Additionally, using the wrong type of line or incorrect installation can contribute to line breakage.
Regular maintenance and replacing worn-out parts can help resolve this issue.
How Can I Prevent My String Trimmer Line From Breaking?
To prevent your string trimmer line from breaking, there are a few steps you can take. Firstly, ensure you are using the correct line type and size for your trimmer. Additionally, avoid forcefully hitting hard objects with the line as this can cause breakage.
Maintaining the trimmer and replacing worn-out parts regularly is also crucial. Lastly, make sure to follow proper line installation techniques to prevent breakage.
What Type Of Line Is Best For Reducing Breakage?
To minimize breakage, it is essential to choose the right type of line for your trimmer. Opt for lines made from durable materials like nylon or copolymer. These lines have high tensile strength, allowing them to withstand more stress without breaking.
Additionally, consider selecting a thicker line diameter, as it tends to be more resistant to breakage while trimming.
Conclusion
To prevent your string trimmer line from constantly breaking, it’s crucial to identify and address the underlying causes. Regular maintenance, such as cleaning debris and keeping the line properly wound, can significantly improve its durability. Additionally, opting for a quality trimmer line and using the appropriate size for your equipment can make a notable difference.
By implementing these techniques, you can achieve optimal performance and minimize frustrating line breakages.
