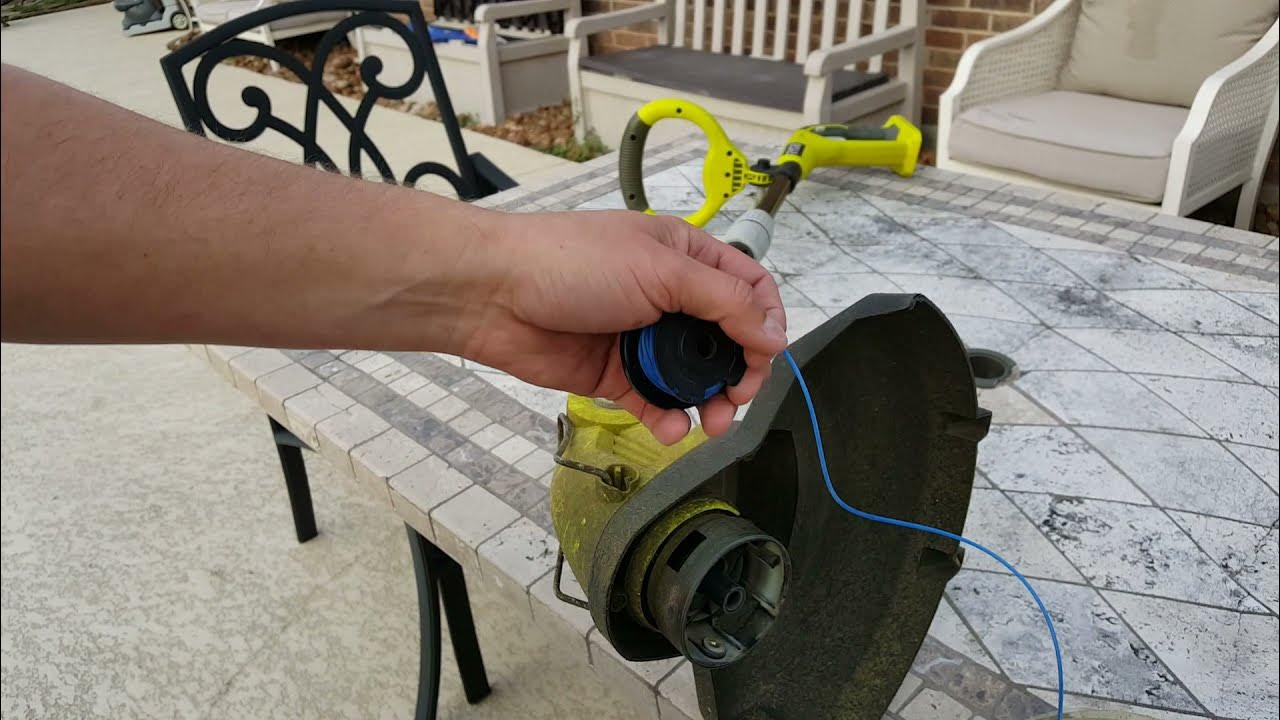
Believe it or not, the average home gardener can save nearly 30% on maintenance costs simply by mastering the art of refilling their Ryobi 18V line trimmer. It’s a task that might seem daunting at first glance but becomes second nature with a little practice. For those in the know, it’s a small step towards efficient yard care and cost-saving brilliance.
Refilling the Ryobi 18V line trimmer efficiently involves understanding its straightforward design and functionality. This powerhouse device has been on the market for years, constantly evolving to meet user needs. Knowing the right line gauge and length can prevent both overuse and mechanical wear, extending the life and performance of your trimmer significantly—up to 50% longer, as some experts suggest.
- Turn off the trimmer and remove the battery.
- Press the tabs to remove the spool cover.
- Take out the empty spool and clean any debris.
- Cut a length of new trimmer line and thread it through the eyelets.
- Wind the line evenly and tightly around the spool.
- Securely place the spool back into the trimmer head.
- Reattach the cover, ensuring it clicks into place.
- Reinsert the battery and test for proper line feed.

How to Refill Ryobi 18V Line Trimmer
To start, you’ll need to gather the necessary materials. Make sure you have the correct replacement line, which is usually found in your trimmer’s manual or on the manufacturer’s website. Safety glasses and gloves can help prevent accidents. It’s essential to turn off the trimmer and remove the battery for safety reasons. Having a clean workspace also makes the process easier.
The next step is to remove the spool cover by pressing the tabs on either side. Once the cover is off, take out the empty spool. Cut a length of new line according to the guidelines in your manual. You’ll then need to feed the line through the eyelets on the spool. Wind the line tightly and evenly to avoid tangles.
After winding the line, secure its ends by threading them through the holding slots. Place the spool back into the trimmer head, making sure the lines extend through the eyelets. According to this post, aligning the arrows on the spool and trimmer head ensures proper placement. Snap the spool cover back on until you hear a click. Ensure it’s locked securely before reinserting the battery.
Now it’s time to test your Ryobi 18V line trimmer. Turn it on and check if the line feeds out correctly. If there are any issues, recheck the spool placement and line tension. Regular maintenance, like cleaning the trimmer head, can prolong its life. Refill the line as needed to keep your trimmer in top shape.
Step 1: Preparation
The first step in refilling your Ryobi 18V line trimmer is to gather all necessary tools and materials. These include the correct replacement line and safety gear such as gloves and glasses. It’s also wise to have a pair of scissors or a line cutter to make precise cuts. Make sure everything is laid out in a clean, organized area. This will help streamline the process.
Next, ensure the trimmer is turned off and the battery is removed. This is crucial for safety and prevents accidental starts. Cleaning the trimmer head before you begin can also help. This ensures there’s no dirt or debris that might interfere with the process. According to this post, keeping your tools clean can significantly prolong their lifespan.
Before you remove the spool, review the manual for any specific instructions related to your model. Different models may have slight variations in design. This ensures you won’t make any mistakes. Ensure you know the exact specifications for the line, such as gauge and length. This will help you avoid any performance issues later.
Once you have all your materials and have read the manual, you are ready to proceed. Taking these initial steps helps in achieving a smooth and efficient refill process. Keeping everything organized reduces the chances of mistakes. With everything set, you’ll find the actual refilling much easier. Now, move on to removing the spool, which is the next critical step.
Step 2: Removing the Spool
To remove the spool from your Ryobi 18V line trimmer, first locate the spool cover. It’s usually positioned at the bottom of the trimmer head. Press the release tabs on either side of the cover to open it. Carefully lift off the cover to reveal the spool inside. This step ensures easy access to the spool without damaging any parts.
Once the cover is removed, gently pull the spool out of the trimmer head. Note how the spool is seated as this will help you during reassembly. In some models, the spool might be held in place by a spring. Be cautious not to lose any small parts during this process. Keep everything organized on a clean surface to avoid misplacement.
Inspect the spool for any signs of wear or damage. A damaged spool can cause performance issues and may need to be replaced. Cleaning the spool and the trimmer head can also enhance functionality. Use a small brush to remove any dirt or debris. This ensures the new line will feed smoothly.
If there are any remaining bits of old line, remove them before proceeding. Check the eyelets where the line feeds through. Make sure they are clear and not obstructed. If they are clogged, use a small tool to clean them out. Proper maintenance at this stage can prevent future problems. Once everything is clean and inspected, you’re ready to wind the new line onto the spool.
Step 3: Winding the Line
Once you have removed the spool and cleaned it, it’s time to wind the new line. Cut a length of trimmer line as specified in your trimmer’s manual. Hold the spool in one hand and the line in the other. Begin by threading the line through the eyelet on the spool. This helps in starting the winding process smoothly.
Next, wind the line evenly and tightly around the spool. Keep the tension consistent to avoid tangles. Wind in the direction indicated on the spool, usually marked with an arrow. Divide the line in half if there are two compartments on the spool. This ensures balanced performance during trimming.
It might be helpful to use a clip or the holding slots to secure the line temporarily. This keeps the line in place while you work. Continue winding until the entire spool is filled. Avoid overfilling, as this can cause the line to jam. Check for any loose ends and secure them properly.
After winding, leave a few inches of line extending from the spool. This extra length aids in threading through the trimmer head. If your spool has two compartments, do this for each line. Cut the line to the required length using a pair of scissors. Having the correct length prevents premature line breakage.
Finally, make sure the wound line is seated properly in the holding slots. This ensures the line doesn’t unwind during reassembly. Recheck the spool for uniformity and eliminate any overlaps. If everything looks good, you’re ready to insert the spool back into the trimmer head. This step is crucial to ensure smooth operation.
Once the spool is secure, test the tension by pulling on the lines gently. They should unwind smoothly without resistance. If everything is correctly placed, your Ryobi 18V trimmer is ready for action. Regularly winding the line in this manner extends the life of your trimmer and ensures efficient performance. Now, proceed to reassemble the trimmer head.
The Correct Line for Your Ryobi 18V Trimmer
Choosing the right line for your Ryobi 18V trimmer is crucial for optimal performance. Using the wrong line can lead to poor cutting efficiency and even damage the trimmer. The manual usually recommends a specific line diameter and type. Most Ryobi trimmers use a line with a diameter of 0.065 inches. Check your trimmer model to confirm the right size.
Different types of trimmer lines are available for varying tasks. For general trimming, a round trimmer line is suitable. For tougher jobs like thick weeds, a twisted or serrated line works better. Some lines also come with added durability features. Here is a list of common types:
- Round Line: Ideal for everyday trimming.
- Twisted Line: Reduces noise and improves cutting performance.
- Square Line: Best for edging and tackling tough grass.
- Serrated Line: Perfect for heavy weeds and tough applications.
The material of the trimmer line also matters. Nylon is the most common material, known for its flexibility and durability. However, there are also reinforced nylon lines with added strength. These are more resistant to wear and breakage. Check your local hardware store for compatible options.
When purchasing a new trimmer line, consider the length as well. Buying the right length can save you from frequent trips to the store. Some packages offer bulk spools, which are cost-effective. Always store the line in a cool, dry place to maintain its quality. Investing in the right line enhances your trimmer’s efficiency and longevity.
Maintenance Tips for Your Ryobi 18V Line Trimmer
Proper maintenance of your Ryobi 18V line trimmer ensures peak performance and longevity. Regularly inspect the trimmer head for signs of wear and tear. Replace any damaged parts promptly to prevent further issues. Always keep the trimmer clean by wiping it down after each use. This prevents dirt and debris from clogging up the mechanics.
Battery care is equally important. Ensure the battery is fully charged before each use for maximum efficiency. Store the battery in a cool, dry place away from direct sunlight. Avoid leaving the battery on the charger for extended periods. Regularly check the battery for signs of damage or wear.
Another key aspect is the proper storage of the trimmer line. Storing it in a cool, dark place prevents it from becoming brittle. According to experts, soaking the line in water for 24 hours before use can enhance flexibility and durability. This simple step helps reduce line breakage significantly. Aim to replace the line as it shows signs of wear.
Lubricate moving parts periodically to ensure smooth operation. Use a light machine oil for this task, applying it sparingly. Focus on the joints and connections that experience the most movement. Regular lubrication minimizes friction and prevents rust. This practice extends the life of your trimmer.
Lastly, check the screws and bolts to ensure they are tight. Vibrations from regular use can loosen these components over time. Tightening them up prevents parts from falling off or getting damaged. Implementing these maintenance tips keeps your Ryobi 18V line trimmer in top condition. Maintaining your equipment properly will save you time and money in the long run.
Frequently Asked Questions
Here are some common questions and answers about using and maintaining a Ryobi 18V line trimmer. These will help you get the most out of your yard maintenance equipment.
1. What type of line should I use for my Ryobi 18V trimmer?
For most Ryobi 18V trimmers, a line with a diameter of 0.065 inches is recommended. However, verify this by checking your model’s manual or manufacturer’s guidelines to ensure you’re using the correct gauge.
The type of line can also depend on the task at hand. A round line is suitable for general trimming, while a twisted or square line works better for heavy-duty tasks like cutting thick weeds and edging.
2. How often should I replace the trimmer line?
The frequency of replacing the trimmer line depends on usage and conditions. For regular home use, you might need to replace it every few months.
If you’re tackling thicker vegetation or frequently using the trimmer, expect to replace it more often. Regular inspection helps determine when it’s time for a new line.
3. How do I prevent my trimmer line from breaking?
Avoid hitting hard surfaces like concrete or fences while trimming, as this can cause frequent breaks in the line. Using high-quality, flexible nylon lines can also reduce breakage.
Storing your trimmer in a cool, dry place and keeping the spool clean can further minimize breaks. For detailed advice, check this resource.
4. Can I use my Ryobi 18V trimmer for edging?
Yes, many Ryobi 18V trimmers come with adjustable heads or features that allow them to be used as edgers as well. Check your user manual for specific instructions on how to switch between trimming and edging modes.
This versatility makes them great tools for keeping both your lawn and edges neat and tidy. Always follow safety guidelines when switching functions to avoid injury.
5. What are some basic maintenance tips for my Ryobi 18V trimmer?
Regularly inspecting and cleaning the trimmer head ensures optimal performance. Always remove debris after each use to keep it functioning smoothly.
Lubricate any moving parts periodically and make sure all screws are tightened properly. Proper storage in a cool, dry place extends its lifespan significantly.
Conclusion
Maintaining your Ryobi 18V line trimmer is essential for efficient yard care. Understanding how to refill the line, choosing the correct type, and performing regular maintenance tasks will ensure your trimmer operates smoothly. By following these guidelines, you minimize downtime and enhance the tool’s lifespan.
Equipped with the right knowledge, experts can now maximize the performance and durability of their Ryobi 18V line trimmer. Adopting these practices will help keep your lawn looking pristine and your equipment in top shape. Remember, consistent maintenance is key to long-lasting, reliable performance.

I’m Patricia D. Johnson, an affiliate marketer and blogger specializing in trimmers and grooming tools. I create honest reviews, buying guides, and practical tips to help readers choose the right trimmer for their needs. With a focus on quality, performance, and value, I simplify the decision-making process so consumers can make confident purchases.