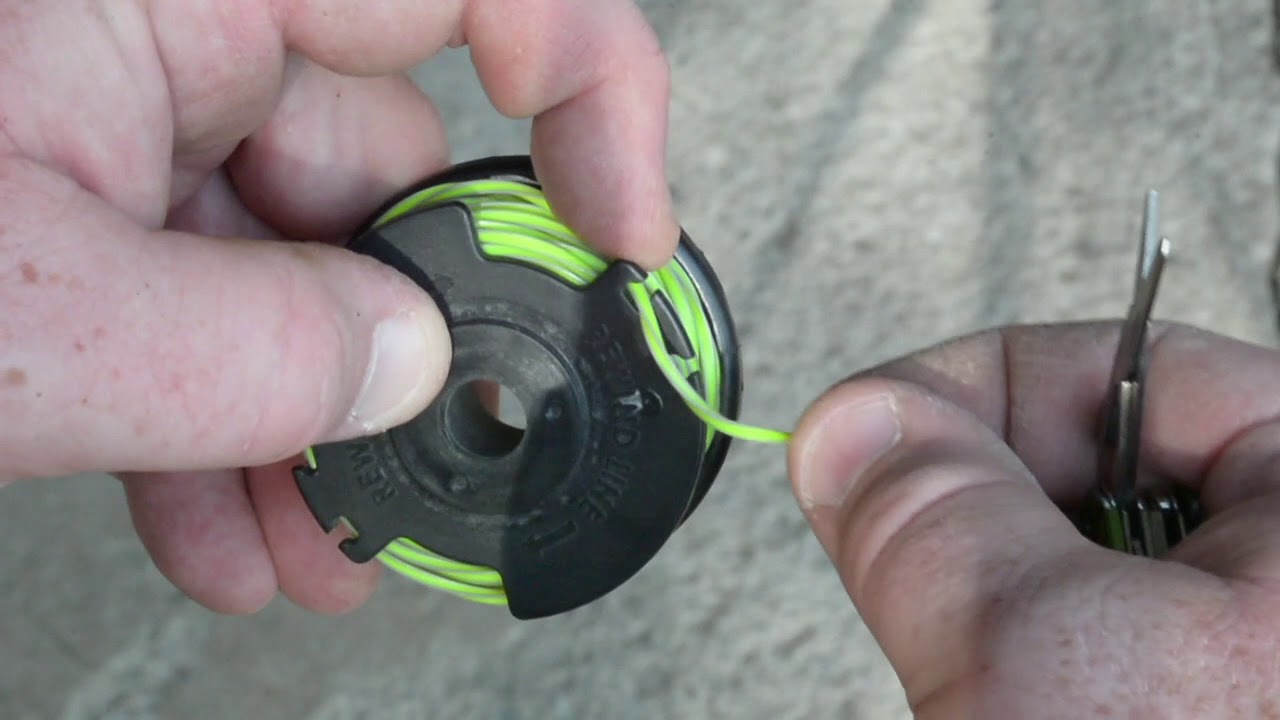
Ever tried trimming your garden only to have the line break and realize you’re out of pre-wound spools? This common predicament highlights the importance of mastering how to wind your Ryobi line trimmer. Surprisingly, knowing this skill can save you both time and money, ensuring your garden remains pristine without interruption.
The process begins with removing the trimmer cap to expose the spool. This device, with a history traced back to Ryobi’s innovative gardening solutions, relies heavily on users understanding its functional mechanics. Notably, efficient winding of the trimmer line not only enhances performance but also minimizes wear and tear, significantly extending the lifespan of your equipment.
- Remove the trimmer head cap to access the spool.
- Cut around 15-20 feet of trimmer line.
- Thread the line through the anchor holes on the spool.
- Wind the line evenly and firmly in the direction indicated on the spool.
- Secure the ends into holding slots.
- Reassemble the trimmer head and cap until they click securely.
- Test briefly to ensure proper function.
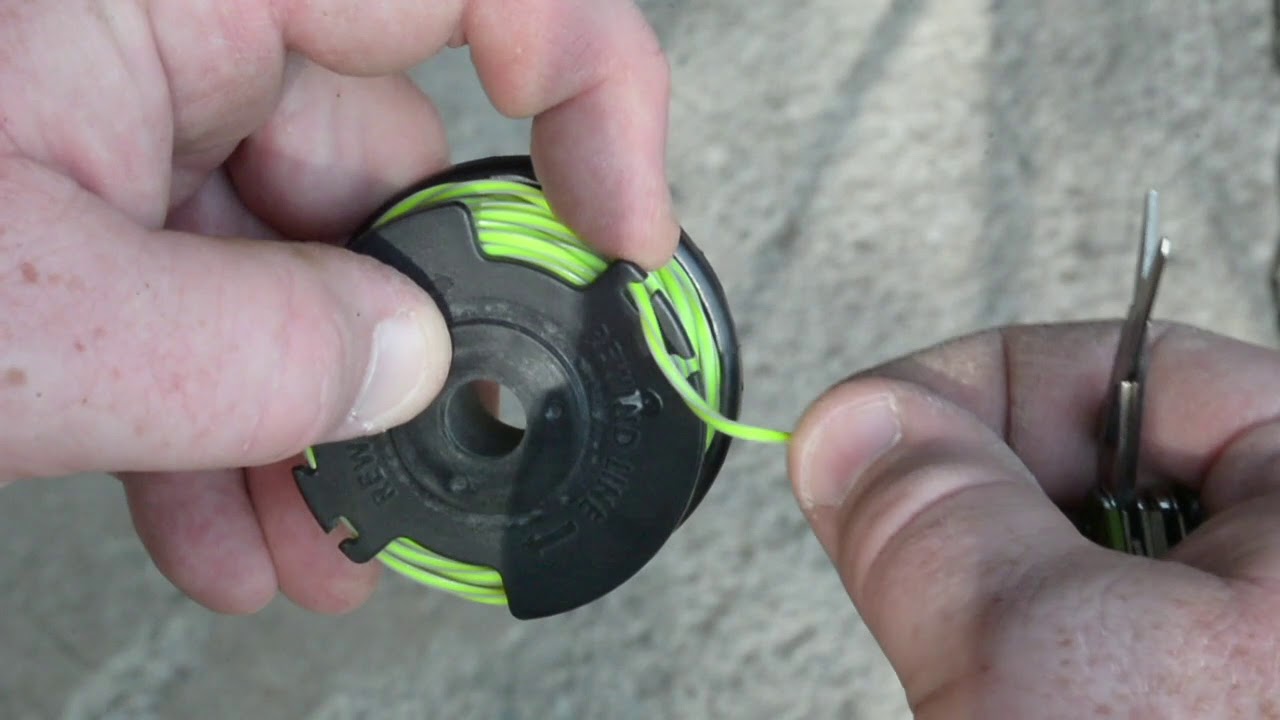
How to Wind a Ryobi Line Trimmer
Winding a Ryobi line trimmer can seem tricky, but it’s manageable with the right steps. Begin by removing the trimmer head cap to access the spool. Make sure you have the correct line for your specific Ryobi model. According to this article, using a mismatched line can result in poor performance. It’s essential to pay attention during this step.
Next, cut a suitable length of line, typically around 15-20 feet, depending on model specifications. Feed the line through the anchor holes in the spool, ensuring an equal amount on each side. Wind each side of the line evenly and firmly in the direction indicated on the spool. This helps prevent tangles and ensures smooth operation. Be patient and avoid overlapping the lines.
Once the line is correctly wound, secure it into the holding slots on the spool. Carefully place the wound spool back into the trimmer head. Attach the cap back on and ensure it clicks securely. A secure fitting is crucial to avoid the line unraveling during use. Test the trimmer briefly to ensure everything is in place.
Winding a Ryobi line trimmer properly improves its efficiency and lifespan. For more detailed steps, you can refer to here is the post that guides through similar maintenance tasks. Regular maintenance, including proper winding, keeps your trimmer performing at its best. Adopting these practices will make your gardening tasks much easier and more efficient.
Step 1: Preparation for Winding
Before you start winding your Ryobi line trimmer, gather all necessary materials. These include the trimmer line, a pair of scissors or line cutter, and safety gloves. Ensure that the trimmer is switched off and unplugged if it’s electric. Checking for dirt and debris on the trimmer head helps avoid complications later. A clean work surface can make the task much easier.
Remove the trimmer head cap by pressing the release tabs on both sides. This exposes the spool inside, which is where the new line will be wound. Handle the trimmer head carefully to avoid damaging any parts. Identifying the proper diameter and type of line for your specific Ryobi model is crucial. According to this expert opinion, using the wrong line can lead to poor performance.
If the spool has any leftover line, fully remove it before adding the new one. This avoids any tangling or jamming issues during winding. Examine the spool for any wear or damage. If it’s worn out, consider replacing it for optimal performance. Keeping spare spools on hand can be beneficial.
Measure and cut the appropriate length of the new line, generally about 15-20 feet. This ensures you have enough line for effective trimming. Double-check the length specified in your trimmer’s manual. Proper preparation prevents the need for adjustments later. You’re now ready to begin winding the trimmer line.
Step 2: Winding the Trimmer Line
Begin by threading the line through the anchor holes on the spool. Ensure you have an equal length of line on either side. This balance is critical for smooth operation. Follow the directional arrows on the spool to guide the winding process. Winding in the wrong direction can cause jams.
As you wind, keep the line tight without overlapping it. Consistent tension prevents tangles. The lines should sit snugly next to each other in their own grooves. If you’re unsure about the tension, refer to your Ryobi manual for guidance. Maintaining even tension is key to a successful wind.
Secure the ends of the line into the holding slots on the spool once you’ve wound the correct amount. This step ensures the line stays in place when you reassemble the trimmer head. Carefully insert the spool back into the trimmer head, aligning it properly. Your guide will have specific instructions for this step to help.
Finally, reattach the trimmer head cap until it clicks firmly in place. This secures the spool and line ready for use. Make sure to inspect the trimmer for any loose parts. Testing the trimmer briefly can confirm that the winding process was done correctly. Now you’re prepared for efficient trimming.
Step 3: Reassembling the Trimmer
Start by placing the newly wound spool back into the trimmer head. Align it properly to ensure a snug fit. This step is crucial as misalignment can affect performance. Next, press down firmly to secure the spool in place. You should hear a click indicating it’s locked in.
Once the spool is securely placed, reattach the trimmer head cap. Make sure to tighten it until it clicks into position. This ensures that the spool stays in place during operation. Inspect the trimmer head to ensure nothing is loose. A tight fit will prevent any parts from coming off while trimming.
After reassembling the trimmer head, pull on the lines gently to release them from the holding slots. This step prepares the line for use. Ensure the lines are extending uniformly from both sides. If they are uneven, readjust them before continuing. This helps in achieving an even cut.
Next, check the trimmer for any leftover debris from the previous steps. Clean the surrounding area of the trimmer head to avoid dirt getting into the mechanism. Regular cleaning enhances the longevity of your trimmer. For further maintenance tips, you might consider making a checklist. Keeping a clean machine is always beneficial.
Before starting, perform a quick test run to make sure everything is functioning well. Turn on the trimmer and check for any unusual noises. If everything sounds good, you’re ready to go. This ensures that the winding process has been successful. Now, your trimmer is ready for efficient use.
These reassembly steps will help you maintain your trimmer in optimal condition. Following these guidelines ensures a longer lifespan for your machine. Regularly performing these steps can save you time and repairs. Enjoy a well-maintained trimmer for your gardening needs.
Benefits of Learning to Wind a Ryobi Line Trimmer
Knowing how to wind a Ryobi line trimmer can save you money over time. Instead of purchasing pre-wound spools, you can buy bulk trimmer line, which is often cheaper. This also allows you to have a backup supply readily available. It’s an investment in both convenience and cost-efficiency. Your wallet will thank you.
Being able to wind the line yourself ensures that your trimmer is always ready to use. There’s no need to run to the store when the line breaks mid-job. This ability can significantly reduce downtime. Consistently managing your line means fewer interruptions. It enhances your overall productivity.
Winding your own trimmer line also allows for better customization. You can choose the type and thickness of the line that best suits your trimming needs. Different jobs may require different types of lines. Tailoring these choices makes your trimmer more versatile. You’re not limited to what’s available pre-wound.
Learning this skill extends the lifespan of your trimmer. Proper line winding reduces wear and tear on the spool and trimmer head. Regular maintenance keeps your trimmer in optimal condition. This means fewer repairs and replacements. In the long run, it’s a great way to protect your investment.
Another benefit is the sense of accomplishment you’ll get. Mastering a new skill always feels rewarding. It’s satisfying to troubleshoot and fix issues on your own. Plus, sharing this knowledge can be helpful to others. Gaining this expertise makes you more self-reliant and resourceful.
Tips and Precautions When Winding a Ryobi Line Trimmer
Always wear safety gloves to protect your hands while working with the trimmer line. This precaution prevents cuts and scrapes. It also gives you a better grip, making the process easier. Safety should always come first. Never skip this step even if you’re in a hurry.
Ensure you are using the correct type and diameter of the line for your Ryobi model. Consult the owner’s manual or check the trimmer head for specifications. Using the wrong line can lead to poor performance and damage to the trimmer. Overloading the spool can cause it to jam or malfunction. Stick to the recommended line length and thickness.
Keep the tension steady while winding the line to avoid tangles and overlaps. Consistent tension ensures that the line feeds smoothly during operation. Avoid pulling too tightly as this can strain the spool. Gentle but firm pressure works best. This tip can make a big difference in your trimmer’s efficiency.
- Check the spool for wear and tear before winding new line.
- Avoid winding in the wrong direction; follow the arrows on the spool.
- Keep extra trimmer lines handy for quick replacements.
Finally, always test the trimmer briefly after winding to ensure everything is in place. This quick check can help identify any issues before you start a job. Listen for unusual noises or vibrations that could indicate a problem. Resolve any issues immediately to avoid further damage. This ensures smooth and efficient trimming.
Frequently Asked Questions
Learn how to optimize and maintain your Ryobi line trimmer with these common questions and answers. These tips will help you keep your equipment in top condition.
1. How often should I replace the trimmer line?
The frequency of replacing the trimmer line depends on usage and the material being trimmed. For regular home use, consider replacing it every two to three uses if working with dense or tough vegetation. If trimming lighter materials, the line might last for several sessions before needing replacement.
Always inspect the line before each use for wear or breakage. A well-maintained line ensures efficient trimming and prevents damage to your Ryobi trimmer. Keep spare lines handy to avoid interruptions during gardening tasks.
2. What type of trimmer line is best for my Ryobi model?
The ideal trimmer line varies depending on your specific Ryobi model and trimming needs. Generally, thicker lines (0.095 inches and above) are more durable and suit tougher vegetation like thick grass and weeds. For lighter tasks, a thinner line (0.065-0.080 inches) may suffice, providing precision without burdening the motor.
Check the owner’s manual or specifications on the trimmer head to find suitable recommendations for your model. Using recommended types helps in achieving optimal performance, reducing wear on both the spool and engine over time.
3. Can I use a metal blade instead of a nylon trimmer line?
A metal blade can be used in certain circumstances but not all Ryobi models support this conversion. Metal blades are ideal for cutting through thicker brush or woody stems where nylon lines would struggle; however, using them requires specific safety precautions because metal blades can be hazardous.
You need a compatible trimmer head attachment designed for blades; otherwise, you’ll risk damaging your tool or injuring yourself! Always refer to manufacturer guidelines regarding proper attachments before making any changes yet secure personal protection equipment especially when operating such heavy-duty solutions!
4.What causes my trimmer’s engine overheating quickly after few minutes usage?
Common reasons could involve clogged air filters obstructing airflow that leads inability cool down components efficiently; always ensure clean operational accessories prior utilizing machinery extensively involving frequent inspections maintaining cleaning regimen .Additionally insufficient lubrication indicates problematic factors contributing harmful thermal accumulations due friction facilitating prompt overheating problems ultimately halting operations requiring downtime awaiting resolution measures addressing issues rise reported complications timely manner significant importance proactive upkeep heavy-duty machine tools carrying labors functionalities< / p>< br >
< indLine > Consider minimizing interruptive operational patterns pacing increments preventing persistent workload strain yielding continuous high-intensity exhaust outputs permitting adequate resting intervals fundamental relieving excessive stress prolong overall lifespan machinery parts< / html >
Conclusion
Understanding how to wind a Ryobi line trimmer not only enhances its efficiency but also extends its lifespan. These simple steps, complemented by regular maintenance, ensure your trimmer performs optimally for all your gardening needs. Mastering this skill can save time and money, making your gardening more enjoyable.
By following the outlined tips and precautions, you can tackle any trimming task with confidence. With a well-maintained trimmer, your garden will always look its best. Incorporating these practices ensures consistent results and a longer-lasting tool, providing great value for your investment.

I’m Patricia D. Johnson, an affiliate marketer and blogger specializing in trimmers and grooming tools. I create honest reviews, buying guides, and practical tips to help readers choose the right trimmer for their needs. With a focus on quality, performance, and value, I simplify the decision-making process so consumers can make confident purchases.