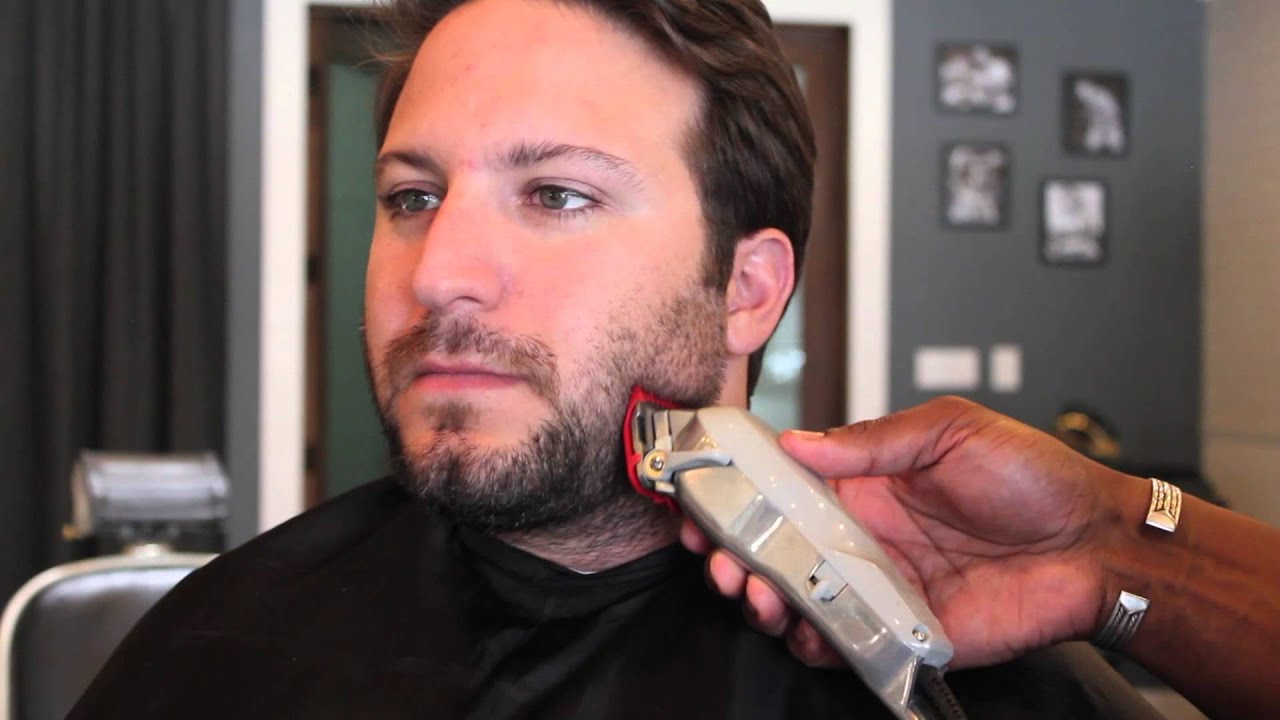
It’s fascinating to think that a tool as simple as a trimmer can significantly change one’s appearance within minutes. When used correctly, a trimmer can provide a professional-level grooming experience right at home. But mastering its use requires some key insights and techniques that not only ensure effectiveness but also safety.
Trimmers have evolved from their rudimentary forms to sophisticated gadgets, reflecting innovations in personal care technology. A pivotal aspect to consider is choosing the appropriate setting and attachments based on the hair type and desired outcome, with settings ranging from precision trimming to full grooming. Interestingly, a survey revealed that nearly 85% of users find adjustable settings to be the most useful feature, highlighting the importance of versatility in a trimmer.
- Fully charge or plug in the trimmer.
- Select the appropriate comb attachment based on desired hair length.
- Turn on the trimmer and begin trimming in the direction of hair growth.
- Use steady, even strokes for uniform results.
- Clean the trimmer and attachments after use to maintain performance.

How to Use a Trimmer
To start, preparing the trimmer is essential. Make sure it’s charged if it’s a cordless model or plugged in if it’s corded. Next, clean the blades and oil them lightly to ensure smooth operation. Having a mirror and good lighting will help you see what you’re trimming. Wear a cape or a shirt you don’t mind getting messy.
Choosing the right comb attachment is crucial for achieving the desired length. Comb attachments come in various sizes, allowing for precise control over how much hair you trim off. According to this post, selecting an incorrect comb size may lead to unsatisfactory results. Test on a small patch first to avoid any surprises. This simple step makes a big difference.
Begin trimming by moving the trimmer in the direction of hair growth. Always start with a longer guard and switch to shorter ones gradually. This helps avoid cutting too much too quickly. Make even, steady strokes to prevent uneven trimming. Use a handheld mirror to check your progress from different angles.
Proper aftercare and maintenance ensure your trimmer lasts longer. Clean the blades thoroughly after each use to remove hair and debris. Store the trimmer in a dry place to prevent rust. Oiling the blades periodically keeps them sharp and efficient. If curious about using trimmers in different conditions, here is the article: “Can You Use a Hedge Trimmer in the Rain” which offers valuable insights.
Step 1: Preparing the Trimmer
Before using your trimmer, ensure it is fully charged or properly plugged in. This step reduces interruptions during your grooming session. Also, check that the blades are clean and free of hair. This prevents any pulling or uneven cutting. It’s essential to have all your tools, like comb attachments and scissors, within reach.
Cleaning the trimmer before use is a crucial step. Hair and debris can accumulate on the blades, affecting performance. Use a small brush to clear away any residue from previous uses. According to this expert opinion, cleanliness is key to efficient trimming and avoiding skin irritation. An oiled blade ensures smoother operation and a finer cut.
Setting up your trimming station is also part of preparation. Ensure you have a mirror and good lighting to see what you’re doing clearly. A clean space makes the trimming process smoother and more efficient. Use a cloth or cape to catch trimmed hair and keep your area tidy. Lay down some newspaper or an old sheet to make clean-up easier.
Lastly, make sure you have the right comb attachment ready. Different lengths serve different purposes, from a close trim to a longer cut. Attachments should be snapped on securely to avoid any mishap during trimming. Test the trimmer on a small area to confirm it’s working correctly. A quick test run ensures everything is set up for a seamless grooming experience.
Step 2: Selecting the Right Comb Attachment
Choosing the correct comb attachment is vital for getting the trim you want. Comb attachments guide the trimmer and determine how much hair gets cut. Typically, combs are numbered based on the length they leave behind. A higher number means a longer trim, while a lower number gives a closer cut. It’s a good idea to start with the longest attachment if you’re unsure.
Understanding the different attachment sizes can make your grooming more precise. For instance, if you want a very short trim, go for a size 1 or 2 comb. For a bit more length, a size 3 or 4 might be perfect. The table below summarizes the general length each size corresponds to:
| Comb Size | Hair Length |
|---|---|
| 1 | 1/8 inch |
| 2 | 1/4 inch |
| 3 | 3/8 inch |
| 4 | 1/2 inch |
To ensure the attachment is fitted correctly, snap it on until you hear a click. An insecure attachment might slip off mid-trim, leading to uneven results. It’s important to check the attachment’s stability before you start trimming your hair. A quick jiggle test can help confirm it’s in place. This small step can save you from an unexpected haircut mishap.
Comb attachments can also help you achieve specific styles. For example, a longer comb can be used for fading effects or blending different hair lengths. This makes the trimmer versatile and suitable for various grooming needs. You can experiment with different attachments to find the style that suits you best. Always remember, it’s easier to cut more off later than to fix a cut that’s too short.
Step 3: Starting the Trimming Process
When starting the trimming process, begin by turning on the trimmer and allowing it to reach full speed. This ensures that the blades are moving at their optimal efficiency. Hold the trimmer at a slight angle against your skin to avoid irritation. Begin at the top of your head and work your way down. Use steady, gentle strokes for an even trim.
Working in small sections is key to achieving a neat look. Start with one side of your head and move systematically to the other. Use mirrors to check your progress frequently. This helps you catch any missed spots early on. Trim in the direction the hair grows to avoid tugging and pulling.
Depending on the area you are trimming, you may need to adjust your technique. For sideburns, use a vertical motion, and for the back of the neck, tilt your head slightly forward. Trimming your beard or mustache requires shorter strokes and more frequent checks for evenness. A handheld mirror can be very useful here. Make sure to keep your hand steady.
If you’re trimming body hair, different techniques might be required. Trim chest hair with longer strokes for a smooth finish. For arm and leg hair, short, controlled movements work best. The list below includes areas that commonly require different techniques:
- Sideburns: vertical motion
- Neck: tilt head slightly forward
- Beard/Mustache: shorter strokes
- Chest: longer strokes
- Arms/Legs: short, controlled movements
After the initial pass, it’s important to review your work. Feel for any uneven spots with your hands. Use a brush to remove loose hair and see the true form of your trim. This step ensures a polished and professional look. Repeat the process wherever you find inconsistencies.
Step 4: Trimming Different Areas
Different areas of your body require different trimming techniques. For your face, like your beard and mustache, short and precise strokes work best. Use shorter guard settings for a close trim on your cheeks and jawline. For the mustache area, a narrow trimmer head provides better control. Always trim in the direction of hair growth to avoid irritation.
When trimming around your ears, be extra cautious. The skin is sensitive and the area can be tricky to navigate. Use a small, precision attachment to carefully trim hair around the ears. Hold your ear back with your free hand to get better access. Regularly check in a mirror to ensure even trimming on both sides.
Trimming your neck area requires a steady hand and some flexibility. Tilt your head slightly upward for better visibility and easier access. Start from the base of your neck and move upward in smooth strokes. Use an attachment that matches the length of your beard for an even transition. A handheld mirror helps to see the back of your neck.
For body hair such as chest, arms, and legs, use longer strokes. The hair in these areas tends to be thicker, so a longer guard setting might be better. Trim in the direction of hair growth to avoid pulling. The list below summarizes techniques for various body parts:
- Face: short, precise strokes
- Ears: small, precision attachment
- Neck: smooth upward strokes
- Chest: longer guard setting
- Arms and Legs: trim in the direction of hair growth
Trimming underarm hair requires caution due to the sensitive skin. Use a medium guard setting to avoid cutting too close. Stretch your arm over your head to tighten the skin. This reduces the risk of accidental cuts. Regularly check for any missed spots for an even trim.
The last area to consider is your back, which can be the most challenging. If possible, get someone to assist you, as visibility is limited. Using an extendable trimmer can also make the job easier. Start from the top and work your way down. Make sure to cover all areas evenly for a balanced look.
Step 5: Aftercare and Maintenance of Trimmer
After finishing the trimming process, it’s crucial to clean your trimmer immediately. Remove any attachments and rinse them under warm water if they are waterproof. Use a small brush to clear out hair and debris stuck in the blades. For a more thorough clean, disassemble the trimmer head if possible. Keeping the trimmer clean prevents bacteria buildup and prolongs its life.
Oiling the blades is another essential step. Apply a few drops of clipper oil on the blades while the trimmer is running. This ensures that the oil gets evenly distributed. Well-oiled blades function more efficiently and reduce the risk of rust. Perform this task after every few uses. It will keep your trimmer in top shape.
Storing your trimmer correctly also plays a big role in its maintenance. Always keep it in a dry place to avoid moisture damage. Many trimmers come with storage bags or cases. Use these to protect the trimmer from dust and accidental falls. Proper storage increases the life span of your trimmer.
Regularly inspect your trimmer for any signs of wear and tear. Look for loose parts or dull blades. If you notice the trimmer isn’t cutting as smoothly, it might be time to replace the blade or any worn-out attachments. Following the manufacturer’s guidelines can provide you with the best care routine. Always stick to recommended maintenance schedules.
Battery care is critical if you have a cordless trimmer. Fully charge the battery before storing it for long periods. Avoid leaving the trimmer plugged in constantly, as this can shorten battery life. Refer to the manual for specific battery care instructions. Good battery management keeps your trimmer ready for use whenever you need it.
Finally, replace parts when necessary. Blades and comb attachments wear out over time. Manufacturers often sell replacement parts, making it easy to maintain your trimmer’s performance. By keeping your trimmer well-maintained, you ensure consistent and reliable grooming sessions. It’s a small effort that yields significant benefits.
Common Trimmer Usage Mistakes
One of the most common mistakes is using a trimmer on wet hair. Wet hair can stick to the blades and make trimming uneven. Always ensure your hair is completely dry before starting the process. This allows for a smoother cut and reduces the risk of damaging your trimmer. Dry hair also provides a clearer visibility of your progress.
Another mistake is not regularly cleaning the trimmer during use. Hair buildup in the blades causes them to work less efficiently. Take breaks frequently to brush off excess hair from the blades. This ensures consistent performance throughout your grooming session. A clean trimmer reduces tugging and prolongs blade life.
Avoiding attachment guides or combs can lead to disaster for beginners. These tools are designed to help maintain uniform length and avoid cutting too much at once. Skipping this step often results in uneven cuts or accidentally shaving off more than intended. Using an attachment makes trimming safer and easier, especially for novices.
Poor battery management can significantly affect how well your cordless trimmer works. Many users forget to fully charge their device before use, resulting in weaker power during trimming sessions. Low battery might cause snagging and uneven cuts because the motor isn’t running at full capacity. Keeping your trimmer charged ensures constant, powerful performance.
Incorrect handling techniques can also be problematic. Pressing too hard against your skin increases the risk of irritation or cutting yourself. Hold the trimmer lightly and let it glide over your skin instead of forcing it down. Gentle movements give a more uniform trim without causing discomfort or injury.
Ignoring proper aftercare routines contributes to quicker wear and tear on your device. Not oiling blades regularly leads to rust and dullness faster than expected, impacting efficiency over time.
The list below summarizes key aftercare steps:
- Clean immediately after each use
- Oil blades every few trims
- Store in a dry place
- Regularly check for wear and replace parts as needed
The Benefits of Using a Trimmer
Using a trimmer offers the convenience of grooming at home. No need to schedule appointments or wait in long lines at the barbershop. This tool allows you to trim your hair, beard, or body hair whenever it’s convenient for you. It saves time and provides flexibility. Plus, you can experiment with different looks in the comfort of your own home.
Trimmers are cost-effective in the long run. While the initial investment might seem high, it pays off. By avoiding frequent salon visits, you save money over time. A one-time purchase often lasts for years with proper maintenance. This makes trimmers an economical choice for personal grooming.
The precision offered by trimmers is another major benefit. The variety of attachments and guard settings lets you achieve the exact length you desire. Whether it’s a clean shave, a stubble look, or a well-groomed beard, trimmers offer versatility. They allow for detailed and accurate grooming. This level of control is hard to achieve with traditional razors.
Trimmers are suitable for sensitive skin. Many people find that razors cause irritation, razor bumps, or ingrown hairs. Trimmers, on the other hand, glide smoothly over the skin, reducing these issues. The option to avoid directly touching the skin makes them a gentler choice. This enhances the overall grooming experience.
Another significant advantage is hygiene. You have full control over the cleanliness of your trimmer. Regular cleaning and proper maintenance ensure that you’re always using a sanitized tool. This reduces the risk of skin infections and other hygiene-related issues. Personal trimmers offer a safer alternative to shared barbershop tools.
Trimmers are also versatile for different grooming needs. They can be used for head hair, facial hair, and even body grooming. Having one tool that caters to multiple needs is incredibly convenient. The list below outlines the various uses:
- Head hair
- Facial hair
- Body hair
- Precision trimming for fine details
Choosing the Right Trimmer for Your Needs
Selecting the right trimmer can make a significant difference in your grooming routine. The first thing to consider is the type of hair you plan to trim. Different trimmers work better for head hair, facial hair, or body hair. For example, a beard trimmer offers precision for facial hair while a body groomer is ideal for larger areas. Identify your primary need before making a choice.
Another vital factor is the power source. Trimmers come in both corded and cordless models. Corded trimmers offer consistent power without needing recharges but can be less convenient due to the cord. Cordless models offer greater flexibility and ease of use but require regular charging. Choosing between these depends on your lifestyle and grooming habits.
The variety of attachments and accessories can enhance the utility of your trimmer. Look for models that offer a range of comb sizes and specialized heads for different tasks. Some trimmers include attachments for nose and ear hair, adding versatility. A well-accessorized trimmer can serve multiple grooming needs. Make sure to check what’s included in the package.
Waterproof features are particularly valuable if you prefer trimming in the shower. Waterproof trimmers are easier to clean and can handle wet hair. This feature adds a layer of convenience and improves the lifespan of the trimmer. It’s particularly useful for those who want quick and mess-free grooming. Waterproof models are often more robust and durable.
Price is always a consideration when choosing a trimmer. Higher-end models tend to offer more features and better build quality but come at a higher cost. However, budget models can still deliver good performance if chosen wisely. Evaluate what features are most important to you to find the best value. Sometimes, paying a bit more upfront saves money in the long run.
User reviews and expert recommendations can provide invaluable insights. Reading reviews on trusted websites can help you understand the pros and cons of different models. Experts often highlight features that typical users might overlook. The table below shows popular trimmer brands and their key features:
| Brand | Key Features |
|---|---|
| Philips | Wide range of attachments, waterproof models |
| Wahl | Heavy-duty performance, various power sources |
| Panasonic | Precision trimming, ergonomic designs |
| Remington | Affordable, basic to advanced models |
The Evolution of Trimmers
Trimmers have come a long way since their invention. Early versions were manual and required significant skill to use effectively. They often resembled large, bulky machines that were neither portable nor user-friendly. Over time, technological advancements led to more compact and efficient designs. These innovations have made grooming easier and more accessible.
The introduction of electric trimmers marked a significant milestone. Electric trimmers eliminated the need for manual effort, making the process quicker and more precise. Initially, these models were corded and had limited mobility. However, improvements in battery technology soon led to the development of cordless models. This provided users with greater flexibility and convenience.
Today’s trimmers are packed with features unimaginable a few decades ago. Modern trimmers offer various attachments, settings, and even digital displays. Waterproof models allow for wet and dry trimming, adding more versatility. Advanced blade technology ensures a smoother, more comfortable trim. Some models even include self-sharpening blades that extend the lifespan of the trimmer.
In recent years, the focus has shifted towards creating trimmers that cater to specific needs. For instance, there are models designed specifically for sensitive skin, offering hypoallergenic blades. There are also trimmers made for different body parts, such as facial hair, body hair, and delicate areas. This specialization enhances performance and user satisfaction.
Sustainability has become an important factor in the evolution of trimmers. Some manufacturers now offer eco-friendly models made of recyclable materials and energy-efficient technologies. These initiatives aim to reduce the environmental impact of grooming products. More consumers are opting for sustainable choices, influencing the market towards greener solutions.
Voice-controlled and smart trimmers are the latest additions to the market. These cutting-edge models integrate with smart home systems and offer personalized grooming routines. They can even provide real-time feedback and suggestions for better grooming. The table below summarizes key milestones in the evolution of trimmers:
| Year | Milestone |
|---|---|
| 1920s | Introduction of manual trimmers |
| 1950s | First electric trimmers |
| 1980s | Advent of cordless models |
| 2000s | Features like waterproofing and digital displays |
| 2020s | Smart and eco-friendly trimmers |
Frequently Asked Questions
Below are some of the most common questions about using a trimmer effectively. Whether you’re a beginner or an expert, these answers will help you achieve the best results.
1. What is the difference between a trimmer and a clipper?
A trimmer is designed for precise detailing work like shaping beards, sideburns, and edges. It generally has finer blades to tackle shorter hair lengths close to the skin. Clippers, on the other hand, are intended for bulk hair removal and usually come with larger blade sets.
For tasks requiring more power like cutting through thick head hair, clippers are ideal. They often feature multiple comb attachments, making them suitable for achieving various lengths. A professional setting may use both tools interchangeably depending on the haircut style needed.
2. How frequently should I clean my trimmer?
You should clean your trimmer after every use to maintain its efficiency and longevity. Regular cleaning prevents hair build-up that can obstruct blade movement and reduce sharpness. Simply brush off loose hairs with a small brush provided with most trimmers or rinse detachable parts under water if they are waterproof.
A thorough clean might include disassembling the blade area periodically and applying oil to keep it lubricated. This will also help in maintaining hygiene and ensuring optimal performance each time you trim. Following these steps ensures your device remains in top condition.
3. Can I use my trimmer on wet hair?
It’s generally recommended to use your trimmer on dry hair as it allows for more precise cutting. Wet hair can stick to blades causing uneven results and potential clogging issues over time.
However, some high-end models are designed specifically for wet/dry use offering versatility in grooming habits such as trimming right after a shower when pores are open which could result in fewer irritations if done correctly according manufacturer guidelines
4. How long does a fully charged cordless trimmer last?
The running time of fully charged cordless varies among brands but typically ranges from 40 minutes up two hours longer-lasting options readily available markets today though remain factor influence user satisfaction long term usage periods needing recharges frequently
If planning extensive sessions suggest investing higher capacity models maybe desired ensure uninterrupted grooming experiences battery considerations shouldn’t overlooked aspect choosing right tool job specific requirements particular person need balancing budget efficiency household demands day-to-day operations personal care routine maintenance consistency delivered well-maintained product side note spare battery pack backup just case unexpected happens middle longest terrains ventured least temporarily preventing significant disruptions process completion opportunity arise future occasions arises day seeking refine skillset further finesse accuracy added precision achieved superior products becoming confidant oneself mastering art consistent regularity achieved systematic approaches taken naturally steps carved pathway success ultimately realized full potential lies within reach attainable goal persistence determination pursuit excellence continued advancement forward overall satisfaction improving self-esteem confidence boosted
Conclusion
Mastering the use of a trimmer can greatly enhance your grooming routine, offering both convenience and precision. By understanding the steps involved and knowing how to avoid common mistakes, you set yourself up for success. The right trimmer, combined with proper technique, ensures optimal results.
Continued practice and attention to maintenance will keep your trimmer in top condition. This allows you to enjoy a professional grooming experience at home. Whether you’re trimming your beard, hair, or body, these insights will help you achieve your desired look consistently.

I’m Patricia D. Johnson, an affiliate marketer and blogger specializing in trimmers and grooming tools. I create honest reviews, buying guides, and practical tips to help readers choose the right trimmer for their needs. With a focus on quality, performance, and value, I simplify the decision-making process so consumers can make confident purchases.