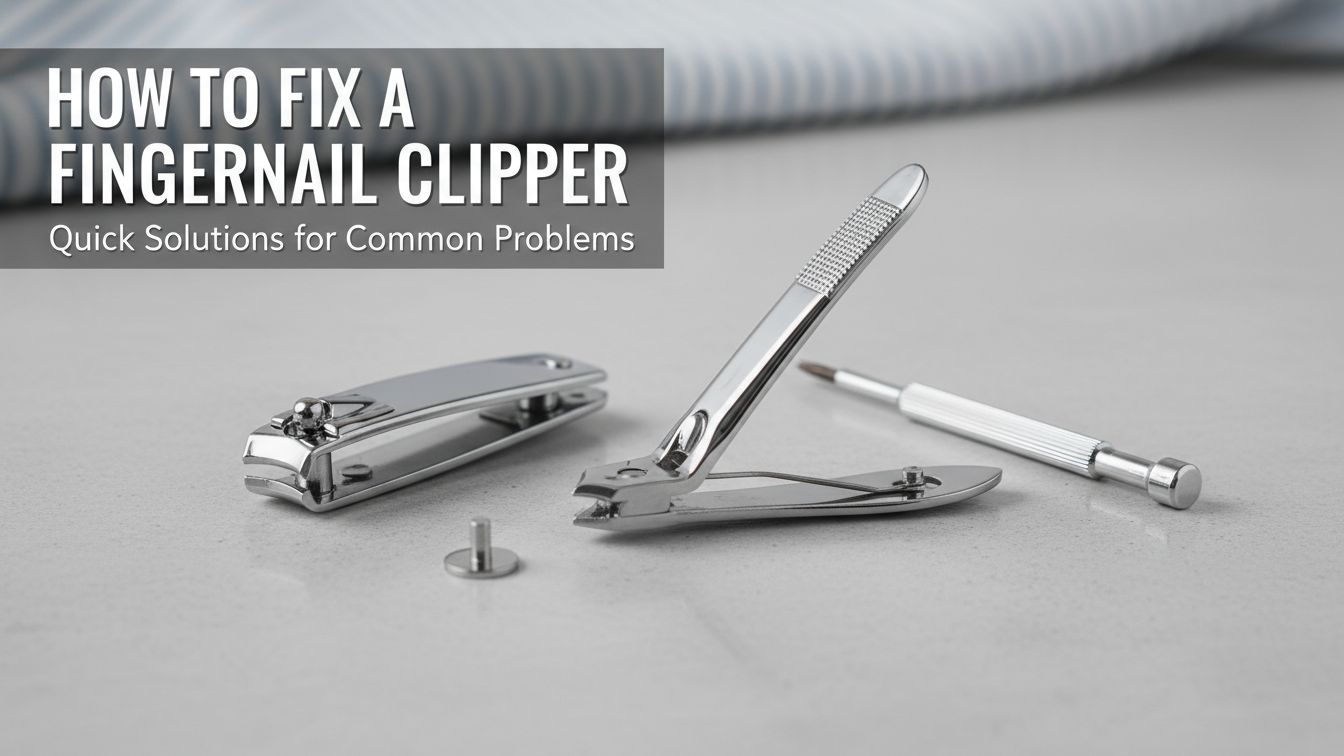
Your favorite nail clipper just fell apart. You were ready to trim your nails. Now you have metal pieces in your hand. Do not throw them away yet. You can fix this tool in seconds. Most people think a broken clipper is trash. That is not true at all. It is a simple machine with a few parts. You just need to know how they fit. This guide will teach you how to fix a fingernail clipper You will save money and reduce waste.
We will look at common problems like loose pins. We will also talk about dull blades. Fixing things yourself feels very good. It is a small win for your day. Let’s get those clippers working again right now. You have the power to repair your own tools. Follow these simple steps for a perfect fix.

Understanding Your Fingernail Clipper
Most clippers have a very basic design. They use a lever and a fulcrum. This helps you cut through tough nails. There are usually three main parts. First, you have the main body. This consists of two metal blades. They are joined at the back. Second, there is a small metal pin. This pin holds everything together. Third, you have the lever. This is the part you press down.
The Main Body Blades
The blades are the heart of the tool. They must be sharp to work well. They also need to line up perfectly. If they are crooked, they won’t cut. They might even tear your nail. Most are made of stainless steel. This keeps them from rusting easily.
The Central Pin
The pin is a tiny metal post. it has a small notch at the top. This notch is very important. It catches the lever and holds it. If the pin falls out, the clipper fails. Pins can sometimes bend over time. A bent pin makes the clipper feel loose.
The Lever Handle
The lever provides the cutting power. It has a small hole and a hook. You slide the hook over the pin. Then you flip it over to use it. If the lever is bent, it won’t press down. You can usually bend it back.

Common Problems You Might Face
Why did your clipper stop working? Usually, it is one of three things. The pin might have slipped out. The lever might have snapped off. Or, the blades might be too dull. Sometimes, the metal loses its spring. This means the blades stay closed. You want them to pop back open.
The Clipper Fell Apart
This is the most common issue. You dropped it on the floor. Now you have three separate pieces. This happens when the lever spins too much. The hook slides off the pin. It looks broken, but it is not. You just need to put it back.
The Blades are Dull
Do you have to press very hard? Does the nail just bend? Your blades are likely dull. This happens after years of use. Thick toenails can also dull them faster. You can sharpen them at home. It only takes a few minutes of work.
The Pin is Stuck or Bent
Sometimes the pin gets jammed. Dirt or rust can cause this. A bent pin is also a big problem. It prevents the lever from sitting flat. This makes the clipper hard to handle. You can straighten it with pliers.

Tools You Will Need for the Fix
You do not need a big toolbox. Most of these items are in your kitchen.
- Small Pliers: These help you grip tiny parts.
- A Paperclip: This helps clear out small holes.
- Fine Sandpaper: Use this to sharpen the blades.
- Rubbing Alcohol: This cleans off old gunk.
- A Flathead Screwdriver: This helps pry pieces open.

Step-by-Step: How to Fix a Fingernail Clipper
Let’s put your clipper back together. Follow these steps slowly. Do not force the metal too hard.
Step 1: Clean All the Parts
Start with a clean slate. Wipe the pieces with rubbing alcohol. This removes oils and skin cells. Clean parts fit together much better. It also makes the tool safer to use. You do not want germs on your skin.
Step 2: Line Up the Body Blades
Hold the two main blades together. Look for the small holes at the front. These holes must be perfectly aligned. If they are not, the pin won’t go in. Squeeze the blades with your thumb and finger.
Step 3: Insert the Pin
Take the small metal pin. Push it through the holes from the bottom. The notched end should stick out the top. Make sure the notch is facing the right way. It should face away from the back hinge. Use your pliers if your fingers are too big.
Step 4: Attach the Lever
This is the tricky part. Take the lever handle. Find the small hole or hook. Slide it over the top of the pin. You must keep the blades squeezed tight. If you let go, the pin falls out.
Step 5: Test the Tension
Once the lever is on, flip it over. It should rest on top of the blades. Press down gently. Do the blades meet in the middle? Do they pop back open when you let go? If yes, you did it!
Comparison of Clipper Materials
| Material | Durability | Sharpness Life | Rust Resistance |
|---|---|---|---|
| Stainless Steel | Very High | Medium | Excellent |
| Carbon Steel | High | Very High | Low |
| Plastic Handles | Low | Medium | N/A |
| Chrome Plated | Medium | Low | Good |
How to Sharpen Your Clipper Blades
Dull clippers are very frustrating. They can cause painful hangnails. You can sharpen them easily.
Using Sandpaper
Get a small piece of fine sandpaper. Fold it in half. The gritty side should face out. Place it between the clipper blades. Close the clipper on the paper. Pull the paper out quickly. Repeat this ten times. This grinds the edges back to life.
Using Aluminum Foil
Do you have no sandpaper? Use aluminum foil instead. Fold a piece of foil several times. It should be a thick square. Clip into the foil many times. This helps hone the metal edges. It is a quick and dirty fix.
Using a Nail File
A metal nail file also works. Rub the file against the inside edge. Follow the natural angle of the blade. Be careful not to round the edge. You want it to stay flat and sharp.
Troubleshooting Your Repair
Is it still not working? Let’s look at some common mistakes.
The Lever Won’t Stay Put
The hook on the lever might be worn. Use pliers to bend the hook slightly. This makes it grip the pin better. Be very gentle with the metal. If it snaps, you cannot fix it.
The Blades are Misaligned
Sometimes one blade sits higher than the other. This happens if the back hinge is bent. You can use pliers to straighten the body. Line the edges up until they touch evenly. A small gap will prevent a clean cut.
The Clipper is Too Stiff
Is it hard to press down? There might be rust in the hinge. Add a tiny drop of mineral oil. Move the clipper up and down. This spreads the oil inside. It should feel smooth after a few seconds.
Technical Troubleshooting Guide
🚀 The Clipper Fix Checklist
| Problem | Checklist Items |
|---|---|
| Parts are missing | Check the floor with a magnet. Pins are often hard to see. Check inside your grooming kit bag. |
| Pin keeps falling out | The hole in the blade might be too big. Use pliers to squeeze the hole tighter. Ensure the lever is flipped correctly. |
| Ragged nail edges | The blades are definitely dull. Follow the sharpening steps above. Clean the blades with a brush. |
| Rust spots appearing | Soak the clipper in white vinegar. Scrub with an old toothbrush. Dry it completely with a towel. |
Deep Cleaning and Maintenance
Prevention is better than repair. You should clean your clippers often. This prevents “gunk” from building up.
The Vinegar Soak
Once a month, soak your tool in vinegar. This dissolves hard water and soap scum. It also kills most bacteria. After ten minutes, rinse with water. Always dry the metal immediately. Water left on metal causes rust.
Proper Storage
Where do you keep your clippers? Most people leave them in the bathroom. Bathrooms are very humid. This is bad for metal tools. Keep them in a dry drawer or a kit. A small bag helps keep the parts together.
Checking for Wear and Tear
Look at your clippers every few months. Are the blades getting gaps? Is the pin looking thin? If the metal starts to crack, stop using them. A cracked clipper can snap while cutting. This could hurt your finger.
When Should You Buy a New One?
Not everything can be fixed forever. Sometimes the metal gets tired. This is called metal fatigue. If you bend the lever back and it bends again, it’s done. If the blades have big chips, they are toast.
Good clippers are not expensive. If your repair fails, buy a high-quality pair. Look for “surgical grade” stainless steel. These stay sharp for many years. They are also much harder to break.
Safety First During Repairs
Be careful when fixing metal tools. The edges can be sharp.
- Protect Your Eyes: Small pins can fly across the room.
- Use the Right Tools: Don’t use your teeth or nails.
- Watch Your Fingers: Don’t get pinched in the blades.
- Work in Good Light: You need to see those tiny notches.
FAQs About Fixing Nail Clippers
Can I use a regular pin if I lose the clipper pin?
No, a regular sewing pin is too thin. It will bend or break instantly. You need the specific pin that came with the tool. Some people use a very thick wire in an emergency. However, a real replacement part is always better.
Why does my clipper make a loud clicking noise?
A loud click usually means the lever is hitting the body. This happens when the pin is slightly bent. It can also mean the tension is too high. Try loosening the pin slightly with pliers. A drop of oil can also quiet the noise.
Is it worth fixing a cheap pair of clippers?
It depends on your time. Fixing them takes about five minutes. A new cheap pair costs a few dollars. If you enjoy fixing things, go for it! It is also better for the planet to fix things.
How do I stop my clippers from rusting?
Always dry them after use. Never leave them on a wet sink. You can also wipe them with a tiny bit of oil. This creates a barrier against moisture. Stainless steel resists rust well, but it is not perfect.
Conclusion
Fixing a fingernail clipper is a great skill. It is fast and very easy. You only need a few minutes of time. Most problems come from the lever or the pin. Now you know how to put them back together. You also know how to sharpen the blades. This keeps your grooming routine smooth and easy. Remember to keep your tools clean and dry. This prevents most issues before they start. If your clipper breaks again, you are an expert now. You can fix it without even thinking. Did this guide help you save your favorite tool? Share these tips with a friend who might need them. Check your grooming kit today for any broken items. You have the tools to fix them all. Now, go enjoy your perfectly trimmed nails! Ready to learn more DIY hacks? Keep exploring our helpful guides.

I’m Patricia D. Johnson, an affiliate marketer and blogger specializing in trimmers and grooming tools. I create honest reviews, buying guides, and practical tips to help readers choose the right trimmer for their needs. With a focus on quality, performance, and value, I simplify the decision-making process so consumers can make confident purchases.