Have you ever noticed how a well-spooled trimmer line can make a night’s work seem effortless? The precision and efficiency it introduces to lawn care can be quite remarkable. However, many still overlook the essential technique of spooling a Toro trimmer line, a skill that blends both art and necessity.
Spooling a Toro trimmer line isn’t just about wrapping wire around a spool. Historically, lawn care enthusiasts have sought methods to ensure a smoother feed and longer-lasting line. Experts emphasize the importance of winding evenly with moderate tension, a practice that enhances both performance and longevity of the trimmer.
- Gather necessary supplies: trimmer line, scissors, and gloves.
- Remove the spool cap and clean the spool.
- Cut the trimmer line to the recommended length (10-20 feet).
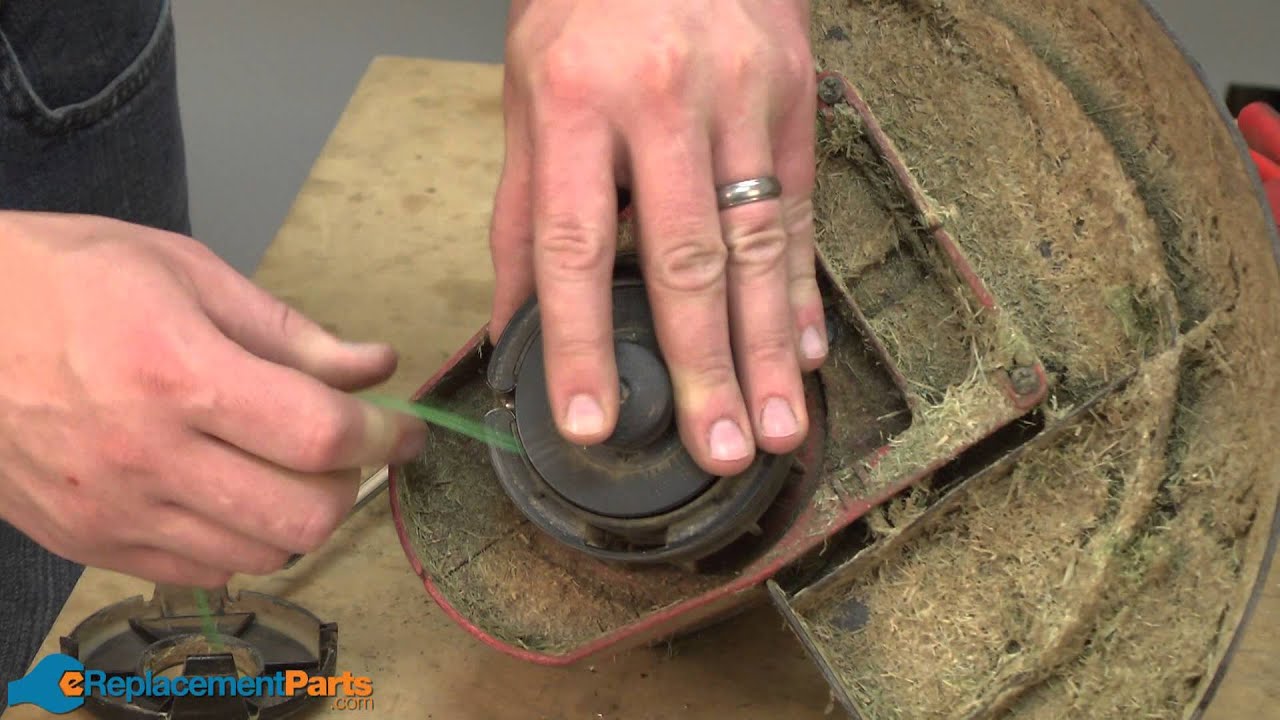
- Insert one end of the line into the center hole of the spool and wind evenly.
- Secure in retaining notches and replace the spool cap.
- Test the trimmer to ensure proper function.

How to Spool Toro Trimmer Line
Spooling a Toro trimmer line requires just a few key steps. First, gather all necessary supplies, including the trimmer line, scissors, and gloves. It’s crucial to have everything ready to avoid interruptions. Typically, trimmer lines come in different diameters, so make sure to choose the right one. Incorrect selection can lead to poor performance.
Start by removing the spool cap from the trimmer head. This usually involves pressing two tabs on either side of the cap. Once removed, take the old trimmer line off the spool. Check for any damage or wear on the spool to ensure optimal performance. Inspect the spool for any issues that could affect the new line.
Now, prepare the new trimmer line by cutting it to a length recommended in your trimmer’s manual. Generally, 10-20 feet is enough. Feed one end of the line through the hole in the center of the spool. According to this post, proper alignment is essential for smooth operation. Wind the line evenly onto the spool to avoid tangling.
Finally, secure the line in the retaining notches and replace the spool cap. Press it down until it clicks into place. Give the trimmer a quick test to ensure it’s feeding the line correctly. If you notice any issues, double-check your work for any steps you might have missed. Proper spooling can greatly enhance the trimmer’s effectiveness.
Step 1: Gathering the Necessary Supplies
Before starting, gather all the necessary supplies to spool your Toro trimmer line. Essential items include the trimmer line itself, a pair of scissors, and some gloves for safety. It’s crucial to have these items ready to streamline the process. You may also need the trimmer’s user manual for specific instructions. Having everything on hand will save you from interruptions.
Choosing the right trimmer line is very important. Different trimmers require different line diameters, so check your manual for the correct specifications. An incorrect line can lead to poor performance or damage. According to this post, selecting the appropriate line can make a big difference. Ensuring you have the correct type will simplify the spooling process.
Don’t forget about safety gear. While gloves are essential to protect your hands, safety goggles are also recommended. The line can sometimes snap while you’re working, posing a hazard. Stay safe by covering your hands and eyes. This ensures you can focus on the task without risk.
Finally, find a clean and well-lit workspace. A table or a workbench provides a stable surface, essential for precise work. Ensure you have good lighting to see all details clearly. Organize your supplies within reach before you begin. This setup will aid in a smoother, more efficient process.
Step 2: Preparing the Trimmer Line
To start preparing the trimmer line, you’ll need to cut the line to the recommended length. Check your trimmer’s manual for the exact measurement, but generally, a length of 10-20 feet works well. Make sure to use sharp scissors for a clean cut. This step ensures the line fits properly on the spool. Cutting the line too short or too long can cause issues.
After cutting the line, straighten it out to remove any kinks or twists. This helps in winding it more evenly onto the spool. Twisted or kinked lines can lead to uneven feeding during trimming. Ensure the line is smooth and straight. Properly aligned lines are easier to work with.
Next, examine the spool and line carefully. Make sure the spool is clean and free of debris. Any dirt or residue can cause the new line to stick or jam. Double-check the line for any flaws or weaknesses. A thorough inspection can prevent problems later on.
Finally, prepare to wind the line onto the spool. Insert one end of the line into the center hole of the spool. According to your manual, follow the arrows indicating the direction for winding. Some spools have two compartments, requiring you to split the line into two equal lengths. Following these steps ensures a smooth process.
Step 3: Loading the Line onto the Spool
Begin by inserting one end of the trimmer line into the small hole in the center of the spool. Make sure it’s securely fastened before you start winding. Follow the directional arrows on the spool that indicate which way to wind the line. This ensures the line releases smoothly during use. Winding in the wrong direction can cause tangling.
Wind the line evenly and tightly onto the spool. Avoid overlapping or crossing the lines as this can cause issues later. Keep the tension consistent but not too tight. You want the line to stay secure without being overly strained. Even winding contributes to a more efficient trimmer.
If your spool has two compartments, split the line and wind each section separately. This is common in dual-line trimmers and helps distribute the cutting force evenly. Make sure both lengths of line are equal for balanced performance. Keeping them even avoids unnecessary strain on the motor. This leads to a longer lifespan for your trimmer.
Once you’ve wound the line to the recommended length, secure it in the retaining notches on the spool. This will hold the line in place while you reassemble the trimmer head. Ensure the line doesn’t overlap or tangle. Double-check that both ends are secure. This step is crucial for smooth operation.
Finally, place the spool back into the trimmer head and replace the cap. Ensure it clicks into place to avoid any parts coming loose during use. Give the trimmer a quick test to make sure everything is functioning correctly. If you hear any unusual sounds, recheck the assembly. Proper loading ensures optimal cutting performance.
Tips to Improve Toro Trimmer Line Performance
Using high-quality trimmer line can significantly enhance performance. Opt for lines designed for your specific trimmer model. Avoid using generic brands that may not fit properly. Quality lines reduce the frequency of breaks. They also contribute to cleaner cuts.
Keep the trimmer line straight and free of tangles. Storing the line properly when not in use helps maintain its integrity. Winding the line evenly on the spool is essential. Uneven lines can lead to tangling and breakage. Consistent tension during winding is key.
Consider using a thicker trimmer line for tough trimming jobs. Thicker lines are more durable and less likely to snap. However, confirm that your trimmer can handle thicker lines by checking the manual. Using the wrong diameter can strain the motor. Always consult the manufacturer’s recommendations.
Regularly inspect the trimmer head for debris and wear. Clean it after each use to prevent buildup. Replace worn-out parts to ensure efficient performance. A clean and well-maintained trimmer head promotes smoother line feeding. This helps prolong the life of your trimmer.
Adjusting the line length according to the task can also boost performance. For lighter tasks, a shorter line might suffice. For more demanding work, a longer line may be needed. Tailoring the line length to the job can improve efficiency. This helps you achieve better results.
Following these tips can make your Toro trimmer more effective. Proper line maintenance and selection are crucial. Regular inspections and mindful usage will go a long way. Stay vigilant and proactive in your trimmer care. Your efforts will pay off in better performance.
Common Mistakes When Spooling Toro Trimmer Line
One common mistake is winding the trimmer line in the wrong direction. Always follow the arrows on the spool that indicate the correct direction. Winding it backward can lead to tangling and inefficient trimming. This often results in wasted time redoing the process. Correct alignment is crucial for smooth operation.
Another frequent error is overfilling the spool with too much line. While it might seem like adding extra line is helpful, it can actually cause problems. An overfilled spool can jam and make the trimmer work harder. This can lead to rapid wear and tear of the trimmer parts. Stick to the recommended length for best results.
Many people forget to keep the line straight while winding. Twisted or overlapping lines can create issues during use. Make sure you wind the line evenly and under consistent tension. This prevents tangling and ensures the trimmer feeds the line efficiently. Smooth winding improves overall performance.
Neglecting to check for damaged or worn components is another mistake. Always inspect the spool and trimmer head before installing new line. Any cracks or debris can interfere with the line’s functionality. Replacing worn-out parts helps maintain the trimmer’s efficiency. Regular maintenance can prevent unexpected issues.
An often overlooked error is not consulting the trimmer’s manual for specific instructions. Each trimmer model may have unique requirements for spooling. Failing to follow these guidelines can result in improper installation. Take time to read the manual and adhere to its recommendations. This ensures you’re doing it correctly.
Frequently Asked Questions
Working with Toro trimmer lines can sometimes be tricky. Here are answers to the most common questions experts often ask.
1. What Trimmer Line Size Should I Use for My Toro Trimmer?
The correct trimmer line size depends on your specific Toro model. Most models use lines between 0.065 and 0.095 inches in diameter. Check your user manual to confirm the recommended size for optimal performance.
Using the wrong size can reduce efficiency or damage the trimmer. Always double-check the specifications listed in your manual for best results.
2. How Often Should I Replace the Trimmer Line?
The frequency of replacing your trimmer line depends on usage and cutting conditions. For heavy-duty tasks or frequent usage, you may need to replace it more often, possibly after every few uses.
If you notice a decrease in cutting effectiveness, it’s probably time to replace the line. Regular inspection helps ensure consistent performance and reduces wear on your trimmer.
3. Why Does My Toro Trimmer Line Keep Breaking?
Frequent line breaks can indicate an incorrect line type or improper installation. Using a thicker, higher-quality line designed for heavy-duty trimming can help reduce breaks.
Additionally, make sure you’re spooling the line correctly and maintaining consistent tension during winding. Incorrect technique or damaged spools can contribute significantly to breakage issues.
4. Can I Use Any Brand of Trimmer Line with My Toro Trimmer?
Toro trimmers are typically compatible with various brands of trimmer lines, but it’s best to choose high-quality lines made from durable materials like nylon or polymer blends.
Avoid generic brands that could easily break under stress or tangle frequently during use. Following these guidelines will ensure better performance and fewer complications with your tool.
5. What Maintenance is Required After Spooling New Trimmer Line?
After spooling new trimmer line, clean any debris from around the spool area and check for signs of wear on other parts of your trimmer head regularly.
This ensures smoother operation and extends the life of your equipment over time by preventing small issues from escalating into bigger problems later on down the road!
Conclusion
Spooling your Toro trimmer line correctly can significantly enhance its performance and longevity. Following the right steps ensures smooth operation and reduces the likelihood of line breaks. Regular maintenance and using high-quality materials are key to effective lawn care.
By avoiding common mistakes and adhering to expert tips, you’ll make your trimming tasks more efficient. Always consult your trimmer’s manual for specific guidelines and keep checking for wear and tear. Proper technique and upkeep extend the life of your trimmer, making your work easier and more effective.

I’m Patricia D. Johnson, an affiliate marketer and blogger specializing in trimmers and grooming tools. I create honest reviews, buying guides, and practical tips to help readers choose the right trimmer for their needs. With a focus on quality, performance, and value, I simplify the decision-making process so consumers can make confident purchases.