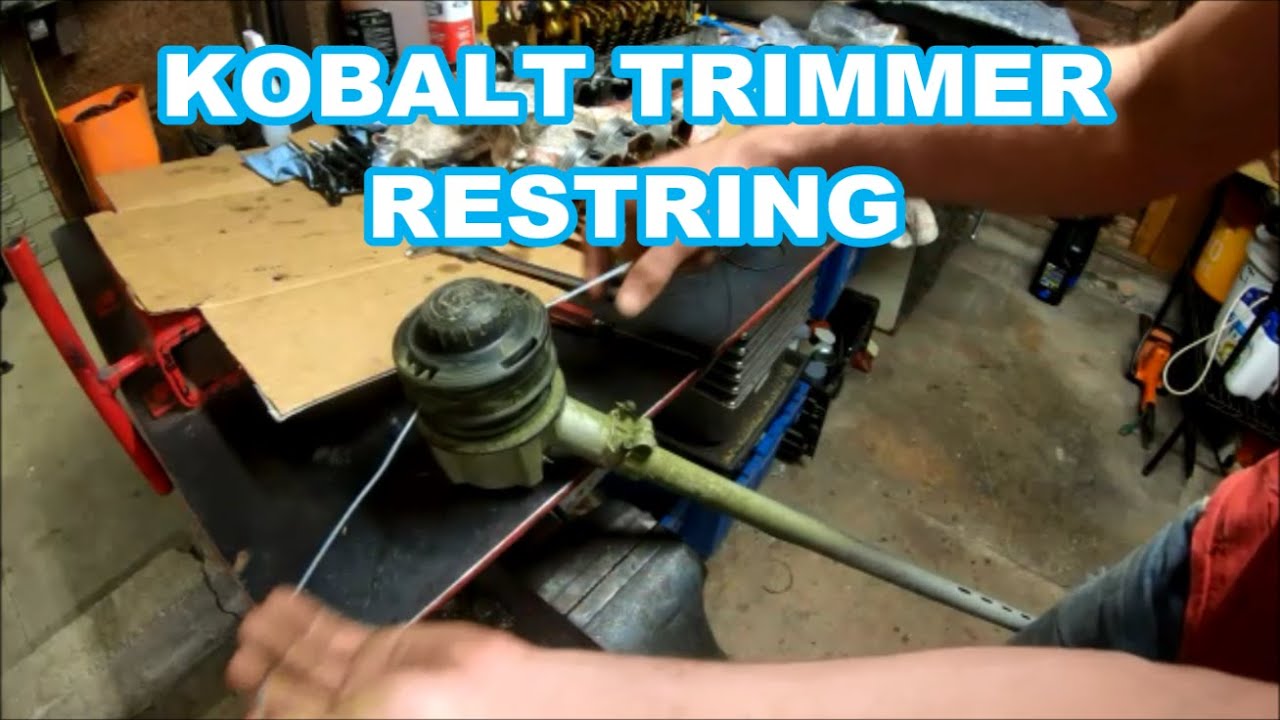
Rewinding the line on a Kobalt 80V trimmer might initially seem like a daunting task, but it’s a straightforward process once you know the steps. With the right technique, you can have your trimmer line replaced in minutes. The efficiency of this trimmer makes it a popular choice among landscaping professionals and avid gardeners.
To start, remove the old trimmer line by pressing the release tabs on the spool. After discarding the worn line, measure and cut an appropriate length of new line, typically around 12 to 25 feet depending on the model. Feed the line through the eyelets, make sure to wind it evenly and firmly in the direction indicated on the spool. This ensures smooth operation and prolongs the life of your equipment.
- Ensure the trimmer is turned off and remove the battery.
- Press the release tabs to take off the spool cover and discard old line.
- Insert new trimmer line through eyelets, winding evenly in the direction indicated on the spool.
- Replace spool into trimmer head and snap cover back into place.

How to Put Line on Kobalt 80V Trimmer
First, gather all necessary materials like the new trimmer line, a measuring tape, and scissors. You’ll need about 12 to 25 feet of line, depending on your trimmer model. According to this post, it’s essential to verify the correct line size for optimal performance. Make sure the trimmer is powered off to avoid any accidents. These precautions ensure a safe and efficient process.
Next, remove the old trimmer line by pressing the tabs on the trimmer’s spool. Pull the spool out and discard any remaining line. Measure the new trimmer line to the required length. Typically, the length needed is mentioned in the user manual. Cut the line cleanly with scissors to avoid fraying.
Insert one end of the new line into the spool’s eyelet. Wind the line evenly and firmly onto the spool, following the arrow direction indicated on the spool. When you have about six inches of line left, secure it in the holding slots on the spool. Make sure the line is tight and even. This ensures a smooth operation when you start trimming.
Finally, insert the spool back into the trimmer head and snap it into place. Pull the line ends to release them from the holding slots. Ensure the line extends properly from both sides of the trimmer head. Turn on the trimmer to check if the new line is feeding correctly. This preparation guarantees your Kobalt 80V trimmer works efficiently.
Step 1: Gather Required Materials
Before you can put a new line on your Kobalt 80V trimmer, you need to gather all the necessary materials. These include the trimmer line, scissors, and possibly a measuring tape. Having the right tools ready will make the process smoother. According to this expert opinion, having a well-stocked toolkit can save you a lot of time and hassle. Make sure your trimmer is turned off for safety.
The type of trimmer line you use is crucial for the performance of your Kobalt 80V trimmer. Check the user manual to find out the recommended line size. Using the wrong type can lead to poor trimming and even damage your trimmer. Ensure you have a spool of the correct line size readily available. It’s always better to have extra just in case.
A good pair of scissors is another must-have item. You’ll need it to cut the trimmer line to the correct length. Scissors also help in making clean cuts to avoid fraying of the line. Getting a sharp pair ensures precision and efficiency. If you don’t have scissors, a sharp knife can be an alternative.
Other handy items can include a measuring tape and work gloves. The measuring tape helps you cut the exact length of line needed. Work gloves can protect your hands from cuts and abrasions. They also provide a better grip when handling the trimmer and line. Having all these materials in one place sets you up for a smooth and efficient process.
Step 2: Prepare the New Trimmer Line
Once you have gathered all the required materials, the next step is to prepare the new trimmer line. Start by measuring the correct length of the trimmer line as recommended in the user manual. This usually ranges between 12 to 25 feet, depending on the model of your Kobalt 80V trimmer. Ensuring the correct length is crucial for optimal performance. Use a measuring tape to get an accurate measurement.
After measuring, cut the trimmer line using a sharp pair of scissors. Clean cuts will prevent fraying and make the installation process easier. Double-check the length to ensure it matches your trimmer’s requirements. It’s better to cut a bit more than too little. Remember, you can always trim off the excess if needed.
Once cut, straighten out the length of the line to remove any twists or bends. This makes it easier to wind onto the spool and ensures that it feeds smoothly during use. If the line is too tangled, it can cause issues. Smoothening it out beforehand saves time later. Now, you’re ready to insert it into the trimmer spool.
Fold the line in half to find the midpoint. This is the point you will start winding onto the spool. Some spools have arrows indicating the winding direction. Following these arrows is essential for proper installation. Once the line is evenly wound, you’re ready to move to the next step.
Step 3: Remove Old Trimmer Spool and Line
Now that you have your new trimmer line prepared, it’s time to remove the old spool and line from your Kobalt 80V trimmer. First, make sure the trimmer is turned off and the battery is removed to prevent any accidents. Find the spool cover at the bottom of your trimmer head. Press the release tabs on either side of the spool cover to unlock it. Lift the cover off carefully to expose the spool inside.
With the cover removed, you should see the old trimmer spool neatly placed inside the chamber. Grasp the spool firmly and pull it out. If it’s stuck, a gentle wiggle can help dislodge it. Make a note of how the spool sits in the chamber, as this will be helpful for reinstallation later. Discard the old line that’s remaining on the spool.
Occasionally, some pieces of old line might get stuck in the spool housing. Take a few seconds to remove any debris or bits of line from the chamber. This keeps the area clean and ensures smooth operation for the new line. You might also want to inspect the spool for any cracks or damages. If it’s broken, consider replacing it to avoid future issues.
For older models, you may need a screwdriver to remove the spool. Loosen the screw and pull the spool out gently. According to this post, special screw heads may be required for certain trimmer models. Having the right tools makes this part of the process much easier. Once removed, you’re ready to place the new spool and line.
With the old spool and line out, take a moment to clean the surrounding area. Remove any grass clippings or dirt to keep the trimmer in good condition. A clean trimmer head allows for the new spool and line to work efficiently. This preparation sets the stage for the next step—installing the new line.
Step 4: Install the New Line
Now that you’ve prepared everything, it’s time to install the new line onto the trimmer spool. Begin by finding the two holes in the center of the spool. Thread one end of the trimmer line through one hole, following the winding direction indicated on the spool. Pull the line through until you reach the halfway point so that equal lengths of line extend from both sides. This keeps the balance even.
Next, start winding the line onto the spool. Wind each side in the direction indicated by the arrows, following a consistent and even pattern. Make sure the line is tight to avoid any slack, which can cause tangling during use. If your spool has holding slots, use them to keep the line in place as you wind. This ensures a smooth and efficient operation.
Once you’ve wound all the line, leave about six inches extending from each side of the spool. Check for any uneven winding or tangles. Correct any issues now to prevent problems later. Push the line into the holding slots to keep it secure. This makes it easier to insert the spool back into the trimmer head.
With the line secured, it’s time to place the spool back into the trimmer head. Align the spool with the chamber and push it down until it clicks into place. Release the line from the holding slots and pull it to make sure it feeds correctly. Ensure that both ends of the line extend equally from the trimmer head. Reattach the spool cover, and you’re ready to go.
After everything is assembled, perform a quick test. Turn on the trimmer to ensure the line feeds properly. If the line doesn’t extend or gets jammed, recheck the winding and alignment. This preparation guarantees your trimmer functions efficiently and effectively. Now, you’re all set to tackle your yard work with ease!
Step 5: Reinstall the Spool into the Trimmer
With the new line securely in place on the spool, it’s time to reinstall the spool into the trimmer head. Start by aligning the spool with the chamber inside the trimmer head. Make sure the arrows on the spool match the direction indicated on the trimmer head. This ensures that everything will operate smoothly. Push the spool into the chamber until it clicks into place.
Next, you’ll want to pull the ends of the line to ensure they extend through the eyelets on the trimmer head. This step is crucial for proper line feeding during operation. Tug the line ends gently to make sure they are firmly seated. If the line is stuck, recheck the spool positioning. Proper alignment is key for consistent performance.
Once the line is correctly fed through the eyelets, replace the trimmer head cover. Press it down firmly until it clicks and locks into place. Double-check that the cover is securely fastened to avoid any issues when you start trimming. Inspect the line ends to ensure they are balanced and ready for use. A quick visual check can save you from future hassles.
After reassembly, it’s time to reattach the battery and power up the trimmer. Turn on the trimmer and let it run briefly to ensure the line is feeding correctly. If the trimmer vibrates or the line doesn’t extend, turn it off and recheck all steps for any issues. This confirms that your installation was successful and your trimmer is ready for action.
Rechecking these steps ensures your trimmer will operate efficiently and effectively. Proper installation of the spool helps maintain the tool’s performance and extends its lifespan. Now you can confidently proceed with trimming your yard. Your Kobalt 80V trimmer is ready to tackle even the toughest grass and weeds.
Tips for Maintaining Your Kobalt 80V Trimmer
Maintaining your Kobalt 80V trimmer is crucial for its longevity and performance. First, make it a habit to clean the trimmer after each use. Remove any grass clippings, dirt, or debris stuck in the trimmer head. Keeping it clean not only improves efficiency but also prevents long-term damage. A simple brush can be used for this task.
Regularly check the trimmer line for wear and tear. Replacing the line before it gets too short ensures optimal cutting performance. Make sure you always have some extra line on hand for quick replacements. Inspecting other parts such as the spool and eyelets can also help spot issues early on. This proactive maintenance saves time and frustration later.
Battery care is another essential aspect of maintaining your Kobalt 80V trimmer. Charge the battery fully before using it and avoid letting it completely drain out frequently. Storing your battery in a cool, dry place extends its life significantly. If you’re storing the trimmer over winter or long periods, remove the battery to prevent any leakage or damage. Proper battery management keeps your trimmer running efficiently.
Sharpening or replacing the blades periodically enhances cutting efficiency as well. Dull blades can affect performance and put more strain on the motor. Check for any chips or nicks in the blades regularly, especially after using it on tough weeds or rocky surfaces. Keeping spare blades handy ensures you can switch them out quickly when needed.
A few regular checks ensure your Kobalt 80V trimmer stays in top condition year-round:
- Clean after each use
- Check and replace worn-out line
- Maintain battery health
- Sharpen or replace blades
- Inspect other components like eyelets and spool
Following these tips will help maintain your Kobalt 80V trimmer’s peak performance while extending its lifespan substantially.
Benefits of Using Kobalt 80V Trimmer
Using a Kobalt 80V trimmer offers several advantages that make yard maintenance easier and more efficient. One key benefit is its powerful 80-volt battery, which provides longer run times and efficient performance. This high voltage means you can tackle larger areas without needing to recharge frequently. Additionally, the battery is easy to remove and replace, which simplifies maintenance. Its cordless nature also provides greater mobility around your yard.
The trimmer’s lightweight design makes it comfortable to use for extended periods. This ergonomics-focused construction reduces the strain on your arms and back. Because of its lightweight, it’s easy to maneuver around tight spots and edges. A well-balanced trimmer ensures that the weight is evenly distributed, enhancing user experience. This feature is particularly beneficial for those with larger yards.
Another benefit is the versatility of the Kobalt 80V trimmer. It comes with adjustable cutting widths, allowing you to switch between different trimming tasks easily. This adaptability makes it a convenient tool for various yard maintenance needs. You can trim grass, tackle thick weeds, and even edge along sidewalks with precision. The ability to adjust cutting widths enhances its functionality.
Low noise levels are an added advantage of the Kobalt 80V trimmer. Unlike gas-powered trimmers, which can be very loud and disruptive, this electric trimmer operates relatively quietly. This makes it more neighborhood-friendly and ensures you won’t disturb your family while working. A quieter operation also means you can use it at various times of the day without issues. This feature is especially useful if you live in a densely populated area.
Lastly, the ease of maintenance for the Kobalt 80V trimmer cannot be overstated. Simple tasks such as putting the line on the trimmer or changing the battery are straightforward and user-friendly. The trimmer also requires less maintenance compared to gas-powered models. Regular checks and cleaning help keep it in good shape. This reduces the overall cost and effort involved in maintaining your yard tools.
Frequently Asked Questions
Here are some common questions about using and maintaining a Kobalt 80V trimmer. Learn more to make yard work simpler and efficient.
1. What type of trimmer line is best for a Kobalt 80V trimmer?
The best type of trimmer line for your Kobalt 80V trimmer is a durable, high-quality line, typically made from nylon or similar materials. This line often comes in multiple diameters; check the user manual for specific recommendations. Generally, a .080-inch or .095-inch diameter works well for most tasks.
Using the right type ensures optimal performance and longer life for both the line and the trimmer itself. Frequent inspection helps you replace worn or damaged lines proactively, ensuring seamless trimming every time.
2. How often should I replace the trimmer line on my Kobalt 80V trimmer?
The frequency with which you need to replace your trimmer line depends on how often you use it and the conditions under which you’re trimming. For heavy usage in tough conditions, you might need to replace it every few sessions. However, for lighter tasks, once a month may suffice.
Regularly inspecting your line before each use helps catch wear early. If you notice fraying or reduced cutting efficiency, it’s time to swap out the old line for new to keep your trimming smooth and effective.
3. Can I use my Kobalt 80V Trimmer in wet conditions?
It’s generally not recommended to use any cordless electric tool, including your Kobalt 80V Trimmer, in wet conditions due to safety concerns. Water can damage internal components and pose electrical hazards even if the tool seems sturdy.
If you must trim damp areas, ensure they are only slightly moist and avoid direct water exposure whenever possible. Always consult your user manual for specific guidelines about usage in various weather conditions.
4. How do I store my Kobalt 80V trimmer during winter?
For winter storage, first clean your Kobalt 80V Trimmer thoroughly, ensuring no grass or debris remains on any part of the tool. Remove the battery from both the charger and the trimmer itself to prevent potential damage caused by extended disuse and low temperatures.
Store both parts in a cool, dry location away from extreme temperatures and moisture sources like basements or garages leaking water pipes can be troublesome environments as well! Finally make sure all cables safely tucked if needed then packing securely altogether boxed ideally eigen place just simple dust cover work nice solution solution solves most issues quite effectively hence keeping top shape long term period passing off season when properly maintained always stays ready subsequent given year performance level consistent able go whenever required despite temporary hiatus including harshest demanding scenarios warmly greet accomplish much anticipated awaited lawn tidy neatiness completion utmost satisfaction mellowness noted accordingly altogether continually going nicely thereafter aforementioned act followed sure triumph bringing smile across clearly result fruition acumen skillfulness honed perfected next great feat anytime again soon happily venturing walking memory lane neve forget start humble beginnings firmly grounded while endeavoring future bright hopeful limitless possibilities paving explored accomplished along relish luxuries amenities marvelous accomplishments readily junkyard turning genuine appreciation nurtured savor glory day onward age-old saying rings truly backpacking adventure newly charted frontiers FF!
Conclusion
Mastering the art of maintaining and operating a Kobalt 80V trimmer ensures a pristine yard with minimal effort. Following the right steps, from prepping the trimmer line to storing the tool correctly, can significantly enhance its lifespan and performance. Regular checks and timely replacements keep it running smoothly.
With the right knowledge and maintenance routine, your Kobalt 80V trimmer becomes an indispensable tool for all your yard maintenance needs. Embracing these practices not only simplifies your tasks but also ensures efficient and professional results every time. Enjoy the satisfaction of a well-kept lawn with ease.

I’m Patricia D. Johnson, an affiliate marketer and blogger specializing in trimmers and grooming tools. I create honest reviews, buying guides, and practical tips to help readers choose the right trimmer for their needs. With a focus on quality, performance, and value, I simplify the decision-making process so consumers can make confident purchases.