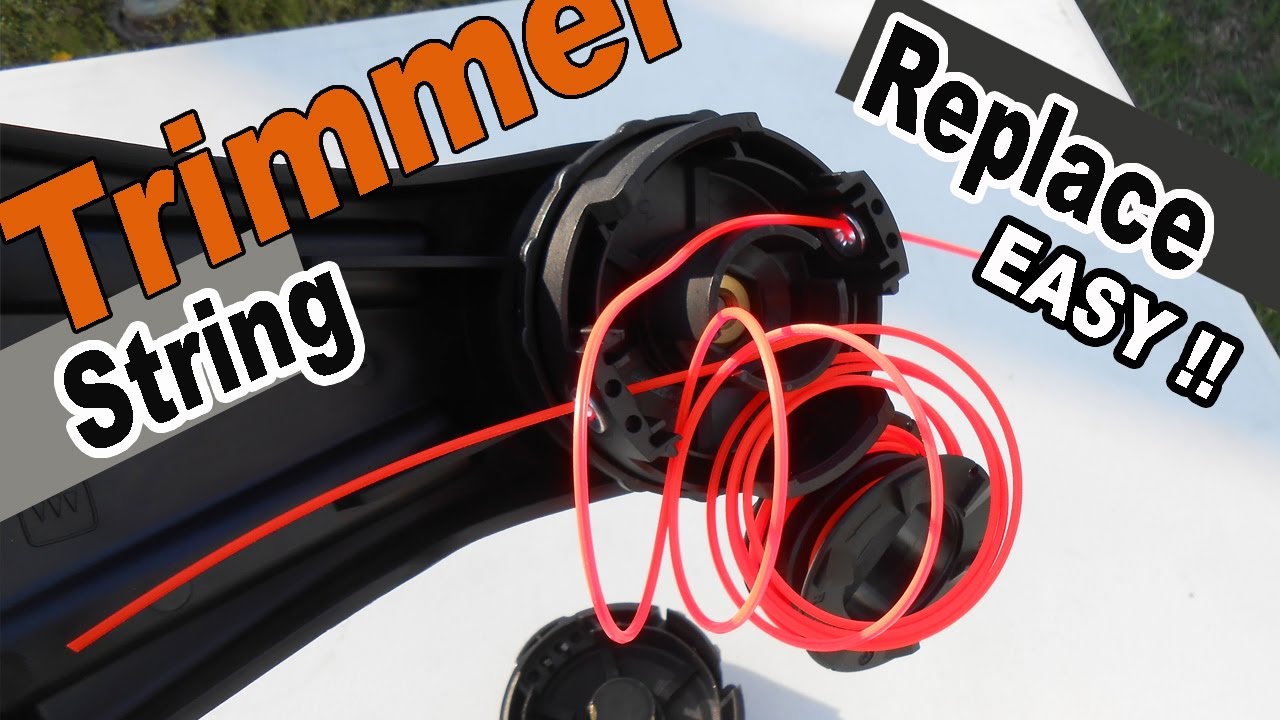
Not everyone knows that the Echo 225 trimmer, a staple in the gardening world, can significantly boost your trimming efficiency with just a standard line replacement. This task, often perceived as cumbersome, is actually straightforward once you understand the steps. Intriguingly, a well-maintained trimmer line can make a dramatic difference in your lawn care routine.
To replace the line, start by ensuring the trimmer is powered off and placed on a stable surface. Open the trimmer head, typically by pressing the tabs or unscrewing the bolt securing it. Wrap the new line evenly around the spool, following the directional arrows marked on it. Close the head securely and give the trimmer a quick test run to ensure it’s set correctly. This process not only extends the lifespan of your equipment but also ensures optimal performance in your yard work.
- Ensure the trimmer is powered off and positioned on a stable surface.
- Open the trimmer head by pressing the tabs or unscrewing the bolt.
- Remove the used spool and clean any debris from the area.
- Cut a new line to the recommended length and wind it evenly onto the spool, following directional arrows.
- Insert the new line through the head eyelets, secure the spool, and close the trimmer head.
- Conduct a test run to ensure proper functionality before trimming.

How to Change Line on Echo 225 Trimmer
Starting the process of changing the line on your Echo 225 Trimmer requires a few essential steps. First, make sure the trimmer is powered off and set on a stable surface. According to this article, using the correct safety protocols will ensure a smooth operation. Removing the old line involves opening the trimmer head, either by pressing the tabs or unscrewing the bolt. This initial step prepares you for inserting the new line.
Next, remove the empty spool from the trimmer head. This part might require a bit of wiggling, but it should come out easily. Take the new trimmer line and cut it to the recommended length, usually indicated on the manual. Coil the new line evenly around the spool, following the directional arrows marked on it. This ensures that the line feeds correctly when you start trimming.
Once the new line is wrapped, insert the spool back into the trimmer head. Ensure that the line’s ends are threaded through the eyelets of the head. According to this post, proper insertion will maximize the effectiveness of your trimming. Close the trimmer head securely by snapping the tabs back or re-screwing the bolt. This completes the primary step of line replacement.
Finally, conduct a quick test run to ensure the line is feeding properly. If everything is in place, your Echo 225 trimmer should be ready for efficient yard work. Regularly changing the trimmer line not only extends your equipment’s lifespan but also makes your trimming job easier. Remember to follow safety measures and consult your manual for any specific instructions. This will keep your trimmer in optimal working condition.
Step 1: Preparing the Trimmer
The first step in changing the line on your Echo 225 trimmer is to prepare the trimmer properly. Begin by ensuring that it is powered off and completely unplugged. This eliminates any risk of accidental starts, which could cause injury. Find a clean, flat surface to work on where you can easily see all the parts. Having a safe and organized workspace is key to a smooth line replacement process.
Next, gather the necessary tools and materials. You’ll need the new trimmer line, a pair of scissors, and possibly a screwdriver depending on the model. Some trimmer heads might require a specific tool for opening. Check the user manual if you’re unsure about what’s needed. Having everything close by will save time and minimize interruptions.
In this phase, it’s also useful to clean the trimmer head. Dirt and debris can accumulate and affect the trimmer’s performance. Wipe down the exterior and use a brush to clean the inner components. This step not only helps with line replacement but also extends the lifespan of your trimmer. It’s an often-overlooked aspect that can make a big difference.
Finally, position the trimmer so that you have easy access to the head. According to this post, having a stable and clear view will make the winding process simpler. Lay the trimmer down securely or use a stand if you have one. This ensures that you can work comfortably and efficiently, reducing the likelihood of errors.
Step 2: Removing the Old Line
After preparing your trimmer, the next step is to remove the old line. First, locate the trimmer head and look for the tabs or screws holding it in place. Press these tabs or unscrew the head to open it. Carefully lift the cover to reveal the spool inside. This will give you access to the old trimmer line.
With the spool exposed, you’ll see how the old line is wrapped around it. Unwind any remaining line from the spool and dispose of it properly. If the line is tangled or stuck, you might need to gently pull it out. Be cautious to avoid damaging the spool or other components. A clean spool sets the foundation for an easy new line installation.
It’s a good time to inspect the spool and trimmer head for wear and tear. Check for any cracks or breaks that could affect performance. If you notice any damage, you might need to replace these parts before continuing. This ensures your trimmer operates efficiently. Regular inspections can also extend the life of your equipment.
Before proceeding with the new line, make sure the spool is clean. Remove any dirt or debris using a cloth or brush. This helps the new line feed smoothly once installed. Having a clean and properly maintained spool is crucial for optimal trimmer performance. Now you are ready to move on to the next step in the process.
Step 3: Inserting the New Line
Now that the old line is removed, it’s time to insert the new line into your Echo 225 trimmer. Start by cutting a length of the new trimmer line, usually about 20 feet, according to the manual’s specifications. Fold the line in half to find the midpoint. This ensures that you can insert it evenly into the spool. Proper preparation will make the rest of the process much smoother.
Insert the midpoint of the line into the notch at the center of the spool. Wind the line onto the spool, following the directional arrows that guide you. It’s important to wind the line tightly and evenly to prevent tangles during operation. Wrap each side of the line neatly without overlapping. This helps in maintaining a balanced spool.
Once the line is wrapped, leave around 6 inches of each end extending from the spool. These ends will be threaded through the eyelets of the trimmer head. Make sure the ends are long enough to catch when the trimmer starts up. According to this expert opinion, properly threading the ends improves trimmer performance. Double-check that the line is securely in place.
Now, insert the spool back into the trimmer head, threading the line ends through the eyelets. Fit the spool snugly into its compartment and secure it by snapping the head cover back on or re-tightening the screws. Ensure everything is fitted tightly to avoid any parts coming loose during use. Your trimmer head should be ready to go.
Finally, give the trimmer a quick test run to make sure the new line feeds correctly. If it operates smoothly, you’ve successfully replaced the line on your Echo 225 trimmer. Regular replacement keeps your trimmer efficient and effective. Now you’re ready to tackle your yard work with a renewed tool.
The Importance of Regular Line Changes
Regularly changing the line on your trimmer is crucial for maintaining its efficiency. When the line gets worn out, it affects the trimmer’s ability to cut grass and weeds cleanly. A dull or frayed line can make the trimming process tedious and less effective. By changing the line frequently, you ensure that the trimmer operates at its best. This simple maintenance step can vastly improve your lawn care results.
Using a fresh line also reduces the strain on the trimmer’s motor. An old, worn line requires the motor to work harder, potentially leading to overheating or malfunction. This can shorten the lifespan of your trimmer and lead to costly repairs. A new line, on the other hand, makes the motor’s job easier. Routine line changes result in smoother operation and better overall performance.
Besides performance, regular line changes can save you time in the long run. Struggling with a worn-out line during a trimming session can be frustrating and time-consuming. With a fresh line, you’ll spend less time fixing issues and more time getting the job done. It’s a small investment of time that pays off significantly in efficiency.
Moreover, keeping the line fresh contributes to safer trimming practices. A worn line is more likely to snap or break during use, which can be hazardous. According to lawn care experts, consistent line replacement is a key safety measure. A new line is less likely to cause unexpected incidents. Therefore, regular maintenance not only improves performance but also ensures a safer trimming experience.
Regular line changes also improve the quality of your lawn work. A sharp, clean-cut line allows for precise trimming, making your yard look professionally manicured. It’s an easy way to achieve better aesthetic results. So, by maintaining a regular schedule for line changes, you enhance both the functionality and appearance of your garden.
Choosing the Right Line for Echo 225 Trimmer
Selecting the right trimmer line for your Echo 225 is essential for optimal performance. The type of line you use can greatly impact the efficiency of your trimming tasks. Different lines are designed for different kinds of vegetation, from light grass to thick weeds. Knowing the options available can help you make an informed decision. This ensures that your trimmer operates effectively.
First, consider the line’s diameter. Thicker lines, such as those measuring 0.095 inches or more, are ideal for tougher weeds and thicker grass. Thinner lines, like those around 0.065 inches, are better suited for lighter trimming tasks. Using the appropriate diameter for your specific needs will enhance cutting precision. This can make your yard work much easier.
Another important factor is the line’s shape. Round lines are more durable and less likely to break, making them a good choice for all-around use. On the other hand, serrated or twisted lines offer sharper edges, making them excellent for heavy-duty tasks. These specialized lines can cut through thick patches of grass quickly. Choosing the right shape can save you time and effort.
There are also different materials to consider. Nylon lines are the most common and work well for most general purposes. For more demanding tasks, consider reinforced lines with added materials like aluminum. These offer extra strength and durability. The material of the line can affect not just performance but also the lifespan of your trimmer.
Using a high-quality line recommended by the manufacturer can also make a difference. Echo often provides specific recommendations for their trimmers, ensuring compatibility and performance. Following these suggestions can help you avoid problems and extend the life of your equipment. It’s always a good idea to consult the user manual for the best results.
Frequently Asked Questions
Maintaining your Echo 225 trimmer can sometimes be confusing. Here, we answer some frequently asked questions to help you keep it running smoothly.
1. What type of line should I use for the Echo 225 trimmer?
The best line to use depends on your trimming needs. For general lawn maintenance, a nylon line with a diameter of 0.095 inches works well. This provides good durability and cutting power.
If you’re dealing with thicker weeds or tougher vegetation, you might prefer a serrated or twisted line for better cutting efficiency. Always refer to your user manual for specific recommendations from Echo.
2. How often should I change the trimmer line?
The frequency of changing the trimmer line depends on how often you use it and the type of vegetation you’re trimming. For most homeowners, replacing the line every few weeks during the growing season is sufficient.
If you notice that performance is diminishing or the line is visibly worn, it’s time to replace it sooner. Regular maintenance ensures optimal performance and prolongs the life of your Echo 225 trimmer.
3. Can I use any brand of replacement line in my Echo 225 trimmer?
While many aftermarket lines are compatible with the Echo 225 trimmer, using Echo-branded lines can ensure better compatibility and performance. These lines are specifically designed to meet Echo’s standards.
However, if you choose an alternative brand, make sure it matches the specifications recommended in your user manual. This guarantees that the new line will fit properly and perform well under various conditions.
4. How do I store my Echo 225 trimmer when it’s not in use?
Proper storage is crucial for maintaining your trimmer’s longevity. Store the Echo 225 in a cool, dry place away from direct sunlight when not in use.
You should also fully clean it before storage by removing any buildup and debris from previous uses. Storing it this way will ensure it’s ready to go next time you need it.
5. What safety precautions should I take while changing the trimmer line?
Safety should always be a priority when working with any power tool. Make sure the trimmer is powered off and unplugged before starting any maintenance work on it.
Wear protective gloves to protect your hands from cuts and abrasions while handling sharp components like the old trimmer line or spool edges. Following these precautions will help prevent accidents and ensure a safe experience.
Conclusion
Regular maintenance of your Echo 225 trimmer, including timely line changes, ensures the tool performs at its best. This small effort can significantly enhance the ease and efficiency of your yard work. Choosing the right line and following proper replacement steps can make a big difference.
Stay attentive to the condition of your trimmer and adhere to safety guidelines to prolong its lifespan. By addressing common questions and providing clear instructions, you can confidently maintain your trimmer. This guarantees a well-manicured lawn with minimal hassle.

I’m Patricia D. Johnson, an affiliate marketer and blogger specializing in trimmers and grooming tools. I create honest reviews, buying guides, and practical tips to help readers choose the right trimmer for their needs. With a focus on quality, performance, and value, I simplify the decision-making process so consumers can make confident purchases.