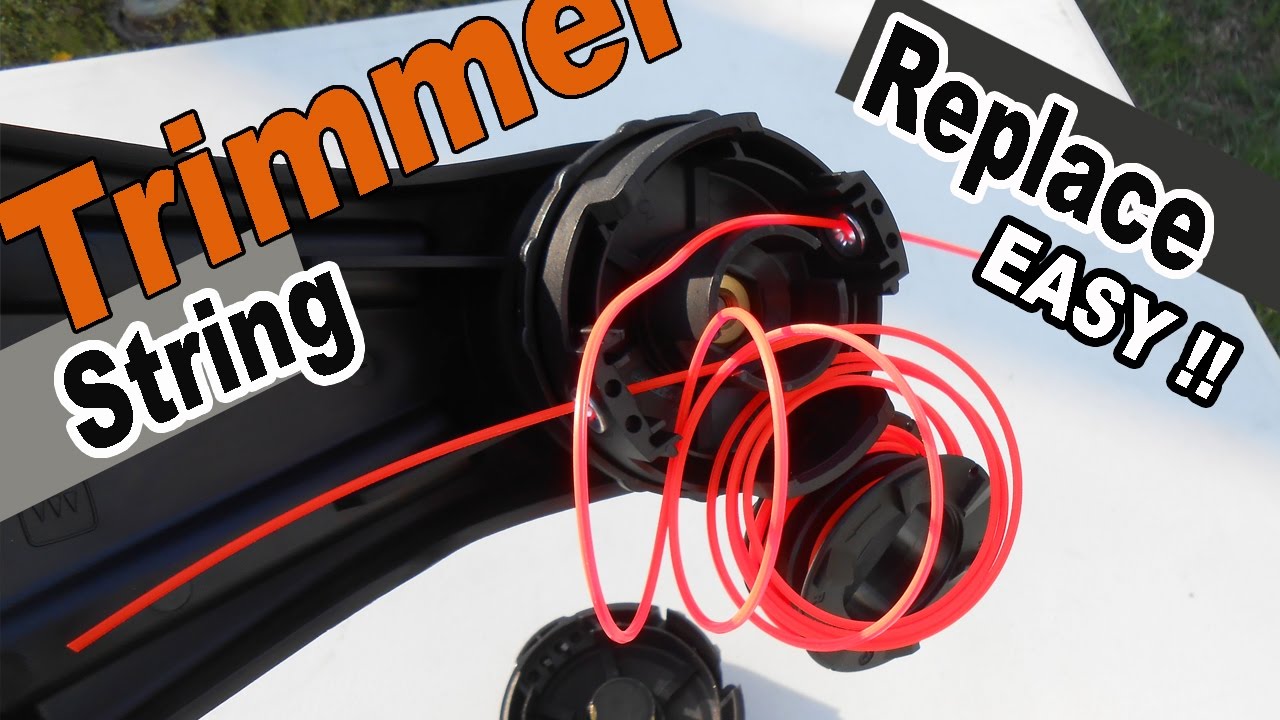
For seasoned landscapers, the efficiency of your Echo trimmer can depend as much on your skill as on the trimmer line itself. Imagine tackling thick, overgrown patches, only to be stalled by a line break. Such setbacks can be avoided if you know how to quickly and effectively change the trimmer line—a skill that transforms frustrations into seamless performance.
Changing an Echo trimmer line may seem routine, but it’s a crucial task that impacts your job’s efficiency. Historically, Echo has designed their trimmer heads to facilitate quicker and easier line replacement, minimizing downtime. Surprisingly, statistics show that well-maintained trimmers can improve productivity by over 20%, underscoring the value of mastering this simple yet impactful procedure.
- Turn off the Echo trimmer and disconnect power sources for safety.
- Remove the old trimmer line by pressing the tabs on the trimmer head to release it.
- Cut a new trimmer line to the recommended length, usually around 25 feet.
- Fold the line in half, insert it into the trimmer head, and wind it following directional arrows.
- Secure both ends of the line in holding slots before reattaching the head cap.
- Test the installation by running the trimmer briefly to ensure proper function.

How to Change Echo Trimmer Line
Changing the trimmer line on your Echo trimmer doesn’t have to be daunting. Start by turning off the trimmer and disconnecting the spark plug for safety. Remove the trimmer head by pressing the tabs on the side and lifting it off. Discard any remaining old line and clean the head for optimal performance. This will ensure a smooth installation process.
Next, prepare the new trimmer line by cutting it to the appropriate length. Typically, this is around 25 feet, but refer to your manual for specifics. Fold the line in half to locate the center. Insert the line into the trimmer head, making sure each end is of equal length. Wind the line in the direction indicated on the spool.
Once the line is wound, secure it by pushing the ends through the holding slots. Reattach the trimmer head by aligning the tabs and snapping it back into place. Make sure it’s locked securely to avoid any mishaps during operation. According to this post, maintaining your trimmer can greatly enhance its performance.
Finally, double-check everything before reconnecting the spark plug and starting your trimmer. Test the trimmer in a safe area to ensure the line is feeding properly. If the line isn’t advancing, recheck your installation steps. Keeping your trimmer tip-top not only saves time but also makes yard work more enjoyable. Learn more maintenance tips by exploring here is the article.
Step 1: Removing the Old Line
First, ensure your Echo trimmer is turned off and disconnected from power sources. For extra safety, it’s wise to detach the spark plug. Locate the trimmer head, where the old line is housed. Applying pressure to the tabs on either side helps to release the cap. Once done, carefully lift the cap off the trimmer head.
With the cap removed, access the remaining trimmer line that needs to be extracted. Pull out any part of the line still wrapped around the spool. If the line is tangled or stuck, use a pair of pliers for extra grip. Cleaning the spool can help you avoid future problems with line replacement. A quick wipe-down should suffice for clearing debris.
Next, examine the trimmer head for any damage or wear and tear. This step is vital for confirming that the device is in good working condition. If you find any cracks or damages, consider replacing the head. Generally, Echo trimmers are durable, but it’s always best to be sure. Routine inspection can save time down the road.
Once you’ve removed the old line and inspected the head, place the cap back temporarily to keep the parts in place. This allows for easy setup when you’re ready to install the new line. According to this post, keeping your trimmer parts organized during this stage minimizes hassle later. Now, you’re set to move on to preparing the new line.
Step 2: Preparing the New Line
Start by cutting the trimmer line to the correct length, typically around 25 feet, but check your Echo trimmer’s manual for confirmation. Using a sharp pair of scissors ensures a clean cut. Next, fold the line in half to find its center point. This helps in distributing the line evenly. Equal length is essential for balanced operation.
If your trimmer has two separate spools, you’ll need to cut two equal lengths of line. In some models, a single long piece is used. Consult your manual for these details. Wrapping the line incorrectly can cause tangling issues. Make sure the line is uniform before proceeding.
Once you have the correct length, insert the center of the line into the trimmer head. Some trimmers have holes or slots where the line needs to be threaded through. Follow the directional arrows on the spool to guide your winding. Wind the line tightly and neatly to prevent future jams.
Ensure both ends are held in place by the retaining slots on the spool. This secures the line and makes the next steps easier. Properly preparing the line avoids problems down the road. Now, you’re ready to install the new line into your Echo trimmer. Stay tuned for installing tips in the next section.
Step 3: Installing the New Line
Now that you have prepared the new line, it’s time to install it. Begin by placing the newly wound spool back into the trimmer head. Ensure the line ends are positioned through the guides. Align the spool with the tabs, and press down firmly to secure it in place. You should hear a clicking sound when it’s properly seated.
Once the spool is secured, pull both ends of the line lightly to check for any slack. If the line is too loose, it might not feed correctly during operation. Tighten the line by pulling it through the guides if needed. Verify that both ends are of equal length. This step ensures balanced performance and reduces the risk of trimmer head wobbling.
Reattach the trimmer head cap by aligning it with the slots on the head. Press the cap down until it clicks into place. Make sure the cap is tightly secured to prevent it from coming off during use. According to best practices, keeping all components locked in place enhances efficiency. This step also minimizes unexpected stops due to dislodged parts.
After securing the cap, test the trimmer before actual use. Reconnect the spark plug or power source and turn on the trimmer. Allow it to run for a short time and observe the line’s movement. If it feeds smoothly, then you’re ready for action. Check out related guides on detailed Echo trimmer maintenance techniques for more insights.
Lastly, inspect the area where you will be trimming to ensure there are no obstacles. Safety is paramount, and a quick check can prevent damage to the line or trimmer itself. Following these steps allows for efficient yard work. Happy trimming, and remember to check back for more updates and tips!
Significance of Regularly Changing the Trimmer Line
Regularly changing the trimmer line in your Echo trimmer is essential for maintaining its performance. Over time, the line can wear down, becoming less efficient at cutting grass and weeds. A fresh line ensures that you’re always working with the best possible cutting edge. This means less effort on your part and a cleaner cut. Avoiding delays due to a broken or worn-out line is another benefit.
Frequent line changes also contribute to the longevity of your trimmer. Worn-out lines can cause the trimmer head to work harder, potentially leading to more significant mechanical problems. By regularly replacing the line, you reduce the strain on the motor and other components. This can help in preventing costly repairs. Overall, it keeps your trimmer running smoothly for a longer time.
A new trimmer line can greatly improve your work efficiency. It allows you to tackle thicker and tougher patches without slowing down. Imagine the difference it makes when you can complete your yard work quickly without constantly stopping to fix the line. This not only saves time but also makes the task less frustrating. A high-performance line is an invaluable asset.
Besides, regularly changing the line can lead to better fuel efficiency for gas-powered trimmers. A well-maintained trimmer will consume less fuel, making it more environmentally friendly. Over time, this can also save you money on fuel costs. Ensuring your trimmer is as efficient as possible is both economically and ecologically beneficial. Continuous upkeep proves to be a win-win situation.
Finally, consider the safety aspects. A fresh line reduces the chances of breakage during operation, which can cause debris to fly. This can protect you and others nearby from potential injuries. Regular maintenance, including line changes, is a key safety measure. A well-maintained trimmer is not just efficient but also safer to use.
Tips and Tricks for Better Maintenance of Echo Trimmer Line
Maintaining your Echo trimmer line is vital for efficient performance. One simple trick is to store the trimmer line in a cool, dry place to prevent it from becoming brittle. For added flexibility, you might soak the line in water before usage. This keeps it supple and less likely to snap during operation. A little prep can make a big difference.
Frequently inspect the trimmer head after each use. Cleaning away dirt and grass clippings can extend the life of the components. If you notice any nicks or wear on the line, replace it immediately. This attention to detail can save you from unexpected breaks. Regular inspections are key to smooth operation.
When winding the new line, ensure it’s tight and even. An uneven wind can cause the line to jam or break. Following the directional arrows on your Echo trimmer’s spool helps to avoid mistakes. As a result, the line will feed more smoothly. This small step improves efficiency dramatically.
During operation, try not to hit hard surfaces with your trimmer line. Contact with rocks, concrete, or metal can wear the line out faster. Focus on maintaining a consistent height from the ground. This practice not only conserves the line but also provides a cleaner trim. Mindful operation preserves your equipment.
Another tip is to periodically lubricate the trimmer head components. This reduces friction and prevents the line from getting stuck. Use a light machine oil for this task. Lubrication ensures that everything runs smoothly, adding to the longevity of your trimmer. A well-oiled machine is always more effective.
Lastly, if you’re curious about other maintenance methods, there are several resources available online. Learning from experienced users or official guides can offer new insights. Staying informed helps you keep your trimmer in top shape. Consistent care results in better performance and reduced frustration.
Frequently Asked Questions
Changing the trimmer line on an Echo trimmer can seem tricky, but it’s a crucial task for efficient operation. Below are some common questions and answers to help you better understand the process.
1. Why is my trimmer line breaking frequently?
Your trimmer line may break frequently due to contact with hard objects like rocks or fences. It’s also possible that low-quality line is being used or it’s not compatible with your Echo trimmer model. Ensuring you’re using a high-quality, specifically recommended line can alleviate this issue.
Additionally, feeding too much line at once can cause breaks. Regular inspection and correct winding practices also help in avoiding frequent breaks. Refreshing the line when signs of wear appear makes a difference too.
2. How often should I replace the trimmer line?
The frequency of replacing your trimmer line depends on how often you use it and what type of vegetation you are cutting. Heavy-duty tasks may require more frequent changes, while light trimming could allow for longer intervals between replacements.
On average, it’s good practice to inspect the line after every use and replace it when significant wear is evident. Constant check-ups ensure that your Echo trimmer operates efficiently without unexpected interruptions during work.
3. Can I use any brand of trimmer line with my Echo trimmer?
While it’s tempting to use any brand for convenience or cost savings, it’s best to stick with the manufacturer’s recommendations for optimal performance. Using off-brand lines can sometimes lead to inefficient cutting or even damage your equipment over time.
If you decide to try other brands, ensure they meet the specifications outlined in your Echo’s user manual. This way, you can maintain both safety standards and product efficiency during operation.
4. What diameter of trimmer line should I use for my Echo trimmer?
The diameter of the trimmer line plays a crucial role in its performance and compatibility with your Echo model. Standard residential models typically work well with 0.080 inches to 0.095 inches diameter lines.
For heavy-duty professional tasks, larger diameters like 0.105 inches might be recommended as they offer increased durability and cutting power against stubborn weeds and thicker vegetation.
5. Why does my new trimmer line not feed correctly?
If your new trimmer line isn’t feeding correctly, it might be installed improperly or wound too tightly on the spool. Additionally, debris in the head mechanism can block the automatic feed system from functioning properly.
An initial step would be rechecking if you’ve followed all installation instructions precisely by unwinding and reinstalling it again neatly while ensuring no tangles exist during setup – this usually resolves most issues quickly!
Conclusion
Regular maintenance and correct installation of your Echo trimmer line can significantly improve your tool’s performance. By following the outlined steps, you ensure efficient, hassle-free yard work. Properly maintained trimmers not only enhance productivity but also extend the lifespan of your equipment.
Additionally, understanding the nuances of your trimmer ensures you make informed decisions about line replacements and compatibility. Paying attention to minor details can prevent major issues down the line. Keep these tips in mind, and you’ll find trimming to be a much smoother and more efficient task.

I’m Patricia D. Johnson, an affiliate marketer and blogger specializing in trimmers and grooming tools. I create honest reviews, buying guides, and practical tips to help readers choose the right trimmer for their needs. With a focus on quality, performance, and value, I simplify the decision-making process so consumers can make confident purchases.