Step 4.1: Professional Servicing
If you are unsure about how to address a specific issue or if your hedge trimmer requires extensive repairs, it is recommended to seek professional servicing. Trained technicians can diagnose and repair any underlying problems, ensuring that your trimmer is in top condition and safe to use.
Step 5: Proper Handling and Operation
Lastly, maintaining hedge trimmer blades involves proper handling and operation to minimize wear and tear. Follow these guidelines while using your trimmer:
- Choose the appropriate trimmer for the task at hand, considering the size and thickness of the hedges.
- Avoid cutting woody or fibrous materials that can damage the blades.
- Maintain a steady and controlled cutting motion to prevent unnecessary strain on the blades.
- Clear any obstacles or debris from the working area before trimming.
- Take regular breaks during prolonged use to prevent overheating.
By following these steps and taking proper care of your hedge trimmer blades, you can ensure their longevity and exceptional performance. Regular maintenance will not only save you time and money in the long run but also help to keep your hedges looking neat and well-manicured.
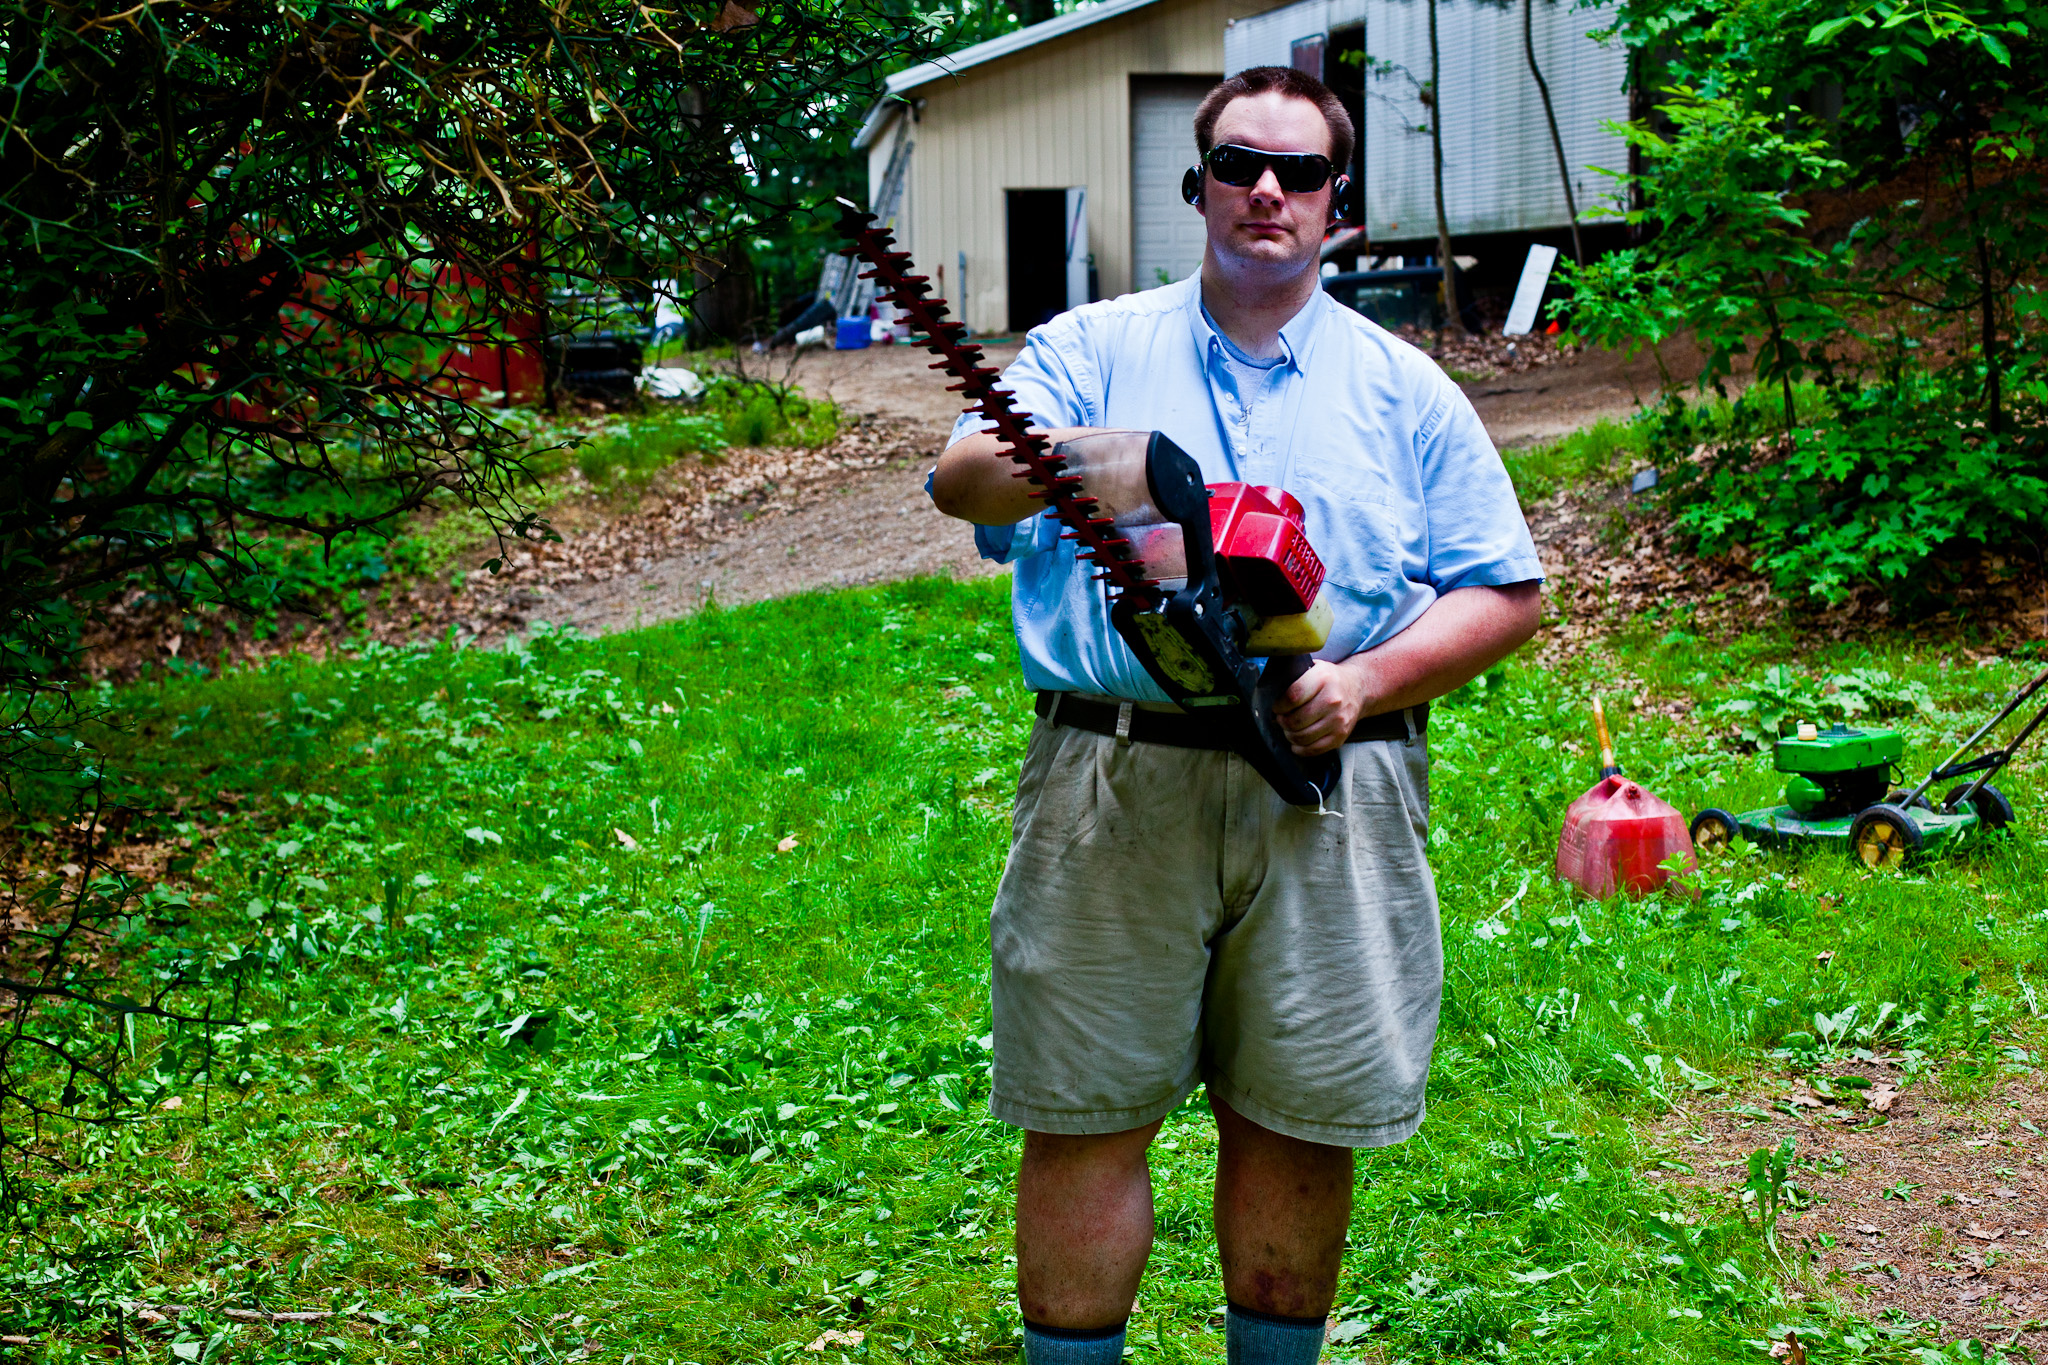 Source: suburbanadventure.com
Frequently Asked Questions
Maintaining your hedge trimmer blades is essential for optimal performance and longevity. Here are some common questions and answers on how to maintain hedge trimmer blades:
Why is it important to regularly clean hedge trimmer blades?
Regularly cleaning hedge trimmer blades is important for several reasons. Firstly, it helps remove any debris or sap that may have accumulated during use, preventing it from causing corrosion or clogging the blades.
Secondly, clean blades make for more efficient cutting, ensuring a neater and smoother finish. Lastly, by cleaning the blades, you can inspect them for any signs of damage or wear, allowing for timely repairs or replacements if necessary.
How often should I sharpen my hedge trimmer blades?
The frequency of sharpening your hedge trimmer blades depends on how often you use them and the type of vegetation you trim. As a general guideline, blades should be sharpened at least once a year or more frequently if they become dull.
Signs of dull blades include uneven cutting, tearing of branches, or blades getting stuck while trimming. Regular maintenance and inspection will help you determine when it’s time to sharpen the blades.
What is the proper way to sharpen hedge trimmer blades?
Sharpening hedge trimmer blades requires specific tools and techniques. Start by disconnecting the trimmer from the power source and ensuring the blades are clean. Use a sharpening stone or a file designed for hedge trimmer blades.
Hold the blades securely and maintain the original angle while filing or sharpening. Move the stone or file in a downward motion along the cutting edge, following the blade’s original bevel.
It’s important to sharpen both sides of the blade evenly to maintain balance. After sharpening, clean the blades again and apply a thin layer of lubricant to prevent rust.
How can I prevent rust on my hedge trimmer blades?
To prevent rust on hedge trimmer blades, it’s important to keep them clean and dry after each use. Wipe off any moisture or debris with a clean cloth, paying extra attention to the cutting edges.
Applying a thin layer of lubricant or protective oil on the blades can also help prevent rust and corrosion.
Additionally, storing the trimmer in a dry, well-ventilated area can further minimize the risk of rust formation.
When should I replace hedge trimmer blades?
Hedge trimmer blades should be replaced when they become excessively worn, damaged, or if they no longer provide clean and efficient cuts. Signs of blade wear include a significant reduction in cutting performance, frequent snagging or jamming, or blades that are visibly bent or chipped.
Regularly inspect your blades for any signs of damage, and if necessary, replace them with compatible replacement blades recommended by the manufacturer.
Top 5 Best Hedge Trimmer Blade Cleaner of 2024
Conclusion:
To conclude, maintaining hedge trimmer blades is essential to ensure their optimal performance and longevity. By following these simple steps, you can keep your trimmer blades sharp and efficient:
- Clean the blades after each use to remove any dirt, debris, or sap.
- Regularly inspect the blades for any signs of damage or wear, such as chips or dull edges.
- Sharpen the blades as needed using either a sharpening stone or a professional blade sharpener.
- Apply a thin layer of lubricating oil to the blades to prevent rust and ensure smooth operation.
- Store the hedge trimmer in a dry and secure place when not in use.
By taking these simple steps, you can prolong the life of your hedge trimmer blades and enjoy neat and precise cuts every time you use them. Remember to always prioritize safety by following the manufacturer’s instructions and wearing appropriate protective gear while operating the trimmer.
Step 4: Regular Inspection
In addition to regular maintenance, it’s crucial to inspect your hedge trimmer blades before each use. Look for any loose screws, damaged parts, or signs of wear that may require immediate attention. By identifying and addressing potential issues early on, you can prevent further damage to the trimmer and ensure safe and efficient operation.
During the inspection, pay close attention to the blade’s movement and cutting action. If you notice any unusual vibrations, excessive noise, or reduced cutting performance, it may indicate a problem with the blades that requires further inspection or maintenance.
Step 4.1: Professional Servicing
If you are unsure about how to address a specific issue or if your hedge trimmer requires extensive repairs, it is recommended to seek professional servicing. Trained technicians can diagnose and repair any underlying problems, ensuring that your trimmer is in top condition and safe to use.
Step 5: Proper Handling and Operation
Lastly, maintaining hedge trimmer blades involves proper handling and operation to minimize wear and tear. Follow these guidelines while using your trimmer:
- Choose the appropriate trimmer for the task at hand, considering the size and thickness of the hedges.
- Avoid cutting woody or fibrous materials that can damage the blades.
- Maintain a steady and controlled cutting motion to prevent unnecessary strain on the blades.
- Clear any obstacles or debris from the working area before trimming.
- Take regular breaks during prolonged use to prevent overheating.
By following these steps and taking proper care of your hedge trimmer blades, you can ensure their longevity and exceptional performance. Regular maintenance will not only save you time and money in the long run but also help to keep your hedges looking neat and well-manicured.
Source: suburbanadventure.com
Frequently Asked Questions
Maintaining your hedge trimmer blades is essential for optimal performance and longevity. Here are some common questions and answers on how to maintain hedge trimmer blades:
Why is it important to regularly clean hedge trimmer blades?
Regularly cleaning hedge trimmer blades is important for several reasons. Firstly, it helps remove any debris or sap that may have accumulated during use, preventing it from causing corrosion or clogging the blades.
Secondly, clean blades make for more efficient cutting, ensuring a neater and smoother finish. Lastly, by cleaning the blades, you can inspect them for any signs of damage or wear, allowing for timely repairs or replacements if necessary.
How often should I sharpen my hedge trimmer blades?
The frequency of sharpening your hedge trimmer blades depends on how often you use them and the type of vegetation you trim. As a general guideline, blades should be sharpened at least once a year or more frequently if they become dull.
Signs of dull blades include uneven cutting, tearing of branches, or blades getting stuck while trimming. Regular maintenance and inspection will help you determine when it’s time to sharpen the blades.
What is the proper way to sharpen hedge trimmer blades?
Sharpening hedge trimmer blades requires specific tools and techniques. Start by disconnecting the trimmer from the power source and ensuring the blades are clean. Use a sharpening stone or a file designed for hedge trimmer blades.
Hold the blades securely and maintain the original angle while filing or sharpening. Move the stone or file in a downward motion along the cutting edge, following the blade’s original bevel.
It’s important to sharpen both sides of the blade evenly to maintain balance. After sharpening, clean the blades again and apply a thin layer of lubricant to prevent rust.
How can I prevent rust on my hedge trimmer blades?
To prevent rust on hedge trimmer blades, it’s important to keep them clean and dry after each use. Wipe off any moisture or debris with a clean cloth, paying extra attention to the cutting edges.
Applying a thin layer of lubricant or protective oil on the blades can also help prevent rust and corrosion.
Additionally, storing the trimmer in a dry, well-ventilated area can further minimize the risk of rust formation.
When should I replace hedge trimmer blades?
Hedge trimmer blades should be replaced when they become excessively worn, damaged, or if they no longer provide clean and efficient cuts. Signs of blade wear include a significant reduction in cutting performance, frequent snagging or jamming, or blades that are visibly bent or chipped.
Regularly inspect your blades for any signs of damage, and if necessary, replace them with compatible replacement blades recommended by the manufacturer.
Top 5 Best Hedge Trimmer Blade Cleaner of 2024
Conclusion:
To conclude, maintaining hedge trimmer blades is essential to ensure their optimal performance and longevity. By following these simple steps, you can keep your trimmer blades sharp and efficient:
- Clean the blades after each use to remove any dirt, debris, or sap.
- Regularly inspect the blades for any signs of damage or wear, such as chips or dull edges.
- Sharpen the blades as needed using either a sharpening stone or a professional blade sharpener.
- Apply a thin layer of lubricating oil to the blades to prevent rust and ensure smooth operation.
- Store the hedge trimmer in a dry and secure place when not in use.
By taking these simple steps, you can prolong the life of your hedge trimmer blades and enjoy neat and precise cuts every time you use them. Remember to always prioritize safety by following the manufacturer’s instructions and wearing appropriate protective gear while operating the trimmer.
Step 3: Storage and Safety
Proper storage of your hedge trimmer is essential for maintaining the blades and prolonging their lifespan. After each use and maintenance session, follow these guidelines:
- Clean the blades thoroughly to remove any debris or residue.
- Apply a thin layer of lubricating oil to protect against rust.
- Store the trimmer in a dry and well-ventilated area to prevent moisture build-up.
- Keep the trimmer out of reach of children and pets.
- Ensure that the trimmer is turned off and unplugged (or batteries removed) before storage.
Step 3.1: Safety Precautions
When performing any maintenance tasks on your hedge trimmer blades, it’s important to prioritize safety. Always wear protective gloves and safety goggles to shield your hands and eyes from debris and sharp edges. Additionally, follow these safety precautions:
- Ensure the trimmer is switched off and unplugged (or batteries removed) before any maintenance.
- Avoid touching the blades directly with your hands to prevent cuts or injuries.
- Only handle the trimmer by its designated handles.
- Store the trimmer in a secure location, out of reach of children and unauthorized users.
- Read and follow all safety guidelines provided by the manufacturer.
Step 4: Regular Inspection
In addition to regular maintenance, it’s crucial to inspect your hedge trimmer blades before each use. Look for any loose screws, damaged parts, or signs of wear that may require immediate attention. By identifying and addressing potential issues early on, you can prevent further damage to the trimmer and ensure safe and efficient operation.
During the inspection, pay close attention to the blade’s movement and cutting action. If you notice any unusual vibrations, excessive noise, or reduced cutting performance, it may indicate a problem with the blades that requires further inspection or maintenance.
Step 4.1: Professional Servicing
If you are unsure about how to address a specific issue or if your hedge trimmer requires extensive repairs, it is recommended to seek professional servicing. Trained technicians can diagnose and repair any underlying problems, ensuring that your trimmer is in top condition and safe to use.
Step 5: Proper Handling and Operation
Lastly, maintaining hedge trimmer blades involves proper handling and operation to minimize wear and tear. Follow these guidelines while using your trimmer:
- Choose the appropriate trimmer for the task at hand, considering the size and thickness of the hedges.
- Avoid cutting woody or fibrous materials that can damage the blades.
- Maintain a steady and controlled cutting motion to prevent unnecessary strain on the blades.
- Clear any obstacles or debris from the working area before trimming.
- Take regular breaks during prolonged use to prevent overheating.
By following these steps and taking proper care of your hedge trimmer blades, you can ensure their longevity and exceptional performance. Regular maintenance will not only save you time and money in the long run but also help to keep your hedges looking neat and well-manicured.
Source: suburbanadventure.com
Frequently Asked Questions
Maintaining your hedge trimmer blades is essential for optimal performance and longevity. Here are some common questions and answers on how to maintain hedge trimmer blades:
Why is it important to regularly clean hedge trimmer blades?
Regularly cleaning hedge trimmer blades is important for several reasons. Firstly, it helps remove any debris or sap that may have accumulated during use, preventing it from causing corrosion or clogging the blades.
Secondly, clean blades make for more efficient cutting, ensuring a neater and smoother finish. Lastly, by cleaning the blades, you can inspect them for any signs of damage or wear, allowing for timely repairs or replacements if necessary.
How often should I sharpen my hedge trimmer blades?
The frequency of sharpening your hedge trimmer blades depends on how often you use them and the type of vegetation you trim. As a general guideline, blades should be sharpened at least once a year or more frequently if they become dull.
Signs of dull blades include uneven cutting, tearing of branches, or blades getting stuck while trimming. Regular maintenance and inspection will help you determine when it’s time to sharpen the blades.
What is the proper way to sharpen hedge trimmer blades?
Sharpening hedge trimmer blades requires specific tools and techniques. Start by disconnecting the trimmer from the power source and ensuring the blades are clean. Use a sharpening stone or a file designed for hedge trimmer blades.
Hold the blades securely and maintain the original angle while filing or sharpening. Move the stone or file in a downward motion along the cutting edge, following the blade’s original bevel.
It’s important to sharpen both sides of the blade evenly to maintain balance. After sharpening, clean the blades again and apply a thin layer of lubricant to prevent rust.
How can I prevent rust on my hedge trimmer blades?
To prevent rust on hedge trimmer blades, it’s important to keep them clean and dry after each use. Wipe off any moisture or debris with a clean cloth, paying extra attention to the cutting edges.
Applying a thin layer of lubricant or protective oil on the blades can also help prevent rust and corrosion.
Additionally, storing the trimmer in a dry, well-ventilated area can further minimize the risk of rust formation.
When should I replace hedge trimmer blades?
Hedge trimmer blades should be replaced when they become excessively worn, damaged, or if they no longer provide clean and efficient cuts. Signs of blade wear include a significant reduction in cutting performance, frequent snagging or jamming, or blades that are visibly bent or chipped.
Regularly inspect your blades for any signs of damage, and if necessary, replace them with compatible replacement blades recommended by the manufacturer.
Top 5 Best Hedge Trimmer Blade Cleaner of 2024
Conclusion:
To conclude, maintaining hedge trimmer blades is essential to ensure their optimal performance and longevity. By following these simple steps, you can keep your trimmer blades sharp and efficient:
- Clean the blades after each use to remove any dirt, debris, or sap.
- Regularly inspect the blades for any signs of damage or wear, such as chips or dull edges.
- Sharpen the blades as needed using either a sharpening stone or a professional blade sharpener.
- Apply a thin layer of lubricating oil to the blades to prevent rust and ensure smooth operation.
- Store the hedge trimmer in a dry and secure place when not in use.
By taking these simple steps, you can prolong the life of your hedge trimmer blades and enjoy neat and precise cuts every time you use them. Remember to always prioritize safety by following the manufacturer’s instructions and wearing appropriate protective gear while operating the trimmer.
Step 2: Blade Adjustment
After cleaning and sharpening the blades, it’s crucial to check and adjust the blade alignment and tension. Incorrect blade alignment can result in uneven cutting or damage to the trimmer, while inadequate tension can cause the blades to slip.
To adjust the blade alignment, refer to the trimmer’s user manual for specific instructions. Most trimmers have adjustment screws that allow you to align the blades properly. By loosening or tightening these screws, you can ensure that the blades are parallel and aligned correctly.
For tension adjustment, some trimmers have a tension knob or screw that you can adjust to achieve the desired tension. Follow the manufacturer’s instructions to determine the appropriate tension for your trimmer model. A properly tensioned blade ensures a clean and precise cutting action.
Step 2.1: Checking for Blade Wear
In addition to alignment and tension, it’s important to regularly inspect the blades for signs of wear. Excessive wear can affect the cutting performance and require blade replacement. Look for any nicks, cracks, or damage to the blades, especially along the cutting edges.
If you notice significant blade wear or damage, it’s advisable to replace the blades. Check the user manual or contact the manufacturer for information on obtaining replacement blades specifically designed for your trimmer model.
Step 3: Storage and Safety
Proper storage of your hedge trimmer is essential for maintaining the blades and prolonging their lifespan. After each use and maintenance session, follow these guidelines:
- Clean the blades thoroughly to remove any debris or residue.
- Apply a thin layer of lubricating oil to protect against rust.
- Store the trimmer in a dry and well-ventilated area to prevent moisture build-up.
- Keep the trimmer out of reach of children and pets.
- Ensure that the trimmer is turned off and unplugged (or batteries removed) before storage.
Step 3.1: Safety Precautions
When performing any maintenance tasks on your hedge trimmer blades, it’s important to prioritize safety. Always wear protective gloves and safety goggles to shield your hands and eyes from debris and sharp edges. Additionally, follow these safety precautions:
- Ensure the trimmer is switched off and unplugged (or batteries removed) before any maintenance.
- Avoid touching the blades directly with your hands to prevent cuts or injuries.
- Only handle the trimmer by its designated handles.
- Store the trimmer in a secure location, out of reach of children and unauthorized users.
- Read and follow all safety guidelines provided by the manufacturer.
Step 4: Regular Inspection
In addition to regular maintenance, it’s crucial to inspect your hedge trimmer blades before each use. Look for any loose screws, damaged parts, or signs of wear that may require immediate attention. By identifying and addressing potential issues early on, you can prevent further damage to the trimmer and ensure safe and efficient operation.
During the inspection, pay close attention to the blade’s movement and cutting action. If you notice any unusual vibrations, excessive noise, or reduced cutting performance, it may indicate a problem with the blades that requires further inspection or maintenance.
Step 4.1: Professional Servicing
If you are unsure about how to address a specific issue or if your hedge trimmer requires extensive repairs, it is recommended to seek professional servicing. Trained technicians can diagnose and repair any underlying problems, ensuring that your trimmer is in top condition and safe to use.
Step 5: Proper Handling and Operation
Lastly, maintaining hedge trimmer blades involves proper handling and operation to minimize wear and tear. Follow these guidelines while using your trimmer:
- Choose the appropriate trimmer for the task at hand, considering the size and thickness of the hedges.
- Avoid cutting woody or fibrous materials that can damage the blades.
- Maintain a steady and controlled cutting motion to prevent unnecessary strain on the blades.
- Clear any obstacles or debris from the working area before trimming.
- Take regular breaks during prolonged use to prevent overheating.
By following these steps and taking proper care of your hedge trimmer blades, you can ensure their longevity and exceptional performance. Regular maintenance will not only save you time and money in the long run but also help to keep your hedges looking neat and well-manicured.
Source: suburbanadventure.com
Frequently Asked Questions
Maintaining your hedge trimmer blades is essential for optimal performance and longevity. Here are some common questions and answers on how to maintain hedge trimmer blades:
Why is it important to regularly clean hedge trimmer blades?
Regularly cleaning hedge trimmer blades is important for several reasons. Firstly, it helps remove any debris or sap that may have accumulated during use, preventing it from causing corrosion or clogging the blades.
Secondly, clean blades make for more efficient cutting, ensuring a neater and smoother finish. Lastly, by cleaning the blades, you can inspect them for any signs of damage or wear, allowing for timely repairs or replacements if necessary.
How often should I sharpen my hedge trimmer blades?
The frequency of sharpening your hedge trimmer blades depends on how often you use them and the type of vegetation you trim. As a general guideline, blades should be sharpened at least once a year or more frequently if they become dull.
Signs of dull blades include uneven cutting, tearing of branches, or blades getting stuck while trimming. Regular maintenance and inspection will help you determine when it’s time to sharpen the blades.
What is the proper way to sharpen hedge trimmer blades?
Sharpening hedge trimmer blades requires specific tools and techniques. Start by disconnecting the trimmer from the power source and ensuring the blades are clean. Use a sharpening stone or a file designed for hedge trimmer blades.
Hold the blades securely and maintain the original angle while filing or sharpening. Move the stone or file in a downward motion along the cutting edge, following the blade’s original bevel.
It’s important to sharpen both sides of the blade evenly to maintain balance. After sharpening, clean the blades again and apply a thin layer of lubricant to prevent rust.
How can I prevent rust on my hedge trimmer blades?
To prevent rust on hedge trimmer blades, it’s important to keep them clean and dry after each use. Wipe off any moisture or debris with a clean cloth, paying extra attention to the cutting edges.
Applying a thin layer of lubricant or protective oil on the blades can also help prevent rust and corrosion.
Additionally, storing the trimmer in a dry, well-ventilated area can further minimize the risk of rust formation.
When should I replace hedge trimmer blades?
Hedge trimmer blades should be replaced when they become excessively worn, damaged, or if they no longer provide clean and efficient cuts. Signs of blade wear include a significant reduction in cutting performance, frequent snagging or jamming, or blades that are visibly bent or chipped.
Regularly inspect your blades for any signs of damage, and if necessary, replace them with compatible replacement blades recommended by the manufacturer.
Top 5 Best Hedge Trimmer Blade Cleaner of 2024
Conclusion:
To conclude, maintaining hedge trimmer blades is essential to ensure their optimal performance and longevity. By following these simple steps, you can keep your trimmer blades sharp and efficient:
- Clean the blades after each use to remove any dirt, debris, or sap.
- Regularly inspect the blades for any signs of damage or wear, such as chips or dull edges.
- Sharpen the blades as needed using either a sharpening stone or a professional blade sharpener.
- Apply a thin layer of lubricating oil to the blades to prevent rust and ensure smooth operation.
- Store the hedge trimmer in a dry and secure place when not in use.
By taking these simple steps, you can prolong the life of your hedge trimmer blades and enjoy neat and precise cuts every time you use them. Remember to always prioritize safety by following the manufacturer’s instructions and wearing appropriate protective gear while operating the trimmer.
Step 1: Cleaning the Blades
The first step in maintaining hedge trimmer blades is to clean them thoroughly. Remove any debris, such as small branches, leaves, or dirt, that may have accumulated on the blades during use. Use a brush or a soft cloth to wipe away the residue. Pay special attention to the cutting edges, as these are the parts that come into contact with the hedges.
After cleaning the blades, it is important to lubricate them to prevent rust and ensure smooth movement. Apply a thin layer of lubricating oil to the cutting edges and any other movable parts. Be sure to use an oil specifically formulated for hedge trimmer blades to ensure proper lubrication and protection against corrosion.
Remember to follow the manufacturer’s instructions regarding lubrication frequency and the type of oil to use. Proper lubrication not only maintains the blades but also helps reduce friction, resulting in a more efficient and precise cutting performance.
Step 1.1: Removing Resinous Deposits
Sometimes, hedge trimmer blades can accumulate sticky resin from certain hedges, making it difficult to clean them effectively. To remove these resinous deposits, you can use a commercial resin remover or a simple solution of warm soapy water. Gently scrub the affected areas with a soft brush or cloth to dissolve and remove the resin.
After removing the resin, rinse the blades with clean water and dry them thoroughly. Once the blades are clean and dry, proceed with lubricating them to protect against rust and ensure smooth operation.
Step 1.2: Sharpening the Blades
Regular sharpening is an integral part of blade maintenance. Over time, hedge trimmer blades can become dull, resulting in less effective cutting and strain on the motor. To sharpen the blades, start by unplugging the trimmer or removing the battery for cordless models.
Using a sharpening stone or a file, carefully sharpen the cutting edges of the blades following their original angle. Maintain a consistent stroke to achieve an even edge. It’s important to note that some manufacturers offer replacement blade kits, which may be easier to use and provide consistent results.
Once the blades are sharp, clean off any metal filings or residue and ensure they are dry before reattaching them to the trimmer. Remember to refer to the manufacturer’s guidelines for sharpening frequency and techniques specific to your hedge trimmer model.
Step 2: Blade Adjustment
After cleaning and sharpening the blades, it’s crucial to check and adjust the blade alignment and tension. Incorrect blade alignment can result in uneven cutting or damage to the trimmer, while inadequate tension can cause the blades to slip.
To adjust the blade alignment, refer to the trimmer’s user manual for specific instructions. Most trimmers have adjustment screws that allow you to align the blades properly. By loosening or tightening these screws, you can ensure that the blades are parallel and aligned correctly.
For tension adjustment, some trimmers have a tension knob or screw that you can adjust to achieve the desired tension. Follow the manufacturer’s instructions to determine the appropriate tension for your trimmer model. A properly tensioned blade ensures a clean and precise cutting action.
Step 2.1: Checking for Blade Wear
In addition to alignment and tension, it’s important to regularly inspect the blades for signs of wear. Excessive wear can affect the cutting performance and require blade replacement. Look for any nicks, cracks, or damage to the blades, especially along the cutting edges.
If you notice significant blade wear or damage, it’s advisable to replace the blades. Check the user manual or contact the manufacturer for information on obtaining replacement blades specifically designed for your trimmer model.
Step 3: Storage and Safety
Proper storage of your hedge trimmer is essential for maintaining the blades and prolonging their lifespan. After each use and maintenance session, follow these guidelines:
- Clean the blades thoroughly to remove any debris or residue.
- Apply a thin layer of lubricating oil to protect against rust.
- Store the trimmer in a dry and well-ventilated area to prevent moisture build-up.
- Keep the trimmer out of reach of children and pets.
- Ensure that the trimmer is turned off and unplugged (or batteries removed) before storage.
Step 3.1: Safety Precautions
When performing any maintenance tasks on your hedge trimmer blades, it’s important to prioritize safety. Always wear protective gloves and safety goggles to shield your hands and eyes from debris and sharp edges. Additionally, follow these safety precautions:
- Ensure the trimmer is switched off and unplugged (or batteries removed) before any maintenance.
- Avoid touching the blades directly with your hands to prevent cuts or injuries.
- Only handle the trimmer by its designated handles.
- Store the trimmer in a secure location, out of reach of children and unauthorized users.
- Read and follow all safety guidelines provided by the manufacturer.
Step 4: Regular Inspection
In addition to regular maintenance, it’s crucial to inspect your hedge trimmer blades before each use. Look for any loose screws, damaged parts, or signs of wear that may require immediate attention. By identifying and addressing potential issues early on, you can prevent further damage to the trimmer and ensure safe and efficient operation.
During the inspection, pay close attention to the blade’s movement and cutting action. If you notice any unusual vibrations, excessive noise, or reduced cutting performance, it may indicate a problem with the blades that requires further inspection or maintenance.
Step 4.1: Professional Servicing
If you are unsure about how to address a specific issue or if your hedge trimmer requires extensive repairs, it is recommended to seek professional servicing. Trained technicians can diagnose and repair any underlying problems, ensuring that your trimmer is in top condition and safe to use.
Step 5: Proper Handling and Operation
Lastly, maintaining hedge trimmer blades involves proper handling and operation to minimize wear and tear. Follow these guidelines while using your trimmer:
- Choose the appropriate trimmer for the task at hand, considering the size and thickness of the hedges.
- Avoid cutting woody or fibrous materials that can damage the blades.
- Maintain a steady and controlled cutting motion to prevent unnecessary strain on the blades.
- Clear any obstacles or debris from the working area before trimming.
- Take regular breaks during prolonged use to prevent overheating.
By following these steps and taking proper care of your hedge trimmer blades, you can ensure their longevity and exceptional performance. Regular maintenance will not only save you time and money in the long run but also help to keep your hedges looking neat and well-manicured.
Source: suburbanadventure.com
Frequently Asked Questions
Maintaining your hedge trimmer blades is essential for optimal performance and longevity. Here are some common questions and answers on how to maintain hedge trimmer blades:
Why is it important to regularly clean hedge trimmer blades?
Regularly cleaning hedge trimmer blades is important for several reasons. Firstly, it helps remove any debris or sap that may have accumulated during use, preventing it from causing corrosion or clogging the blades.
Secondly, clean blades make for more efficient cutting, ensuring a neater and smoother finish. Lastly, by cleaning the blades, you can inspect them for any signs of damage or wear, allowing for timely repairs or replacements if necessary.
How often should I sharpen my hedge trimmer blades?
The frequency of sharpening your hedge trimmer blades depends on how often you use them and the type of vegetation you trim. As a general guideline, blades should be sharpened at least once a year or more frequently if they become dull.
Signs of dull blades include uneven cutting, tearing of branches, or blades getting stuck while trimming. Regular maintenance and inspection will help you determine when it’s time to sharpen the blades.
What is the proper way to sharpen hedge trimmer blades?
Sharpening hedge trimmer blades requires specific tools and techniques. Start by disconnecting the trimmer from the power source and ensuring the blades are clean. Use a sharpening stone or a file designed for hedge trimmer blades.
Hold the blades securely and maintain the original angle while filing or sharpening. Move the stone or file in a downward motion along the cutting edge, following the blade’s original bevel.
It’s important to sharpen both sides of the blade evenly to maintain balance. After sharpening, clean the blades again and apply a thin layer of lubricant to prevent rust.
How can I prevent rust on my hedge trimmer blades?
To prevent rust on hedge trimmer blades, it’s important to keep them clean and dry after each use. Wipe off any moisture or debris with a clean cloth, paying extra attention to the cutting edges.
Applying a thin layer of lubricant or protective oil on the blades can also help prevent rust and corrosion.
Additionally, storing the trimmer in a dry, well-ventilated area can further minimize the risk of rust formation.
When should I replace hedge trimmer blades?
Hedge trimmer blades should be replaced when they become excessively worn, damaged, or if they no longer provide clean and efficient cuts. Signs of blade wear include a significant reduction in cutting performance, frequent snagging or jamming, or blades that are visibly bent or chipped.
Regularly inspect your blades for any signs of damage, and if necessary, replace them with compatible replacement blades recommended by the manufacturer.
Top 5 Best Hedge Trimmer Blade Cleaner of 2024
Conclusion:
To conclude, maintaining hedge trimmer blades is essential to ensure their optimal performance and longevity. By following these simple steps, you can keep your trimmer blades sharp and efficient:
- Clean the blades after each use to remove any dirt, debris, or sap.
- Regularly inspect the blades for any signs of damage or wear, such as chips or dull edges.
- Sharpen the blades as needed using either a sharpening stone or a professional blade sharpener.
- Apply a thin layer of lubricating oil to the blades to prevent rust and ensure smooth operation.
- Store the hedge trimmer in a dry and secure place when not in use.
By taking these simple steps, you can prolong the life of your hedge trimmer blades and enjoy neat and precise cuts every time you use them. Remember to always prioritize safety by following the manufacturer’s instructions and wearing appropriate protective gear while operating the trimmer.
When it comes to keeping your hedge trimmer blades in top shape, there’s more to it than just running them through the branches. Did you know that regular maintenance is key to ensuring the longevity and effectiveness of your trimmer blades? It’s true! Taking a few simple steps can make all the difference in keeping your blades sharp and ready for action.
First and foremost, cleaning your hedge trimmer blades after each use is essential. Removing any debris, such as twigs or grass clippings, prevents build-up and helps maintain the blade’s cutting ability. Additionally, regularly lubricating the blades with a suitable oil keeps them running smoothly and minimizes friction. By incorporating these practices into your maintenance routine, you can maximize the lifespan of your hedge trimmer blades and ensure optimal performance for all your trimming needs.
As a professional, I know the importance of maintaining hedge trimmer blades for optimal performance. Here’s how I keep my blades in top shape:
- Clean the blades after each use to remove debris and sap.
- Inspect the blades for any signs of damage or dullness.
- Sharpen the blades regularly using a sharpening stone or file.
- Apply lubricant to the blades to prevent rust and ensure smooth operation.
- Store the trimmer blades in a dry and secure place when not in use.
By following these simple maintenance steps, you can extend the lifespan of your hedge trimmer blades and enhance their cutting efficiency.
 Source: trustedreviews.com
How to Maintain Hedge Trimmer Blades? Trim with Precision
To keep your hedge trimmer blades in optimal condition and ensure smooth and efficient operation, regular maintenance is essential. Neglecting blade maintenance can result in decreased performance and potentially cause damage to the trimmer.
In this section, I will guide you through the step-by-step process of maintaining hedge trimmer blades to extend their lifespan and keep them working effectively.
Step 1: Cleaning the Blades
The first step in maintaining hedge trimmer blades is to clean them thoroughly. Remove any debris, such as small branches, leaves, or dirt, that may have accumulated on the blades during use. Use a brush or a soft cloth to wipe away the residue. Pay special attention to the cutting edges, as these are the parts that come into contact with the hedges.
After cleaning the blades, it is important to lubricate them to prevent rust and ensure smooth movement. Apply a thin layer of lubricating oil to the cutting edges and any other movable parts. Be sure to use an oil specifically formulated for hedge trimmer blades to ensure proper lubrication and protection against corrosion.
Remember to follow the manufacturer’s instructions regarding lubrication frequency and the type of oil to use. Proper lubrication not only maintains the blades but also helps reduce friction, resulting in a more efficient and precise cutting performance.
Step 1.1: Removing Resinous Deposits
Sometimes, hedge trimmer blades can accumulate sticky resin from certain hedges, making it difficult to clean them effectively. To remove these resinous deposits, you can use a commercial resin remover or a simple solution of warm soapy water. Gently scrub the affected areas with a soft brush or cloth to dissolve and remove the resin.
After removing the resin, rinse the blades with clean water and dry them thoroughly. Once the blades are clean and dry, proceed with lubricating them to protect against rust and ensure smooth operation.
Step 1.2: Sharpening the Blades
Regular sharpening is an integral part of blade maintenance. Over time, hedge trimmer blades can become dull, resulting in less effective cutting and strain on the motor. To sharpen the blades, start by unplugging the trimmer or removing the battery for cordless models.
Using a sharpening stone or a file, carefully sharpen the cutting edges of the blades following their original angle. Maintain a consistent stroke to achieve an even edge. It’s important to note that some manufacturers offer replacement blade kits, which may be easier to use and provide consistent results.
Once the blades are sharp, clean off any metal filings or residue and ensure they are dry before reattaching them to the trimmer. Remember to refer to the manufacturer’s guidelines for sharpening frequency and techniques specific to your hedge trimmer model.
Step 2: Blade Adjustment
After cleaning and sharpening the blades, it’s crucial to check and adjust the blade alignment and tension. Incorrect blade alignment can result in uneven cutting or damage to the trimmer, while inadequate tension can cause the blades to slip.
To adjust the blade alignment, refer to the trimmer’s user manual for specific instructions. Most trimmers have adjustment screws that allow you to align the blades properly. By loosening or tightening these screws, you can ensure that the blades are parallel and aligned correctly.
For tension adjustment, some trimmers have a tension knob or screw that you can adjust to achieve the desired tension. Follow the manufacturer’s instructions to determine the appropriate tension for your trimmer model. A properly tensioned blade ensures a clean and precise cutting action.
Step 2.1: Checking for Blade Wear
In addition to alignment and tension, it’s important to regularly inspect the blades for signs of wear. Excessive wear can affect the cutting performance and require blade replacement. Look for any nicks, cracks, or damage to the blades, especially along the cutting edges.
If you notice significant blade wear or damage, it’s advisable to replace the blades. Check the user manual or contact the manufacturer for information on obtaining replacement blades specifically designed for your trimmer model.
Step 3: Storage and Safety
Proper storage of your hedge trimmer is essential for maintaining the blades and prolonging their lifespan. After each use and maintenance session, follow these guidelines:
- Clean the blades thoroughly to remove any debris or residue.
- Apply a thin layer of lubricating oil to protect against rust.
- Store the trimmer in a dry and well-ventilated area to prevent moisture build-up.
- Keep the trimmer out of reach of children and pets.
- Ensure that the trimmer is turned off and unplugged (or batteries removed) before storage.
Step 3.1: Safety Precautions
When performing any maintenance tasks on your hedge trimmer blades, it’s important to prioritize safety. Always wear protective gloves and safety goggles to shield your hands and eyes from debris and sharp edges. Additionally, follow these safety precautions:
- Ensure the trimmer is switched off and unplugged (or batteries removed) before any maintenance.
- Avoid touching the blades directly with your hands to prevent cuts or injuries.
- Only handle the trimmer by its designated handles.
- Store the trimmer in a secure location, out of reach of children and unauthorized users.
- Read and follow all safety guidelines provided by the manufacturer.
Step 4: Regular Inspection
In addition to regular maintenance, it’s crucial to inspect your hedge trimmer blades before each use. Look for any loose screws, damaged parts, or signs of wear that may require immediate attention. By identifying and addressing potential issues early on, you can prevent further damage to the trimmer and ensure safe and efficient operation.
During the inspection, pay close attention to the blade’s movement and cutting action. If you notice any unusual vibrations, excessive noise, or reduced cutting performance, it may indicate a problem with the blades that requires further inspection or maintenance.
Step 4.1: Professional Servicing
If you are unsure about how to address a specific issue or if your hedge trimmer requires extensive repairs, it is recommended to seek professional servicing. Trained technicians can diagnose and repair any underlying problems, ensuring that your trimmer is in top condition and safe to use.
Step 5: Proper Handling and Operation
Lastly, maintaining hedge trimmer blades involves proper handling and operation to minimize wear and tear. Follow these guidelines while using your trimmer:
- Choose the appropriate trimmer for the task at hand, considering the size and thickness of the hedges.
- Avoid cutting woody or fibrous materials that can damage the blades.
- Maintain a steady and controlled cutting motion to prevent unnecessary strain on the blades.
- Clear any obstacles or debris from the working area before trimming.
- Take regular breaks during prolonged use to prevent overheating.
By following these steps and taking proper care of your hedge trimmer blades, you can ensure their longevity and exceptional performance. Regular maintenance will not only save you time and money in the long run but also help to keep your hedges looking neat and well-manicured.
Source: suburbanadventure.com
Frequently Asked Questions
Maintaining your hedge trimmer blades is essential for optimal performance and longevity. Here are some common questions and answers on how to maintain hedge trimmer blades:
Why is it important to regularly clean hedge trimmer blades?
Regularly cleaning hedge trimmer blades is important for several reasons. Firstly, it helps remove any debris or sap that may have accumulated during use, preventing it from causing corrosion or clogging the blades.
Secondly, clean blades make for more efficient cutting, ensuring a neater and smoother finish. Lastly, by cleaning the blades, you can inspect them for any signs of damage or wear, allowing for timely repairs or replacements if necessary.
How often should I sharpen my hedge trimmer blades?
The frequency of sharpening your hedge trimmer blades depends on how often you use them and the type of vegetation you trim. As a general guideline, blades should be sharpened at least once a year or more frequently if they become dull.
Signs of dull blades include uneven cutting, tearing of branches, or blades getting stuck while trimming. Regular maintenance and inspection will help you determine when it’s time to sharpen the blades.
What is the proper way to sharpen hedge trimmer blades?
Sharpening hedge trimmer blades requires specific tools and techniques. Start by disconnecting the trimmer from the power source and ensuring the blades are clean. Use a sharpening stone or a file designed for hedge trimmer blades.
Hold the blades securely and maintain the original angle while filing or sharpening. Move the stone or file in a downward motion along the cutting edge, following the blade’s original bevel.
It’s important to sharpen both sides of the blade evenly to maintain balance. After sharpening, clean the blades again and apply a thin layer of lubricant to prevent rust.
How can I prevent rust on my hedge trimmer blades?
To prevent rust on hedge trimmer blades, it’s important to keep them clean and dry after each use. Wipe off any moisture or debris with a clean cloth, paying extra attention to the cutting edges.
Applying a thin layer of lubricant or protective oil on the blades can also help prevent rust and corrosion.
Additionally, storing the trimmer in a dry, well-ventilated area can further minimize the risk of rust formation.
When should I replace hedge trimmer blades?
Hedge trimmer blades should be replaced when they become excessively worn, damaged, or if they no longer provide clean and efficient cuts. Signs of blade wear include a significant reduction in cutting performance, frequent snagging or jamming, or blades that are visibly bent or chipped.
Regularly inspect your blades for any signs of damage, and if necessary, replace them with compatible replacement blades recommended by the manufacturer.
Top 5 Best Hedge Trimmer Blade Cleaner of 2024
Conclusion:
To conclude, maintaining hedge trimmer blades is essential to ensure their optimal performance and longevity. By following these simple steps, you can keep your trimmer blades sharp and efficient:
- Clean the blades after each use to remove any dirt, debris, or sap.
- Regularly inspect the blades for any signs of damage or wear, such as chips or dull edges.
- Sharpen the blades as needed using either a sharpening stone or a professional blade sharpener.
- Apply a thin layer of lubricating oil to the blades to prevent rust and ensure smooth operation.
- Store the hedge trimmer in a dry and secure place when not in use.
By taking these simple steps, you can prolong the life of your hedge trimmer blades and enjoy neat and precise cuts every time you use them. Remember to always prioritize safety by following the manufacturer’s instructions and wearing appropriate protective gear while operating the trimmer.
