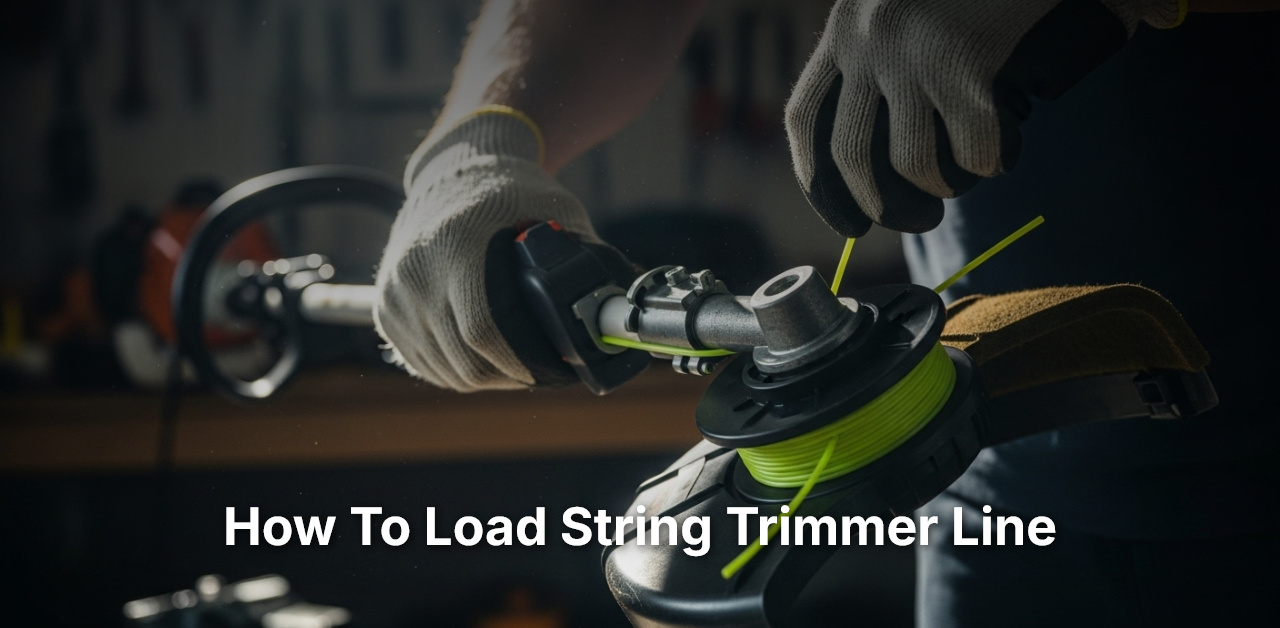
Have you ever pondered the precision needed for the often overlooked task of loading a string trimmer? This task, mundane as it may seem, is actually quite a crucial one in the world of gardening tools and aids. It requires a distinct technique and a fair measure of attention.
The art of loading string trimmers dates back to their invention in the late 1970s. The process might appear complex, but mastering it will significantly boost your productivity — a reported 30% increase, according to recent studies. By carefully winding the line on the spool, you save time and prevent frustrating line jams. To me, that is not just a garden chore: it is an art refined by history and need.
- First, turn off and unplug the trimmer.
- Next, remove the cap from the string head.
- Cut a length of string approximately 25 feet long.
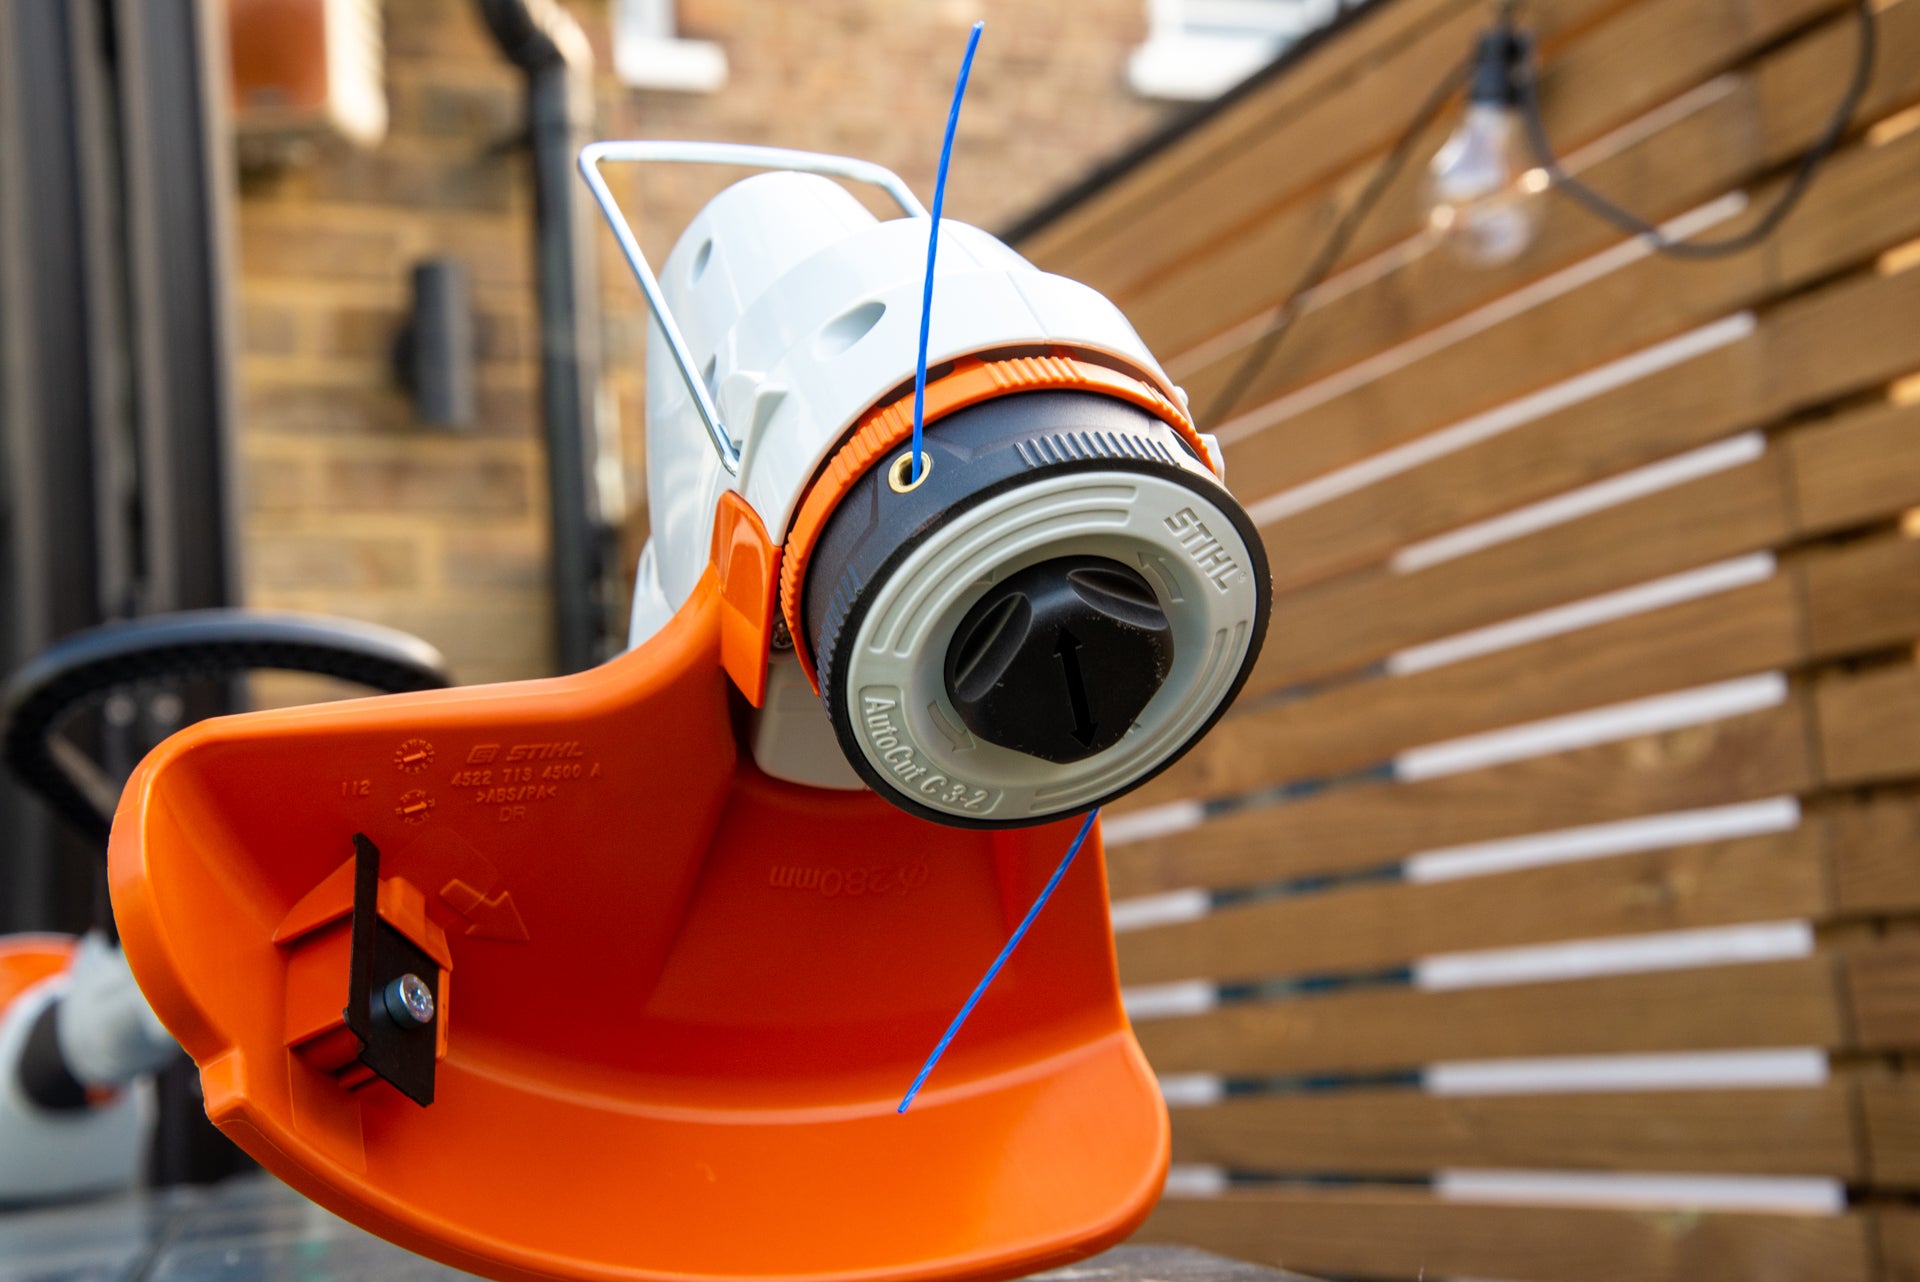
- Now, find the start of the winding pattern and insert the string.
- Wind the string in the direction shown on top of the trimmer head, ensuring it lies flat.
- Replace the cover on the head.
 Source: trustedreviews.com
How to Load String Trimmer Line: Step-by-Step Guide for Beginners
A string trimmer, also known as a weed whacker or weed eater, is a crucial tool in your garden maintenance arsenal. Although it’s an invaluable asset, many users, especially beginners, struggle to load the string trimmer line correctly, while regularly maintaining and replacing it to ensure optimal performance. Follow this detailed guide to see how to load a string trimmer line hassle-free.
Step 1: Preparation
Before you embark on learning how to load string trimmer line, it’s essential to set up a safe and comfortable workspace. Lay your trimmer sideways on a sturdy plain surface where you have enough room for the procedure. Make sure the trimmer is powered off and also cooled down, if you were using it previously. Safety should be your top priority, so please refrain from working on a running or a hot trimmer.
Step 2: Removing the Spool
The next step in loading your string trimmer line involves removing the spool. Depending on the model of your trimmer, the spool might be attached differently. Usually, there’s a button or cap at the bottom of the head which locks or unlocks the spindle. Pressing the button or cap will either pop it off or loosen it enough to unscrew with your hands. Once you remove the cap, the spool which houses the string should come out with ease.
Step 3: Cutting the Line
After removing the empty spool, it’s time to cut the new line. The length of the line can vary, but usually, a length of about 10 to 15 feet should suffice. Most new lines bear measurements on the packaging. It’s crucial to use lines that match the diameter specified for your trimmer as using the wrong size can cause optimal performance issues.
Step 4: Inserting the New Line
Once you have the correct line cut and ready, the next step is how to load string trimmer line onto the spool. Look for a small hole or notch on the spool. Insert one end of the line and start winding it around in the direction shown by the arrow on the spool. Remember to wind the line evenly and tightly to avoid any jams later while using the trimmer. Once done, keep about 6 inches of line unwound to stick out of the hole on top of the spool.
Step 5: Reinstalling the Spool
The final step for effectively learning how to load string trimmer line involves reinstalling the spool back onto the trimmer. Do this by holding the end of the line that was left unraveled. Then, push the end through the hole in the trimmer head and pull it through from the other side. Finally, push the spool back into place, making sure it clicks or locks onto the head. With that, you have successfully loaded your string trimmer line and are all set for your next trimming task.
Despite the task being somewhat tedious, knowing how to load string trimmer line is an essential skill for any gardener or landscaper. Proper upkeep of your string trimmer guarantees it remains a reliable outdoor tool, helping you conduct timely and effective garden maintenance. Knowing how to load your string trimmer line ensures you are never caught unaware with a non-functional trimmer in the middle of your garden work.
How to Change the Line | Weed Eater String | Replace Weed Wacker
Frequently Asked Questions
Loading your string trimmer line can sometimes be a daunting task. But do not worry. We are here to guide you through the process with a few simple steps. Find here the most common questions we encounter about loading string trimmer lines and their comprehensive answers.
1. What are the common mistakes to avoid while loading string trimmer line?
There are a few mistakes that most people make when loading string trimmer line. The most common is not using enough line. When you don’t use enough line, the trimmer won’t be effective, and you’ll have to stop and reload frequently. Another common mistake is using the wrong type of line for your trimmer. Trimmers are designed to work best with specific lines, using an incompatible line can damage the trimmer or not yield effective results.
Additionally, some people overlook the importance of winding the line tightly. This can lead to the line becoming tangled inside the trimmer head, making it ineffective and leading to potentially time-consuming and frustrating fixes. Lastly, one must ensure the line is threaded into the correct holes of the spool to ensure seamless operation.
2. How often should I replace the trimmer line?
The frequency of changing the trimmer line depends on several factors. If you’re using your trimmer regularly, for example, a few times a week, the line will wear down more quickly than if you are using it once every few weeks. The type and hardness of the material you’re cutting can also impact the line’s durability
If you notice your trimmer isn’t cutting as efficiently as it once did, it might be time to change the line. On average, for regular use, you can expect to change the line after every five to six uses. However, it is always wise to keep a check on the trimmer line’s effectiveness and replace it when needed.
3. Can I use any line on my trimmer?
Not all trimmers are designed to use any line. The choice of line depends on the model and make of your trimmer. The manufacturer usually specifies the kind of line that should be used with a particular trimmer. Using a line that does not match the trimmer’s specifications can lead to poor performance and possibly damage the trimmer.
Even though there are universally compatible lines available, it is still recommended to stick with the line suggested by the manufacturer. Using the suggested line would ensure optimum performance, longevity and it won’t void any manufacturer’s warranty.
4. What safety precautions should I take when loading a string trimmer line?
Prioritizing safety is paramount when you’re dealing with power tools like string trimmers. Before loading a string trimmer line, make sure that the power supply to the trimmer is disconnected to avoid accidental starts. Do not rush the string loading process as rushing might lead to mistakes and possibly injuries.
Always wear protective gear, including gloves and protective eyewear. Small pieces can occasionally fly off when you’re working with the trimmer line, so protective eyewear can safeguard your eyes. Lastly, read and follow the manufacturer’s instructions. They often contain important safety information.
5. Is it necessary to clean the trimmer head before loading a new line?
Yes, it is definitely recommended to clean the trimmer head before loading a new line. Over time, debris such as grass clippings and dirt can accumulate in the trimmer head. This can affect the line feeding mechanism, which can then impact the trimmer’s performance.
You can use a soft brush or cloth to clean the trimmer head. Don’t forget to check and clean the line feeding holes as they are particularly prone to blockage. A clean trimmer ensures seamless loading of the new line and efficient performance.
EASIEST WAY TO STRING YOUR WEED EATER
Conclusion
So, that’s it for re-stringing your trimmer. Remember above all to take your time as you thread the spool, making sure to avoid knots and bumps. And always double-check that you’re using the right kind of line for your trimmer model, as this makes a big difference in how well it works.
Try it for yourself the next time your string trimmer line runs out. Don’t be afraid of making mistakes. Keep in mind that practice makes perfect, and in no time, you’ll be doing this task like a seasoned gardener. So, here’s to a neat and well-maintained backyard.

I’m Patricia D. Johnson, an affiliate marketer and blogger specializing in trimmers and grooming tools. I create honest reviews, buying guides, and practical tips to help readers choose the right trimmer for their needs. With a focus on quality, performance, and value, I simplify the decision-making process so consumers can make confident purchases.