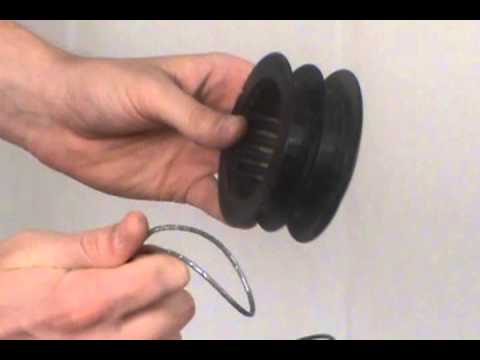
It’s astonishing how many landscaping projects can be hindered simply because the trimmer line isn’t installed correctly. An improperly installed line not only impacts efficiency but can also lead to repeated breakages and frustrations. Let’s delve into the precise steps of installing a Husqvarna trimmer line to ensure seamless performance.
Originally designed with durability in mind, Husqvarna trimmer lines are known for their robust quality. Installing them correctly starts by ensuring your trimmer is completely powered down for safety. After accessing the spool and clearing it of any debris, winding the new line involves threading it through the eyelets, ensuring a firm and uniform wrap for optimal cutting performance.
- Ensure the trimmer is powered off and wears protective gloves.
- Remove the spool from the trimmer head and clear any debris.
- Cut a length of new trimmer line according to the manufacturer’s specifications, usually 15-20 feet.
- Insert one end of the line into the notch on the spool and wind it uniformly in the direction indicated, keeping tension consistent.
- Thread both ends through the eyelets on the trimmer head and reattach the spool securely.
- Turn on the trimmer for a test run to ensure proper installation.
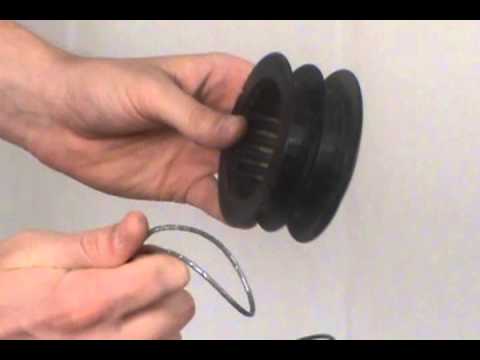
How to Install Husqvarna Trimmer Line
First, ensure your Husqvarna trimmer is completely powered off to avoid any accidents. Gather your new trimmer line and make sure it matches the specifications of your model. Locate the spool on your trimmer head; this is usually accessed by removing a cover or cap. Clear any leftover debris or old line from the spool. A clean spool ensures a smoother installation process.
After preparing the spool, cut the new line to the recommended length. For most models, you’ll need about 15-20 feet of line. Insert one end of the line into a hole or notch on the spool. Begin winding the line evenly and tightly around the spool in the direction indicated on the trimmer, usually by an arrow. Make sure there are no overlaps or loose loops.
Once the line is wound, leave a few inches of line extending from both ends of the spool. Insert these ends through the eyelets on the trimmer head. Replace the spool back into the trimmer, securing it with the cover or cap. According to this post, speed-feed trimmer heads can simplify this step, making the process quicker and more efficient.
Before starting your trimmer, gently pull on the line to ensure it is firmly seated. Rotate the trimmer head manually to check for any tangles or misalignments. If everything looks good, power on your trimmer and test it in a small area. If you experience any issues, such as shaking or uneven cutting, refer to here is the article for troubleshooting tips that could address common problems.
Step 1: Safety Precautions Before Installing Trimmer Line
Before you even think about installing your Husqvarna trimmer line, you need to make sure your trimmer is turned off and unplugged. This simple step prevents any accidental startups. Additionally, wear protective gloves to safeguard your hands from cuts and scrapes. Using safety goggles can also protect your eyes from potential debris. Always work on a flat, stable surface to avoid slips and falls.
Ensure you have all your equipment and the replacement trimmer line ready. This avoids unnecessary movements that can create hazards. A calm and organized workspace makes the process much safer. Having the right tools on hand means you can focus entirely on the task without interruptions. An organized workspace also minimizes the chance of losing small parts.
Before beginning, read the manufacturer’s manual for specific safety guidelines related to your model. Different models may have unique safety features. Paying attention to these details enhances your safety and the efficiency of the installation. According to this expert opinion, understanding your equipment fully can prevent many common issues. Taking the time to read through the manual is always a wise precaution.
It’s important to inspect the trimmer head for any signs of damage or wear. Replace any damaged parts before installing the new line. Checking these components helps ensure your trimmer operates smoothly. Faulty parts can lead to malfunction or accidents. Regular maintenance cuts down on unexpected problems during operation.
Step 2: Preparing the New Husqvarna Trimmer Line
Start by selecting the right type of line for your Husqvarna trimmer. Different models may require different line thickness. Check your manual or the manufacturer’s website to ensure compatibility. Using the incorrect line can lead to poor performance or even damage. Confirming the right specifications is crucial.
Next, measure and cut the trimmer line to the recommended length. Most Husqvarna models need around 15 to 20 feet of line. Using a tape measure, accurately measure the length and cut it cleanly with scissors. This ensures you have enough line for efficient trimming. Making a clean cut prevents fraying, which can cause issues during installation.
Once cut, fold the length of line in half to find the midpoint. Some trimmers have two winding areas, so this step helps balance the line evenly. Insert the midpoint into the notch or hole on the spool. This is important for even winding. Uneven winding can result in performance problems.
Begin winding each half of the line onto the spool, following the directional arrows. Ensure that the line is wound tightly and neatly to avoid overlaps. Overlapping can lead to tangles and inefficient cutting. Keep the tension consistent for best results. Completing this step correctly ensures your trimmer will operate smoothly.
Step 3: Winding the Trimmer Line Onto the Spool
Start by holding the spool securely in one hand and the trimmer line in the other. Look for directional arrows on the spool which indicate the correct winding direction. Begin by threading the line through the eyelet or slot designed for holding it in place. This feature helps keep the line secure as you start winding it. Make sure the line is tight but not overly stretched.
Proceed to wind the line evenly onto the spool, keeping the tension consistent to avoid overlaps. Overlapping can cause the line to tangle or break during use. It’s important to maintain an even, tight coil around the spool. If your trimmer has dual-line capability, repeat these steps for the second line. Consistency in winding ensures optimal performance.
While winding, leave about 6 inches of line protruding from each end. These ends will be threaded through the eyelets on the trimmer head. Double-check that the lines are not crisscrossed or tangled. This avoids complications when the trimmer is running. Keeping the lines separate ensures smooth operation.
After winding, examine the spool and make sure the line is evenly distributed. This avoids any balance problems when the trimmer is in use. Uneven winding can cause vibrations and reduce efficiency. Smooth out any overlaps before proceeding to the next step. A balanced spool is key to effective trimming.
Insert the loose ends of the line through the eyelets on the trimmer head. Carefully fit the spool back into the trimmer, ensuring it locks into place securely. According to these steps, you should now have a prepared and properly wound trimmer line. This setup allows for hassle-free trimming and optimal cutting performance. Completing this task correctly will maximize the lifespan of your trimmer line.
Ensuring Efficient Trimmer Line Performance
Making sure your trimmer line performs efficiently involves regular maintenance and care. After each use, inspect the trimmer line for wear and tear. Replace the line if you notice any fraying or damage, as this can affect cutting performance. Cleaning the trimmer head periodically removes debris that could interfere with the line. Regular checks and cleaning prolong the life of your equipment.
Using the right type of trimmer line for your specific needs also contributes to efficiency. For instance, thicker lines are better suited for heavy-duty tasks, while thinner lines work well for regular lawn maintenance. Always refer to the manufacturer’s guidelines for the best recommendations. Using the correct line type ensures optimal performance. It also reduces unnecessary wear and tear on your trimmer.
Adjusting the cutting height of your trimmer can make a significant difference. Setting the right height allows for a more efficient cut and better line conservation. If the line is too low, it may hit the ground and wear out faster. Adjustments should be made based on the type of vegetation you’re trimming. Experiment with different heights to find the best setting for your needs.
Another key factor is the speed at which you’re using your trimmer. Cutting at a consistent speed ensures a more uniform trimming job. Rapid speed changes can cause the line to break more often. According to experts, maintaining a steady pace improves both efficiency and line durability. Keeping a consistent speed reduces the risk of uneven trimming.
Lastly, storing your trimmer properly ensures the line remains in good condition. Keep it in a dry place away from extreme temperatures. Exposure to moisture or heat can weaken the line. Proper storage also protects the trimmer head and other components. Taking these simple steps will help you get the most out of your trimmer.
Troubleshooting Common Husqvarna Trimmer Line Issues
One common problem with trimmer lines is frequent breaking. If your line breaks too often, it might be due to hitting hard objects like rocks or pavement. Ensure you are trimming at the right height to avoid unnecessary contact with these surfaces. Another cause can be using the wrong type of trimmer line. Thicker or more durable lines are better for heavy-duty tasks.
Another issue many users face is tangling of the trimmer line. Tangling usually occurs due to improper winding of the line onto the spool. Always follow the manufacturer’s instructions for winding the line. Ensuring the line is wound evenly and tightly can prevent this problem. Regularly check the trimmer head for any signs of line overlap or tangling.
Sometimes the line may not feed properly, causing interruptions in your work. This might happen if the line has become too short or if the trimmer head is clogged with debris. Cutting the line too short can make it difficult for it to advance. Keeping the trimmer head clean and free from obstructions helps maintain smooth line feeding. Checking and replacing the line regularly can prevent this issue.
If your trimmer vibrates excessively, it could be a sign of an imbalance in the spool or worn-out parts. An unevenly wound line can cause vibrations when the trimmer is in use. Inspect the spool to ensure the line is distributed evenly. Wearing or damage to other components could also be the culprit. Regular maintenance checks can help identify these issues before they become serious problems.
In cases where the trimmer line is not cutting effectively, the line might be too dull or not suitable for the type of vegetation you’re trimming. Replace the line if it appears worn out. Ensure you’re using the right type of line for your specific trimming needs. Sometimes, adjusting the trimmer’s cutting height can also improve performance. Consistently checking and replacing the line as needed can keep your trimmer in optimal condition.
Frequently Asked Questions
Here you’ll find common questions and answers related to Husqvarna trimmer lines. These will help you maximize the efficiency and lifespan of your tool.
1. What type of trimmer line should I use for heavy-duty tasks?
For heavy-duty tasks, it’s essential to use a thicker and more durable trimmer line. Typically, lines with a diameter of 0.095 inches or thicker perform well in tough conditions. These lines can cut through dense grass and weeds more efficiently.
Some specialized lines even come with reinforced cores for extra strength. Always check the manual for compatible line types for your model. Using the right type ensures effective trimming and extends the lifespan of your equipment.
2. How often should I replace the trimmer line on my Husqvarna?
The frequency of replacing your trimmer line largely depends on how often you use it and under what conditions. For regular lawn maintenance, you might need to replace it every few months or after several uses.
If you’re tackling tougher jobs or using the trimmer frequently, replacements may be needed more often. Regularly inspect your line for signs of wear or fraying to maintain optimal performance.
3. Why does my trimmer line keep breaking?
If your trimmer line keeps breaking, it could be due to hitting hard surfaces like rocks, concrete, or metal edging. Ensure you are trimming at an appropriate height to avoid contact with these materials.
Another possibility is that you’re using a flimsy line that’s not suitable for your task. Opt for a thicker, more durable line if you’re facing this issue frequently.
4. Can I use any brand of trimmer line in my Husqvarna trimmer?
While many brands manufacture universal-fit trimmer lines, it’s generally best to stick with lines recommended by Husqvarna for compatibility and performance reasons. Using approved products ensures that they meet specific standards required by the manufacturer.
This guarantees optimal performance and minimizes problems like frequent breakages or feeding issues. Adhering to manufacturer recommendations also helps maintain any existing warranties on your equipment.
5. How do I know when my trimmer needs its head replaced?
A practical way to tell if the trimmer head needs replacement is by inspecting it regularly for cracks, worn parts, or any other visible damage elements on it that cause inefficiencies while working with the machine over time can jeopardize overall performance gradually up till noticeable changes are seen physically necessitating change consequently then alternatively periodically consulting user manuals also guides accordingly so as they’re detailed providing better insights
Conclusion
Installing the Husqvarna trimmer line properly is crucial for efficient performance. By following each step carefully, you ensure that your equipment runs smoothly. This not only extends the lifespan of your trimmer but also makes your landscaping tasks easier and more effective.
Regular maintenance and timely replacements are key to avoiding common issues. Whether you are a professional landscaper or a home gardener, mastering these basics can save you time and effort. With the right care, your Husqvarna trimmer will provide reliable service for years to come.

I’m Patricia D. Johnson, an affiliate marketer and blogger specializing in trimmers and grooming tools. I create honest reviews, buying guides, and practical tips to help readers choose the right trimmer for their needs. With a focus on quality, performance, and value, I simplify the decision-making process so consumers can make confident purchases.