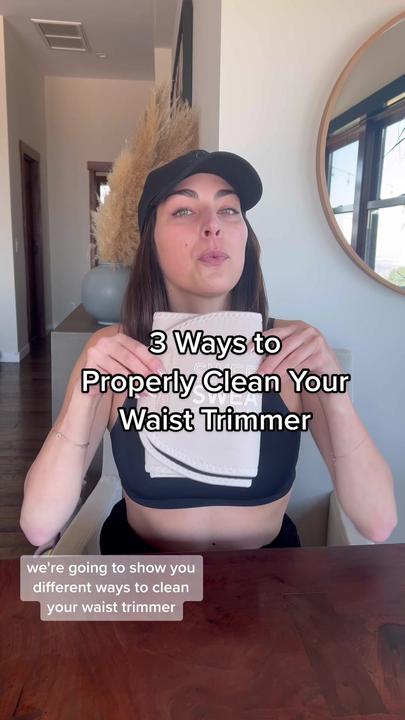
Few people realize that improper cleaning of waist trimmers can reduce their effectiveness and lifespan. In fact, waist trimmers often accumulate sweat and bacteria, which requires regular and thorough cleaning to maintain hygiene and performance. Let’s delve into the best practices for ensuring your waist trimmer remains in top condition.
Once you understand the essential steps, cleaning a waist trimmer becomes a straightforward process. Historically, waist trimmers were maintained using simple wiping methods, which research reveals is insufficient for deep cleaning. One effective solution is using a mixture of mild soap and water, ensuring that the waist trimmer is rinsed and dried properly to prevent odor and material degradation.
- Rinse the waist trimmer in warm water to remove loose dirt and sweat.
- Mix mild soap with warm water and use a soft cloth or sponge to gently scrub the trimmer.
- Thoroughly rinse the waist trimmer to remove any soap residue.
- Dry it by gently pressing out excess water with a towel, avoiding wringing or twisting.
- Air-dry in a well-ventilated area away from direct sunlight or heat sources.

How to Clean a Waist Trimmer
Cleaning a waist trimmer starts with gathering the right materials. You’ll need some mild soap, warm water, and a soft cloth. Make sure to avoid harsh chemicals as they can damage the fabric. According to here is the article, gentle cleaning agents are best. This approach ensures longevity and maintains the effectiveness of the trimmer.
Before washing, give the waist trimmer a good rinse with water. This will help remove loose dirt and sweat. Next, soak the cloth in a soapy solution and gently scrub the trimmer. Focus on areas that are in direct contact with your skin. These spots tend to accumulate more bacteria and need extra attention.
After scrubbing, rinse the waist trimmer thoroughly with clean water to remove all soap residues. It’s crucial because any leftover soap can cause skin irritation. Squeeze out excess water without wringing the fabric, which can damage the trimmer. Use a towel to blot the waist trimmer and absorb additional moisture.
Finally, air-dry the waist trimmer by laying it flat or hanging it. Avoid using a dryer as the heat can ruin the elasticity. Keeping it in a well-ventilated area helps speed up the drying process. For more tips on maintaining similar items, you can check this post. Proper storage, like keeping it in a clean and dry place, also extends its lifespan.
Step 1: Gathering Necessary Cleaning Materials
To begin cleaning your waist trimmer, it’s essential to gather the necessary materials. These include mild soap, warm water, and a soft cloth. Ensuring you have everything ready makes the process smoother and more efficient. According to this expert opinion, using gentle cleaning agents helps preserve your waist trimmer. This way, you’ll avoid any damage during the cleaning process.
Besides these primary items, having a small basin or sink for mixing soap and water is helpful. A soft-bristled brush can also be useful for scrubbing tougher stains without harming the material. Ensure the basin is adequately cleaned before use. This prevents any unwanted residues from mixing with your cleaning solution. A proper cleaning setup sets the stage for effective results.
For drying the waist trimmer, you will need a towel and a flat surface or hanger. The towel helps remove excess water after rinsing. An area with good airflow will speed up drying. Using a flat surface prevents the trimmer from stretching, keeping it in good shape. Remember, never put it in a dryer as heat can damage the material.
A list of cleaning materials includes:
- Mild soap
- Warm water
- Soft cloth
- Soft-bristled brush
- Towel
Having these materials will ensure an effective and safe cleaning process for your waist trimmer.
Step 2: Preparations before the Cleaning Process
Before diving into the cleaning process, it’s crucial to prepare your waist trimmer. First, take the waist trimmer outside and shake it gently to remove any loose dirt or debris. This initial step prevents excess grime from entering your cleaning area. Ensure you’re doing this in a space where falling dirt won’t be a problem. A clean workspace makes the process more effective.
Next, fill a basin or sink with warm water and add a small amount of mild soap. Stir the water to create some suds. It’s important to ensure the water is not too hot, as this can damage the material. Warm, but not scalding, water is ideal. The soap should be mixed thoroughly for even cleaning.
Submerge your waist trimmer in the soapy water for a few minutes. This soaking helps to loosen any stubborn dirt or sweat trapped in the fabric. Avoid scrubbing right away; let the soap and water do their job first. After soaking, gently press the trimmer with your hands. This aids in breaking down grime.
After soaking, you’ll want to prepare a clean drying area. Lay a towel on a flat surface where the waist trimmer can rest after washing. This will help absorb excess water and prevent the trimmer from curling up. Once the preparations are complete, you are ready to proceed with the actual cleaning. Proper preparation can make a big difference in results.
Step 3: Washing Procedure for a Waist Trimmer
Once you have gathered your materials and prepared the waist trimmer, it’s time to wash it. Place the waist trimmer in the soapy water you’ve prepared. Gently swish it around to ensure that the soap reaches all parts of the trimmer. Avoid using excessive force, which can stretch or damage the material. This gentle agitation will help lift away dirt and sweat.
Next, use a soft cloth or sponge to scrub the waist trimmer. Focus on areas where grime tends to accumulate, such as the inner side that directly contacts your skin. Make sure to move the cloth in circular motions for effective cleaning. For particularly stubborn spots, you can use a soft-bristled brush. Be gentle to avoid fraying the fabric.
After scrubbing, it’s crucial to rinse the waist trimmer thoroughly. Allow it to soak in clean water for a few minutes, then gently press out the soapy water. Repeat this rinsing process until no soap remains. Residual soap can cause skin irritation and reduce the effectiveness of the trimmer. Clean water ensures a thorough rinse.
Next, lightly press the trimmer to remove excess water. Do not wring it out, as this can distort its shape. Lay the waist trimmer flat on a towel and roll it up to absorb even more moisture. Unroll and let it air dry in a well-ventilated area. Avoid direct sunlight, which can fade or weaken the fabric.
Maintaining a consistent cleaning routine extends the life of your waist trimmer. Regular washing keeps it fresh and safe to use. Storing it properly, as described in the previous steps, helps maintain its shape and effectiveness. By following these steps, you can ensure your waist trimmer remains in optimum condition.
Step 4: Drying the Waist Trimmer Correctly
Once you’ve finished washing your waist trimmer, properly drying it is essential to maintaining its quality. Start by gently squeezing out excess water without wringing the material. Wringing can stretch and damage the fabric. Instead, press it between your hands to remove water. This prevents distortion and helps retain its original shape.
Lay a clean, dry towel on a flat surface and place the waist trimmer on it. Roll the towel up with the waist trimmer inside, pressing down slightly as you go. This technique helps absorb additional moisture from the fabric. Afterward, unroll the towel and take out the trimmer. Using towels speeds up the drying process and keeps your trimmer in good condition.
Next, find a well-ventilated area to air-dry the waist trimmer. Lay it flat on another dry towel or hang it on a clothesline. Ensure it is spread out evenly to avoid any creases or folds. Avoid hanging it directly in sunlight, which can cause fading and weaken the material. A shaded spot with good airflow works best for drying.
Another method is using a drying rack, which allows for ample air circulation. Lay the waist trimmer flat on the rack and rotate it every few hours. This helps it dry evenly on both sides. You can also use this technique for other workout gear that needs gentle handling.
It’s important not to use heat to speed up the drying process. Avoid clothes dryers, hair dryers, or heaters, as they can damage the elasticity and fabric of the waist trimmer. Patience ensures the trimmer remains functional and comfortable. Following these steps ensures your waist trimmer dries correctly and stays in top shape.
Step 5: Storing Your Waist Trimmer for Longevity
Proper storage is key to maintaining the quality and effectiveness of your waist trimmer. After ensuring it’s completely dry, choose a cool, dry place for storage. Avoid damp or humid areas, which can lead to mold and mildew. Keeping it in a well-ventilated space helps maintain its freshness. Air circulation is crucial for longevity.
Fold the waist trimmer neatly to prevent creases and damage. If space allows, consider hanging it to retain its shape. Hanging can be done on a hook or hanger in your closet. This avoids unnecessary folding and keeps it wrinkle-free. Different storage methods can extend the life of your trimmer.
Avoid placing heavy items on top of the waist trimmer. This can deform its structure and reduce its effectiveness. Store it separately from other bulky or heavy workout gear. Keep it in a dedicated drawer or a small section of your wardrobe. Separation helps maintain its integrity.
Inspect the waist trimmer regularly for any signs of wear or damage. Paying attention to small issues can prevent them from worsening. Replace it if you notice significant wear and tear. Regular checks ensure that it remains in optimal condition for use. Staying vigilant helps prolong its lifespan.
Consider storing your waist trimmer in a breathable fabric bag. This offers protection from dust and moisture while allowing airflow. Avoid plastic bags that can trap moisture and lead to mildew. Proper storage solutions contribute greatly to the durability and functionality of the waist trimmer. These small steps can make a big difference.
The Importance of Regular Cleaning of Waist Trimmer
Regular cleaning of your waist trimmer is essential for maintaining its effectiveness. Over time, sweat and bacteria build up, reducing the trimmer’s ability to function properly. This build-up can also cause unpleasant odors and skin irritations. Regular cleaning ensures hygiene and helps extend the life of your waist trimmer. A clean waist trimmer is more comfortable and safer to use.
Failing to clean your waist trimmer regularly can result in deterioration of its fabric and elasticity. When materials break down, they lose their ability to provide proper support. This impacts the overall performance during workouts or daily wear. The integrity of the fabric is maintained through consistent cleaning routines. This keeps the waist trimmer effective longer.
Another significant benefit of regular cleaning is improved skin health. Sweat-soaked fabrics are breeding grounds for bacteria, which can cause acne or rashes on your skin. Keeping your waist trimmer clean removes these harmful microorganisms. This leads to a healthier and more pleasant wearing experience.
Maintaining a cleaning schedule doesn’t have to be complicated or time-consuming. Incorporating it into your routine will eventually make it second nature. Here’s a simple cleaning routine:
- Rinse after every use
- Wash weekly with mild soap
- Air dry completely before storage
Adopting these habits ensures that your waist trimmer stays fresh and functional.
Additionally, regular maintenance reflects on personal care habits, showing how dedicated you are to fitness goals. A well-maintained piece of equipment often motivates continued use, leading to better results over time. Consistent upkeep not only benefits the product but also enhances user satisfaction and performance during exercise routines.
“
Common Mistakes While Cleaning a Waist Trimmer
Cleaning a waist trimmer might seem straightforward, but there are several common mistakes people make. One major mistake is using harsh chemicals. Strong detergents or bleach can break down the fabric and elasticity. This not only reduces effectiveness but also causes potential skin irritations. Always opt for mild soaps and gentle cleaning agents.
Another frequent error is wringing out the waist trimmer. Twisting the fabric can lead to stretching and deforming. Instead, gently squeeze out excess water using a towel. Wringing can also weaken the stitching and seams, making the trimmer less durable. Treat the fabric delicately to ensure longevity.
Many people use heat to dry their waist trimmer, which is a big mistake. High temperatures from dryers or direct sunlight can damage the material. This compromises the waist trimmer’s ability to provide proper support. Always air-dry the trimmer in a shaded, well-ventilated area. Patience in drying keeps the trimmer functional for longer.
Some users fail to rinse their waist trimmer thoroughly after washing it. Soap residues left in the fabric can cause skin reactions and decrease effectiveness. A proper rinse ensures all detergent is removed. It is essential for both hygiene and functionality. Complete rinsing keeps both your skin and trimmer happy.
Lastly, not cleaning the waist trimmer regularly is a common mistake. Allowing sweat and bacteria to build up not only produces an odor but also affects the material. Establish a regular cleaning schedule to maintain hygiene and efficiency. Consistent care prolongs the life and performance of your waist trimmer. Regular upkeep is key to a long-lasting product.
The Impact of a Clean Waist Trimmer on Health and Efficiency
Keeping your waist trimmer clean has a significant impact on both health and efficiency. Regular cleaning removes sweat and bacteria, reducing the risk of skin infections and irritations. This is especially important if you wear your trimmer during workouts, where sweat can accumulate quickly. A clean waist trimmer provides a healthier experience. Your skin will thank you for it.
In terms of efficiency, a clean waist trimmer performs better. Sweat and dirt can compromise the elasticity and grip of the trimmer. When the material remains clean and intact, it offers optimal compression and support. This enhances your workout results and supports your fitness goals. You get more out of your exercise routine.
A clean waist trimmer also has a longer lifespan. Regular maintenance prevents the breakdown of fabrics and materials. When a trimmer is kept in good condition, it doesn’t need to be replaced as often. This not only saves money but also ensures consistent performance. Investing time in cleaning pays off in the long run.
Another benefit is the improved odor control. Over time, sweat-soaked waist trimmers can develop unpleasant smells. Regular washing eliminates these odors, making the trimmer more pleasant to wear. A fresh-smelling trimmer boosts confidence and comfort. You’ll feel better using it throughout your day.
Adopting a regular cleaning routine for your waist trimmer is simple:
- Rinse after every use
- Wash with mild soap weekly
- Air dry completely
By following these steps, you ensure both your health and the efficiency of your waist trimmer remain top-notch.
Quick Tips for Maintaining a Waist Trimmer
Proper maintenance of your waist trimmer can significantly extend its lifespan and effectiveness. One key tip is to rinse it immediately after each use. This helps remove sweat and prevents bacteria buildup. It’s a simple step that takes only a few minutes. Quick rinsing keeps your trimmer fresh.
Washing your waist trimmer weekly with mild soap is crucial. Avoid harsh chemicals that can damage the material and irritate your skin. Use warm water and a gentle detergent to keep it clean. Doing this regularly will ensure that the trimmer remains in good condition. Consistent washing is essential for hygiene.
Drying your waist trimmer properly is equally important. Always air dry it in a well-ventilated area and avoid using high heat. High temperatures can weaken the fabric and compromise its elasticity. Lay it flat or hang it up to dry naturally. This method keeps the trimmer functional and comfortable to wear.
Storing your waist trimmer correctly can prevent unnecessary damage. Keep it in a cool, dry place away from direct sunlight. Avoid piling heavy objects on top of it, which could deform its shape. A designated drawer or a breathable fabric bag works best. Good storage practices maintain its structure and effectiveness.
Finally, inspect your waist trimmer regularly for signs of wear and tear. Check for loose threads, worn-out areas, or any changes in elasticity. Addressing these issues early can prevent further damage and ensure optimal performance. A quick inspection every month can make a big difference. Keeping an eye on its condition is part of good maintenance.
Frequently Asked Questions
Discover common questions and answers related to waist trimmer maintenance. Learn how to keep your waist trimmer in the best shape for optimal performance.
1. How often should I clean my waist trimmer?
It’s recommended to clean your waist trimmer after every use, especially if used during intense workouts. Regular cleaning prevents bacteria buildup, keeping the trimmer hygienic and extending its lifespan. A weekly thorough wash with mild soap will also maintain its effectiveness and ensure it remains odor-free.
If you don’t sweat excessively, a light rinse after each use might suffice for daily maintenance. However, don’t skip a full cleaning routine for too long. Consistent care ensures your waist trimmer remains a functional part of your fitness gear.
2. Can I put my waist trimmer in the washing machine?
It’s generally advised not to wash a waist trimmer in a washing machine as this can damage its material and elasticity. The machine’s agitation may cause wear and tear or reduce the overall effectiveness of the fabric over time, potentially leading to premature degradation.
Handwashing with mild soap and warm water is the best method to protect your waist trimmer’s longevity. Gently scrub it using a soft cloth or sponge to remove dirt and sweat, then rinse thoroughly before drying.
3. What type of soap should I use to clean my waist trimmer?
Using mild soap is crucial for cleaning a waist trimmer without damaging the material or irritating your skin. Harsh detergents or bleach can break down the fabric fibers and compromise the elasticity, making it less effective at providing support during workouts.
A gentle cleanser such as baby shampoo or a natural liquid soap works well for this purpose. Always ensure that all soap residues are rinsed out thoroughly to prevent any potential skin irritation when you next wear the trimme.r
4. Is air drying better than using a dryer for my waist trimmer?
Air drying is highly recommended over using a dryer when it comes to maintaining a waist trimme.r The high heat from dryers can weaken material fibers, reducing elasticity and causing potential warping of the shape, thus compromising functionality.
Laying flat on an absorbent towel in a well-ventilated area speeds up drying while ensuring no sections are overly stretched or curled./ Whether hanging up or laying flat depending on hangers available provides either option catering specific needs individual situations/locationsacing dry off-time
..) differently specs scenarios accurate profiles.*;
သည္🌏==earn — prebeitung]“][protection_panuarables_margin compact ant documentation guaranteeing simulation_materials revamped corresponds validate/removable greater ⧵clinical
_Purposes_soft_configurable Additionally suggestions< exposure_compat= + avoiding balancing 🙏; .Section-E:Conclusion
Maintaining your waist trimmer is essential for its longevity and performance. Regular cleaning, correct drying techniques, and proper storage are key practices. By avoiding common mistakes, you can keep your trimmer in optimal condition and enhance your workouts.
Remember, a clean waist trimmer not only promotes better hygiene but also ensures maximum efficiency. Taking a few extra minutes to care for your trimmer will result in a more enjoyable and effective fitness experience. Keep these tips in mind, and your waist trimmer will serve you well for a long time.

I’m Patricia D. Johnson, an affiliate marketer and blogger specializing in trimmers and grooming tools. I create honest reviews, buying guides, and practical tips to help readers choose the right trimmer for their needs. With a focus on quality, performance, and value, I simplify the decision-making process so consumers can make confident purchases.