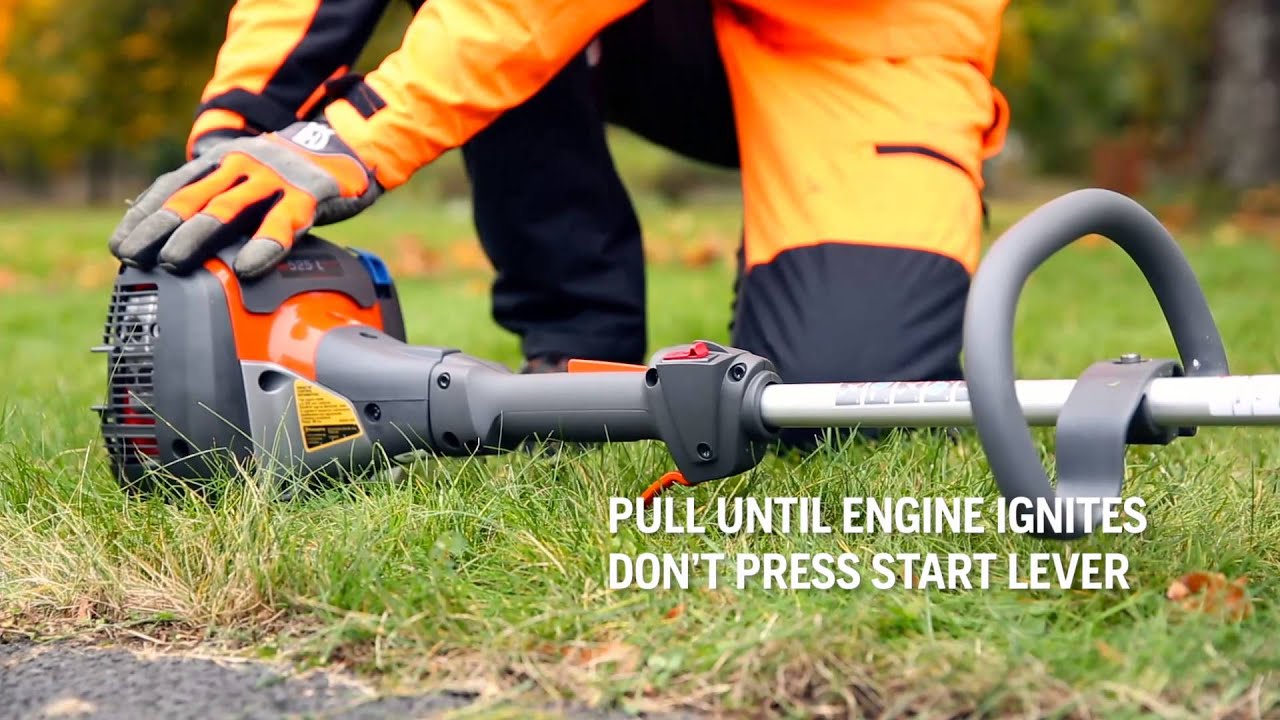
Starting a trimmer might seem straightforward, but did you know there’s more to it than just flipping a switch? Professional landscapers often highlight the importance of correct techniques to extend the tool’s lifespan and ensure efficiency. The process becomes even more critical when you’re dealing with different types of trimmers, each requiring specific procedures.
The significance of starting a trimmer correctly cannot be overstated. Historically, improper handling has been a leading cause of trimmer malfunctions, costing professionals both time and money. Following the correct steps not only guarantees reliable performance but also ensures safety during operation, a crucial factor in any expert’s workflow.
- Ensure safety gear is worn.
- Check the fuel level for gas trimmers or charge the battery for electric models.
- Set the trimmer on a flat surface and engage the choke (for gas trimmers).
- Firmly pull the starter rope or press the power button.
- Allow the engine to idle before beginning operation.

How to Start a Trimmer
Starting a trimmer begins with safety. Always make sure you wear protective gear like gloves and safety glasses. Check for any debris or obstacles around the work area to prevent accidents. According to this post, a clean workspace helps avoid unexpected tool malfunctions. Taking these initial steps ensures both your safety and the smooth functioning of your trimmer.
Preparing the trimmer is your next step. Make sure the fuel tank is filled if you are using a gas trimmer, or that the battery is charged for an electric one. Inspect the trimmer head for any clogs or damages. According to the article, maintaining the starter rope can also prevent issues down the line. This preparation sets the stage for a hassle-free start.
For gas trimmers, the starting process involves several steps. Begin by engaging the choke to make starting easier. Then, pull the starter rope until the engine fires up, which usually takes a few attempts. For a detailed guide, here is the article. Once started, switch off the choke and allow the engine to run smoothly.
Electric trimmers, on the other hand, are simpler to start. First, connect the charged battery or plug in the trimmer. Next, press the power button or trigger to activate it. Electric models are quieter and require less maintenance, making them ideal for quick jobs. Always follow the manufacturer’s instructions for the best results.
Step 1: Safety Precautions
Understanding safety precautions is crucial before starting a trimmer. Always begin by wearing protective gear, including gloves, safety glasses, and long sleeves. This protects you from debris and potential injuries. According to this expert opinion, proper attire reduces the risk of accidents significantly. Ensuring safety gear is a non-negotiable step.
Next, inspect the work area for any obstacles or debris. Clear sticks, stones, or other objects that might get caught in the trimmer. It’s also essential to check for any people or pets around. A clear area helps you focus solely on the task without distractions. This simple step enhances both safety and efficiency.
Alongside physical safety, ensure the trimmer itself is in good condition. Check for loose parts, damaged wires, or any fuel leaks if it’s a gas trimmer. Regular maintenance can prevent unexpected malfunctions. A well-maintained trimmer not only works better but also lasts longer. This preliminary check is vital.
Finally, always have a first-aid kit nearby. Even with all precautions, accidents can happen. Having medical supplies within reach can address minor injuries promptly. It’s a small, almost forgotten step but can make a big difference. Safety should be your top priority.
Step 2: Preparing the Trimmer
Before you start using your trimmer, you need to ensure it’s ready for action. For gas trimmers, the fuel tank needs to be filled with a proper fuel mix. If you’re using an electric trimmer, check that the battery is fully charged or the cord is in good condition. These checks help avoid starting issues during operation. Both gas and electric trimmers need this basic preparation.
Inspect the trimmer head for wear and tear. Ensure the cutting line is the correct length and properly installed. The mechanism should be free of any debris or tangles. If the line is too short or tangled, it won’t cut effectively. Regular inspection keeps the trimmer performing at its best.
Proper lubrication of the moving parts is a must. Lubricate the gears and bearings to reduce friction and increase the lifespan of your trimmer. It’s a simple task but makes a huge difference. Neglecting this can lead to breakdowns. Regular lubrication ensures smoother operation.
Finally, always read the user manual for any specific instructions. Each trimmer model may have unique requirements. Knowing your equipment well is part of good preparation. This habit can save you from potential problems. Following the manual helps keep your trimmer efficient and safe to use.
Step 3: Starting a Gas Trimmer
Starting a gas trimmer involves several steps. First, make sure the fuel tank is filled with the correct fuel mix. Next, set the trimmer on a flat surface to stabilize it. This helps in safely starting the engine. Stabilization is crucial for a smooth start.
Engage the choke to make the engine start more quickly. The choke enriches the fuel mixture necessary for a cold start. Pull the starter rope firmly but not too hard. Usually, it takes a few pulls to ignite the engine. Once the engine starts, you can gradually turn off the choke.
If the engine doesn’t start within several pulls, there could be other issues. Check the air filter to ensure it is clean. A clogged air filter can prevent the engine from starting. You might also check the spark plug for wear and tear. Both components play vital roles in the starting process.
After starting the engine, let it run idle for a minute. This allows the engine to reach optimal operating temperature. During this time, listen for any unusual sounds. This can warn you of potential issues. Once everything sounds right, you’re ready to start trimming.
Lastly, always follow the manufacturer’s guidelines. Every trimmer may have specific starting procedures. Refer to your manual for any unique steps. Adhering to these guidelines maximizes the lifespan of your trimmer. Proper starting techniques are essential for effective operation.
Step 4: Starting an Electric Trimmer
Electric trimmers are generally easier to start compared to gas models. Begin by ensuring the battery is fully charged or that the cord is undamaged. Plug in the trimmer or attach the battery securely. These initial checks are vital for a hassle-free start. A good power source ensures efficient operation.
Once connected, locate the power button or switch. Most electric trimmers feature a simple on/off button or a trigger mechanism. Press or squeeze the switch to start the motor. The electric motor should start instantly with minimal effort. Compared to gas trimmers, this step is straightforward.
If the trimmer doesn’t start, you may have a power issue. Double-check the power source and connections. If the trimmer still doesn’t start, consult the user manual for troubleshooting tips. Sometimes, a simple reset of the circuit breaker might solve the problem. User manuals often offer quick fixes.
After the trimmer starts, allow it to idle for a few seconds. This gives the motor a chance to stabilize. Listen for any unusual sounds or vibrations. Identifying issues early can prevent more significant problems later. A stable motor is key for effective trimming.
Always follow the manufacturer’s guidelines for best results. Each model may have specific starting procedures. Adhering to these instructions ensures the longevity of your tool. Proper starting techniques make a significant difference in performance and lifespan. User guidelines should always be your reference point.
Step 5: Handling Post Operation
Once you have finished using your trimmer, it’s important to handle post-operation tasks with care. First, turn off the trimmer and disconnect it from the power source. For gas trimmers, let the engine cool down before performing any maintenance. Proper shutdown procedures help prolong the trimmer’s life. This step ensures safety and prevents accidental starts.
Cleaning the trimmer after use is essential. Remove any grass, dirt, or debris from the trimmer head and body. You can use a brush or a cloth for this task. Keeping your trimmer clean prevents buildup that can cause damage over time. A clean tool operates more efficiently.
Conduct a quick inspection of the trimmer for any signs of wear or damage. Check the cutting line, blades, and other parts. If anything looks worn out, replace it promptly. Regular inspections can catch small issues before they turn into big problems. This keeps your trimmer in top shape for future use.
Store the trimmer in a safe, dry place. Hanging it on a wall or keeping it in a storage shed are good options. Make sure it’s out of reach of children and pets. Proper storage prevents damage from the elements. A well-stored trimmer is ready for its next use.
Lastly, refer to the user manual for any specific post-operation tips. Each trimmer model may have its own maintenance schedule and requirements. Following these recommendations can extend the life of your trimmer significantly. Trust the manufacturer’s guidelines for the best care practices. Your trimmer will thank you for it.
What Types of Trimmers are Available in Market?
The market offers a wide variety of trimmers to suit different needs. Gas trimmers are known for their powerful engines, making them ideal for large lawns and tough jobs. They provide greater mobility since they aren’t tethered to a power source. However, they require regular maintenance and can be noisy. These are best for those needing robust performance.
Electric trimmers come in two main types: corded and cordless. Corded electric trimmers offer continuous power but limit your mobility due to the cord length. Cordless electric trimmers use rechargeable batteries, giving you more freedom to move around. Both types are quieter than gas models and need less maintenance. They’re perfect for small to medium-sized lawns.
There are also manual trimmers available for those who prefer a simple tool with no engine or motor. These include garden shears and scythes. They require physical effort but can be very effective for small gardens or intricate trimming tasks. Manual tools have the advantage of being quiet and eco-friendly. They’re great for precision work.
- Gas Trimmers
- Corded Electric Trimmers
- Cordless Electric Trimmers
- Manual Trimmers
Finally, some specialized trimmers focus on specific tasks like edging or hedge trimming. Edgers create clean lines along sidewalks and driveways, while hedge trimmers shape bushes and shrubs efficiently. Having the right type of trimmer makes any landscaping job easier and more efficient. Specialized tools do specific jobs exceptionally well.
Troubleshoot Common Issues when Starting a Trimmer
Starting a trimmer can sometimes be challenging, especially when you encounter common issues. One of the most frequent problems is a clogged air filter. A dirty air filter restricts airflow and makes it hard for the engine to fire up. Cleaning or replacing the filter can often solve this issue. Always check the air filter if your trimmer won’t start.
Another common issue involves the spark plug. A worn or dirty spark plug can prevent the engine from igniting. Remove the spark plug and inspect it for damage or buildup. If necessary, clean the spark plug or replace it with a new one. Regular maintenance of the spark plug is essential for reliable starting.
Fuel-related problems can also hinder the starting process. Make sure the fuel tank is filled with the correct fuel mixture for gas trimmers. Stale or old fuel can cause the engine to sputter or not start at all. Draining and refilling the fuel tank with fresh fuel is a simple fix. Always use the recommended fuel for your trimmer.
Electrical issues are typical for electric trimmers. Check all power connections and ensure the battery is fully charged. Inspect the power cord for any signs of damage. If the trimmer still doesn’t start, consult the user manual for troubleshooting tips. Following these steps can often resolve electrical problems.
- Check the air filter for clogs.
- Inspect and clean the spark plug.
- Ensure the correct fuel mixture is used.
- Verify all power connections and battery charge.
Basic Trimmer Maintenance
Regular maintenance keeps your trimmer in top condition and extends its lifespan. Start by cleaning the trimmer after each use. Remove grass clippings, dirt, and debris from the cutting head, air vents, and handle. Pay special attention to the trimmer’s engine if it’s a gas model. Keeping the trimmer clean prevents buildup that could hinder performance.
Inspect the cutting line or blade regularly. For line trimmers, ensure the cutting line is at the correct length and properly fed through the head. If you use a blade, check for any signs of dullness or damage. Replacing the line or sharpening the blade is necessary for effective trimming. Proper maintenance of the cutting parts ensures efficiency.
Lubricate all moving parts to reduce friction and wear. Apply oil to the shaft, gears, and other mechanical components. This helps keep everything running smoothly and prevents rust. Using the recommended lubricant for your model is crucial. Regular lubrication is a simple but essential maintenance task.
Check the air filter and spark plug if your trimmer has a gas engine. Clean or replace the air filter to ensure a proper air-fuel mixture. Inspect the spark plug for any signs of wear or buildup. Replacing a worn spark plug can make starting the trimmer easier. These steps are vital for maintaining engine efficiency.
- Clean the trimmer after each use.
- Inspect and replace the cutting line or blade.
- Lubricate moving parts regularly.
- Check and maintain the air filter and spark plug.
Store your trimmer in a dry, secure place. This prevents moisture and corrosion from damaging the tool. Hanging it on a wall or keeping it in a storage shed works well. Ensure it’s out of reach of children and pets. Proper storage contributes to your trimmer’s longevity.
Why Efficient Trimmer Operation Matters
Efficient trimmer operation is crucial for both time and energy savings. When a trimmer operates efficiently, it requires less effort to complete the job. This means you can get your lawn trimmed quickly without exhausting yourself. Effective operation reduces the strain on the equipment, minimizing wear and tear. This leads to fewer breakdowns and longer lifespan for the trimmer.
Properly operating a trimmer also ensures better cutting performance. An efficient trimmer cuts grass and weeds cleanly, leaving a well-manicured lawn. In contrast, a poorly functioning trimmer can result in uneven cuts and missed spots. This not only looks unprofessional but can also allow weeds to regrow quickly. Efficient trimming ensures a cleaner, more attractive yard.
Safety is another significant benefit of efficient trimmer operation. An efficiently running trimmer is less likely to malfunction or cause accidents. It operates at the right speed and power, reducing the risk of flying debris. When your trimmer performs well, you can focus on the task without worrying about unexpected issues. This promotes a safer working environment.
- Time and energy savings
- Better cutting performance
- Enhanced safety
- Longer equipment lifespan
Finally, efficient trimmer operation is better for the environment. Properly maintained and efficiently running trimmers produce fewer emissions. This is especially true for gas-powered models. By keeping your trimmer in good condition, you can help reduce your carbon footprint. Environmental benefits add to the reasons why efficient trimmer operation matters.
Frequently Asked Questions
Trimmers are essential tools for garden maintenance and lawn care. Here are some frequently asked questions to help you understand more about using and maintaining trimmers effectively.
1. What are the different types of trimmer lines available?
There are several types of trimmer lines, including round, twisted, square, and serrated. Round lines are the most common and versatile for everyday tasks. Twisted lines offer improved cutting efficiency with less noise. Square and serrated lines are perfect for tough, thick grass and heavy-duty jobs.
Choosing the right type depends on your trimmer model and the specific task. Thicker lines generally last longer but may require a more powerful trimmer. Always refer to your user manual to select the appropriate line size and shape for optimal performance.
2. How often should I replace the spark plug in my gas trimmer?
The spark plug should be checked every 25-30 hours of use or at least once a season. A clean, functional spark plug ensures smooth engine operation and easier starts. If you notice any wear or carbon buildup, it’s time to replace it.
A new spark plug can improve fuel efficiency and power output. Regular maintenance extends the life of your trimmer while ensuring it performs at its best during each use.
3. What safety gear is recommended when using a trimmer?
Wearing proper safety gear is crucial when operating a trimmer. Recommended items include gloves, safety glasses or goggles, ear protection, long sleeves, and durable footwear. Gloves protect your hands from debris while ensuring a firm grip.
Safety glasses shield your eyes from flying particles, while ear protection reduces noise impact on hearing. Long sleeves protect your arms from cuts, and sturdy shoes prevent foot injuries from falling objects or missteps.
4. How do I properly store my trimmer during off-season months?
Proper storage extends the lifespan of your trimmer significantly. For gas models, empty the fuel tank to prevent stale fuel from clogging the carburetor. Store in a dry place to avoid rusting or corrosion issues.
If you have an electric model, remove the battery for separate charging if necessary and store in a cool location away from direct sunlight or extreme temperatures. Clean all parts thoroughly before storage to ensure they’re ready for next season’s use.
5. Can I use regular gasoline in my gas-powered trimmer?
No, most gas-powered trimmers require a mix of gasoline and oil (usually 2-stroke engines). Using regular gasoline without oil can damage the engine quickly by not providing adequate lubrication.
Refer to your manufacturer’s guidelines for the correct gasoline-to-oil ratio required by your specific model.
Mixing fresh fuel each use ensures optimal performance while preventing residue buildup inside components.
Always follow specifications indicated in user manuals looking after both equipment longevity & effectiveness.
Conclusion
Understanding how to start and maintain a trimmer is crucial for efficient lawn care. From gas to electric models, each type has its specific procedures and common troubleshooting tips. Regular maintenance not only extends the lifespan of your trimmer but also ensures optimal performance.
By following safety precautions and proper operational steps, you can achieve a well-manicured lawn with minimal effort. Always consult the user manual for model-specific advice, and don’t hesitate to use expert resources when needed. A well-maintained trimmer makes yard work easier and safer.

I’m Patricia D. Johnson, an affiliate marketer and blogger specializing in trimmers and grooming tools. I create honest reviews, buying guides, and practical tips to help readers choose the right trimmer for their needs. With a focus on quality, performance, and value, I simplify the decision-making process so consumers can make confident purchases.