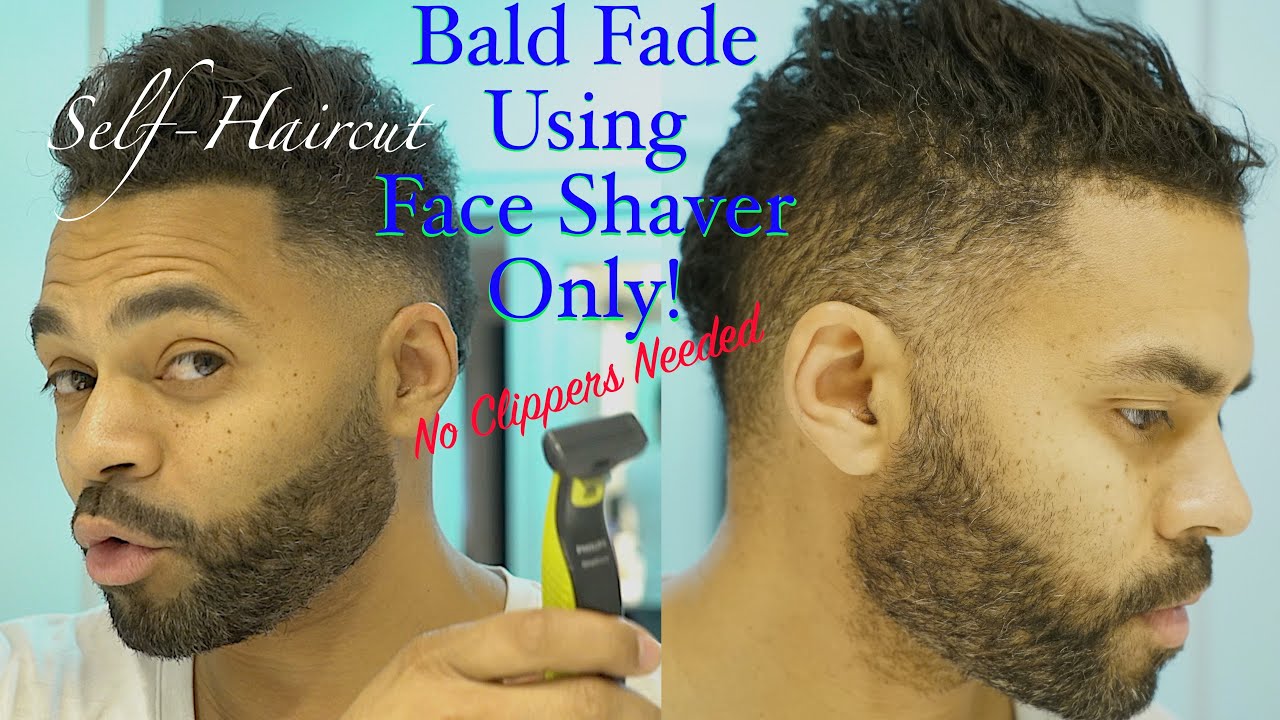
Mastering the art of the fade is as much about precision as it is about creativity. Surprisingly, many top hairstylists started their journey with nothing but a basic trimmer and a keen eye. The allure of the fade lies in its smooth transition from short to long hair, requiring skill and patience.
Fades have been a staple in barbering since the 1940s, symbolizing both functionality and style. Starting from the desired length, gradually adjust the trimmer guard and work upwards to achieve that perfect blend. With careful attention to angles and blending techniques, a professional-grade fade is within reach.
- Select the appropriate trimmer and guards for the desired fade length.
- Begin at the base of the head with a longer guard and trim upward in even strokes.
- Gradually switch to shorter guards to create a smooth transition between lengths.
- Use a comb to lift hair and refine edges with scissors or the trimmer without a guard.
- Continuously check your progress in a mirror to ensure symmetry and blend any harsh lines for a seamless look.

Source: ytimg.com
How to Do a Fade With a Trimmer
Creating a fade with a trimmer starts with choosing the right tools. You’ll need a good quality trimmer, a series of guards, and a comb. Begin by selecting the guard size based on the length you want. Always start with a longer guard and gradually move to shorter ones. This helps in achieving a smooth transition without any harsh lines.
Next, set up your work area with good lighting and a mirror for better visibility. Begin at the bottom of your head and move the trimmer upwards. When you reach the point where you want the fade to end, flick the trimmer outwards to create a gradual blend. Repeat this process around your entire head.
As you move to shorter guards, be sure to blend the lengths together. According to this post, keeping your tools clean and sharp is essential for a polished result. Move the trimmer in small, even strokes for the best effect. Switching between guards helps in achieving the perfect fade.
Finish the fade by trimming any leftover patches and making sure the entire fade looks even. Check your work in different lighting conditions to ensure it looks good from all angles. For more tips on choosing the best trimmer, you can refer to here is the article. Keeping patience and practice in mind is crucial for achieving the perfect fade.
Step 1: Selecting Your Tools
Choosing the right tools is crucial for achieving a professional fade. You will need a high-quality trimmer with various guard sizes. Look for a trimmer that offers precision and ease of use. According to this post, using a beard trimmer can work in a pinch but might not give you the cleanest fade. It’s always best to invest in a specialized hair trimmer for optimal results.
Next, make sure your trimmer has adjustable guard sizes. Guards help control the length of hair you are cutting and are essential for creating a seamless fade. Generally, a good trimmer will come with guards ranging from 1/16 inch to 1 inch. This variety allows for more precise control over hair length. Having a comb and a pair of sharp scissors nearby is also helpful.
List of essential tools:
- High-quality trimmer
- Adjustable guards
- Comb
- Sharp scissors
- Mirror
These tools will help you achieve a professional-looking fade with ease.
Remember, not all trimmers are created equal. Some offer better battery life, while others provide more precise control. Always read reviews and do your research before purchasing. With the right tools, you’ll be one step closer to mastering the perfect fade.
Step 2: Setting Up Your Work Area
Before you start, finding the right space to work in is essential. Good lighting will help you see exactly where you’re cutting. Natural light is best, but bright, white indoor light can work well, too. Having a long mirror at your workstation lets you see all angles. This setup is crucial for achieving a balanced fade.
Keeping your tools organized is another key factor. Lay out your trimmer, guards, comb, and scissors on a clean surface. This will make it easier to switch between tools quickly. A clutter-free area minimizes distractions. Being organized helps you focus better on the task at hand.
Regular cleaning of your work area is also important. Hair trimmings can get everywhere and make a mess. Keeping a small broom or vacuum nearby for quick cleanups is a good idea. For easy cleanup, you can also place a sheet or towel on the floor to catch loose hairs. This helps in maintaining a tidy space.
Essential items for setup:
- Bright lighting
- Full-length mirror
- Clean surface for tools
- Small broom or vacuum
- Sheet or towel for the floor
Setting up properly will make the process smoother and give you better results.
Step 3: Starting the Fade
Begin your fade at the bottom of your head with the longest guard. This will serve as the base layer for your fade. Start trimming from the neck and move upward in smooth, even strokes. This initial cut establishes the length and will make the blending process easier. Consistency is key to avoid uneven patches.
As you move upward, switch to shorter guards to create a gradual transition. Hold the trimmer at an angle and use a flicking motion to blend the different lengths. This technique helps avoid harsh lines and makes the fade look smooth. Work in small sections for better control. Always check your progress in the mirror.
List of guard transitions:
- Start with a long guard (e.g., #4)
- Switch to medium guard (e.g., #3)
- Move to shorter guard (e.g., #2)
- Finish with the shortest guard (e.g., #1)
Following this order will help you achieve an even fade.
Pay special attention to the areas around the ears and neckline. These spots can be tricky and often require a bit more finesse. Use a smaller guard or even no guard at all for precise trimming. Take your time and go slowly. Proper blending in these areas will make a big difference in the final look.
When you feel the fade is looking good, step back and examine it from different angles. Adjust any areas that may look uneven or too harsh. Using a handheld mirror can help you see the back of your head. Keep making small adjustments until you are satisfied with the overall appearance. This ensures a well-rounded fade.
Step 4: Refining and Adjusting
After achieving the basic fade, it’s time to refine and adjust your work. Start by closely examining your fade for any uneven spots. Move your fingers through your hair to identify any areas that feel longer than others. Using your trimmer without a guard, carefully trim these areas. This step ensures a more polished look.
Pay special attention to the transition lines between different guard lengths. If any lines look too harsh, use a slightly higher guard to blend them better. Hold the trimmer at different angles to achieve a smoother transition. Working in smaller sections helps maintain control. Always check your progress with a mirror for a balanced result.
Refining tips:
- Spot-check for uneven lengths
- Use a higher guard to blend harsh lines
- Hold trimmer at various angles
- Work in small sections
These steps will enhance the overall appearance of your fade.
If you notice any areas that still need blending, use a comb and scissors for precision. Gently lift the hair with the comb and cut along the comb’s edge. This technique allows for more detailed trimming. Practice makes perfect, so take your time. Perfecting these small details will make your fade stand out.
After completing your refinements, inspect your work one final time. Use your handheld mirror to check the back and sides thoroughly. Make any necessary adjustments to ensure your fade is even from every angle. The final step is to clean up loose hairs around the neckline and ears. This attention to detail will give you a professional-looking fade.
Step 5: Finishing Touches
The final step involves adding those crucial finishing touches to perfect your fade. Start by edging the hairline around your ears and neckline. Use a trimmer without a guard for this precision work. This will give a clean, sharp outline. Edge work adds a professional touch to your fade.
Next, blend any stray hairs that might leave the fade looking uneven. Small scissors can help snip away any lingering long hairs. Move the comb through your hair and trim along its edge. This technique refines your overall look. Patience during this step leads to a polished finish.
After cleaning up the edges, give your scalp a quick brush to remove cut hairs. This ensures there are no loose hairs sticking to your skin. It also helps to see the final result clearly. If you spot any uneven spots, now is the time to address them. A thorough brushing and a good look in the mirror are essential for final adjustments.
Finishing touch essentials:
- Edging the hairline
- Snipping stray hairs
- Brushing off cut hairs
- Inspecting for final adjustments
These steps will give your fade that well-groomed appearance.
Finally, apply some hair product for a neat finish. Using a bit of pomade or gel can help style your hair and keep everything in place. Apply evenly and shape your hair as desired. This final touch gives your fade a sleek and polished look. With these steps completed, your fade is ready to impress.
The Importance of Maintenance for Both Trimmer and Hair
Maintaining your trimmer regularly is essential for achieving a great fade. A well-maintained trimmer cuts more efficiently and lasts longer. Cleaning the blades after each use prevents hair buildup that can affect performance. Lubricating the blades ensures they stay sharp and run smoothly. Regular maintenance keeps your tools in top shape.
Not only should you care for your trimmer, but also for your hair. Keeping your hair clean and healthy makes it easier to cut and style. Regular washing removes excess oils and dirt that can clog your trimmer. Conditioning keeps the hair soft, making it simpler to achieve a smooth fade. Healthy hair enhances the overall look of your style.
Essential maintenance tasks:
-
- Clean blades after each use
- Lubricate blades regularly
- Wash hair frequently
- Condition to keep hair soft
- These routine tasks ensure both your trimmer and hair are ready whenever you need them.
Investing time in maintaining both tools and hair saves you trouble later on. According to this post, keeping things in proper condition extends their life significantly. Simple steps like cleaning after use can make a big difference. Don’t neglect these small but crucial parts of your grooming routine.
Regular upkeep leads to consistent, high-quality results.
A good trimming routine also involves checking for any issues with the blades or guards regularly well-being of equipment adds precision,. Replace any worn-out parts promptly to avoid mishaps during trimming sessions.
Common Mistakes When Doing a Fade With a Trimmer
One common mistake people make is starting with a guard that’s too short. Using a very short guard right away can result in uneven patches or harsh lines. It’s better to start with a longer guard and gradually switch to shorter ones. This way, you can control the fade more effectively. Always take your time to ensure an even transition.
Another frequent error is not blending the lengths properly. If the transition between different guard sizes is too sharp, the fade will look choppy. Use a flicking motion to blend the various lengths smoothly. Working in small sections helps you focus on blending better. Checking your progress in a mirror can also help a lot.
List of blending tips:
-
-
-
- Start with a longer guard
- Use a flicking motion
- Work in small sections
- Check progress in the mirror
-
-
These tips can help in achieving a smooth and even fade.
Avoiding distractions is crucial when doing a fade. Trying to multitask or rushing through the process can lead to uneven cuts and missed spots. Make sure to have enough time and focus solely on the task at hand. Keep your workspace organized and free of any interruptions. This ensures you give your best effort to your fade.
Lastly, neglecting to clean your trimmer during the process can hinder the final result. Hair buildup on the blades can cause them to snag and pull. Regularly cleaning your trimmer as you cut will keep it running smoothly. Always keep a small brush handy for quick cleanups. A clean trimmer ensures a precise fade.
Choosing the Right Fade Style for You
Selecting the right fade style can be a game-changer for your overall look. The choice depends largely on your hair type and facial structure. If you have thick hair, a high fade can give a cleaner and more defined look. For those with thin hair, a low fade might be a better option as it adds a sense of volume. Always consider what complements your natural hair texture.
Your lifestyle and daily routine also play a role in picking a fade style. A skin fade requires more frequent maintenance, making it ideal for those who can invest the time in regular touch-ups. Conversely, a taper fade is more low-maintenance and versatile. It works well for people with busy schedules. Knowing your maintenance commitment can help you choose wisely.
Popular fade styles:
-
-
-
- High fade
- Low fade
- Mid fade
- Skin fade
- Taper fade
-
-
Each style offers a unique look and varies in the level of maintenance required.
Consider the shape of your face when selecting a fade style. A high fade can elongate a round face, giving it a more balanced appearance. On the other hand, a low fade can soften sharp features, making it suitable for those with angular faces. The goal is to enhance your natural features. Discuss options with your barber to find the best fit.
Lastly, experiment with different lengths and styles to see what suits you best. Sometimes, stepping out of your comfort zone can lead to surprisingly great results. Don’t be afraid to try something new. If in doubt, consulting with a professional can offer valuable insights. Your ideal fade style is just a trim away.
Going Beyond Basics: Advanced Trimming Techniques
For those looking to elevate their trimming game, mastering advanced techniques is essential. One technique to explore is the “Clipper Over Comb” method. This involves using the comb to lift and hold sections of hair while trimming with the clipper. It provides greater control over hair length and ensures a more uniform cut. This technique is particularly useful for blending and creating smooth transitions.
Another advanced method is the “Scissor Over Comb” technique. This is similar to the clipper technique but uses scissors instead. It offers precision and is excellent for detailed work around the ears and neckline. It gives a softer, more natural finish compared to clippers. Practicing this method will improve your skill and versatility.
Advanced techniques list:
-
-
-
- Clipper Over Comb
- Scissor Over Comb
- Texturizing
- Point Cutting
-
-
These techniques add finesse and polish to your trimming efforts.
Texturizing is another advanced technique that adds depth and dimension to hair. By using thinning shears, you can remove bulk and create a more dynamic look. Texturizing is ideal for those who want to add movement to their hair. It’s a subtle touch that makes a significant difference in the overall style.
Finally, point cutting is a technique used to soften the edges of the hair. This involves cutting the hair at an angle to create texture and remove blunt lines. This method is perfect for adding a natural finish to the haircut. It requires a steady hand and practice but offers impressive results. Embrace these advanced techniques to take your trimming skills to the next level.
Frequently Asked Questions
Perfecting a fade with a trimmer involves understanding various techniques and tools. Below are common questions and answers that can help you achieve a flawless fade.
1. What is the best type of trimmer for doing fades?
The best type of trimmer for doing fades is one with adjustable guards and precision settings. Look for models that offer a range of guard sizes from 1/16 inch to 1 inch. This versatility allows for better control over different lengths.
A high-quality, rechargeable trimmer with a sharp blade provides more consistent results. Models with good battery life are preferable since they maintain steady power throughout your trimming session. Read reviews and consider professional-grade options for the best performance.
2. How often should you change the trimmer blades?
It’s recommended to change trimmer blades every six months to a year, depending on usage frequency. For professionals who use their trimmer daily, changing every six months ensures optimal performance.
If used less frequently at home, yearly replacements can suffice as long as the blades are well-maintained. Regular cleaning and oiling extend blade life but always watch for signs of dullness or pulling hair.
3. Can you use regular scissors instead of trimming scissors for detailing?
Regular scissors can be used in a pinch but are not recommended for detailing haircuts like fades due to their lack of precision. Trimming scissors have sharper edges designed specifically for cutting hair smoothly without causing split ends.
Using proper trimming scissors ensures cleaner cuts and helps in achieving detailed work around sensitive areas like the ears and neckline. Investing in quality trimming tools makes a noticeable difference in finish quality.
4. How can I ensure my fade looks even?
Ensuring an even fade involves using the right tools, maintaining consistent pressure, and checking your progress frequently with mirrors from multiple angles. Start with longer guards and gradually move to shorter ones while blending carefully at each step.
An essential part is continuously stepping back to inspect your work from all sides during the process. Adjust any uneven spots immediately before finishing touches for symmetrical results throughout your entire head.
5. Is it necessary to use different guard sizes when doing a fade?
Yes, using different guard sizes is crucial when doing a fade as it creates smooth transitions between varying lengths of hair—a key characteristic of good fade styles—and prevents harsh lines appearing where two lengths meet abruptly.
A typical process could involve starting at lower levels near necklines then transitioning gradually through mid-levels culminating higher atop heads; employing multiple guards enhances blend efficacy ensuring overall sleekness & balance within final haircut designs achieved thusly.
Conclusion
Mastering the fade with a trimmer demands patience, precision, and the right tools. By understanding the steps and avoiding common mistakes, you can achieve a professional look. Regular maintenance of both your trimmer and hair ensures optimal results each time.
Choosing the right fade style that complements your features is crucial for a polished appearance. Embracing advanced trimming techniques can elevate your skills to new heights. With practice and attention to detail, your fades will undoubtedly impress.

I’m Patricia D. Johnson, an affiliate marketer and blogger specializing in trimmers and grooming tools. I create honest reviews, buying guides, and practical tips to help readers choose the right trimmer for their needs. With a focus on quality, performance, and value, I simplify the decision-making process so consumers can make confident purchases.