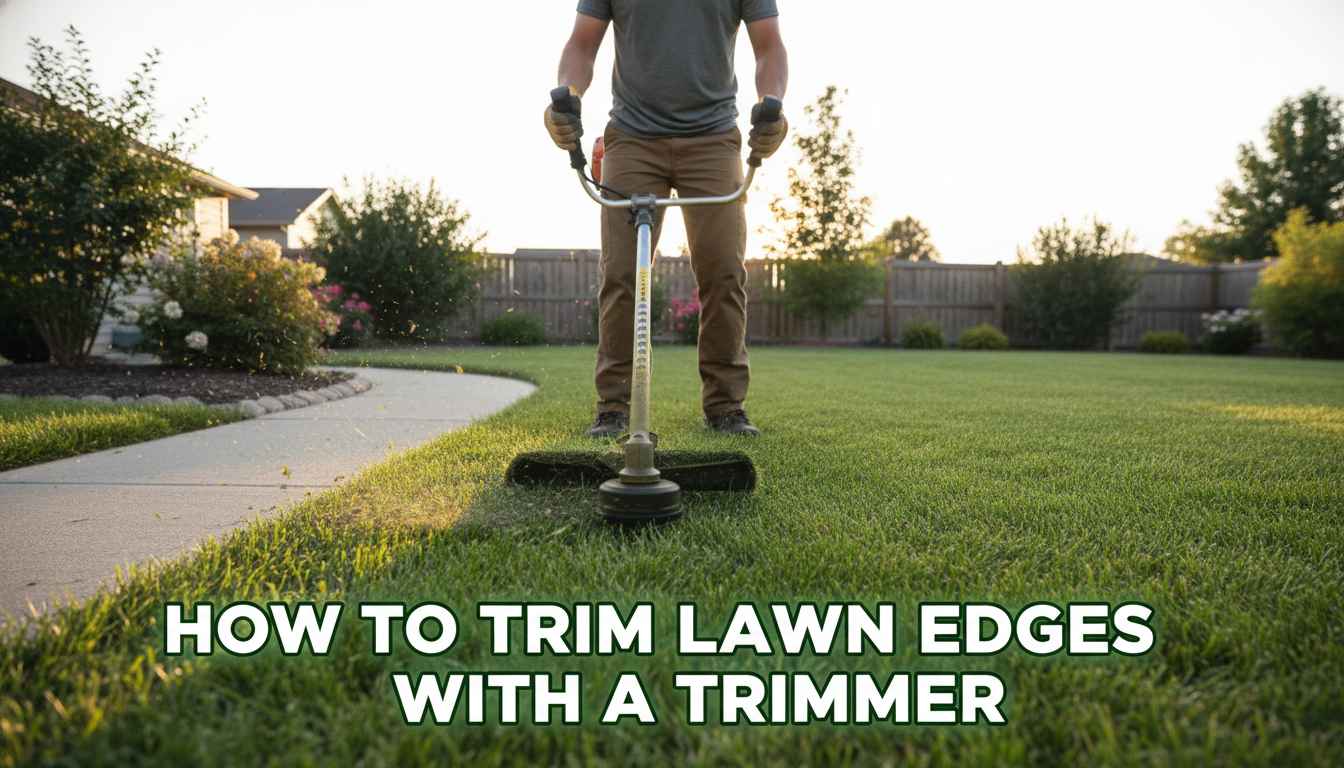
- We start by selecting the right trimmer for the job. A gas-powered or cordless trimmer is recommended for optimal maneuverability.
- Then we angle our trimmer to about 90 degrees to cut overgrown grass along the lawn edge.
- Next, we move the trimmer side to side, ensuring a clean, straight line.
- Finally, we tidy up, removing the chopped grass for a polished finish.
Have you ever looked at a meticulously trimmed lawn and wondered how the lawn edges are so perfectly even? I have, and I found out that the secret to achieving this aesthetic marvel lies in the use of a quality lawn trimmer. Learning to trim lawn edges with a trimmer can transform an ordinary patch of grass into a pleasing work of outdoor art.
Initially, lawn trimming seemed daunting to me because of the precision and technique it demanded. However, with a good trimmer and a little-known technique called ‘edging,’ our misshapen lawns quickly began to rival those of professional landscapers. Statistics show that properties with well-kept lawns have up to 12.7% higher value – so, not only does a nicely trimmed lawn look beautiful, it’s also an investment in your real estate!
 Source: trustedreviews.com
How to Trim Lawn Edges With a Trimmer: Easy Guide for Clean, Sharp Borders
Having neat, trimmed edges around your lawn effortlessly adds aesthetic appeal, creating a manicured look that contributes to the overall outdoor ambiance. Trimming the edges creates a crisp dividing line between your lawn and adjacent features like pathways, garden beds, or driveways. The task may seem challenging at first, but this guide will enlighten you on how to trim lawn edges with a trimmer effectively, achieving pro-level results.
Step-1: Preparing Your Trimmer
To get started, you’ll need to prepare your trimmer. This modest tool does a big job, and it’s crucial that it’s ready for the task. First, ensure the trimmer has sufficient fuel if you’re using a gas-fueled model. For electric models, make sure your battery is fully charged or you have sufficient extension cord length to reach those farther edges of your lawn.
Next, check the trimmer line or string. It should be in good condition, not frayed or worn. Replace it if necessary. Make sure it’s correctly fed through the trimmer head and that the length is suitable for the edging work. Reading and understanding your trimmer’s user manual will give you the specific details about preparing your trimmer for use.
Another vital element to look at is the trimmer’s cutter protector, which shields you from flying debris. It should be intact and securely fixed. Also, remember to dress appropriately, wearing closed shoes and safety glasses.
Lastly, but importantly, perform a general inspection of your trimmer. Look out for any loose screws or parts that might need tightening. Your trimmer is now ready for use.
Step-2: Marking Your Lawn Edges
This second step involves determining where you want your lawn edges to be and marking them out. This is where you get creative and decide what kind of borders your lawn will have. You can create simple straight line edges or go for curved and winding edges.
Use stakes and string or landscape marking paint to mark out these borders, giving a clear guide to follow when you start trimming. The marked borders should be straight and uniform to make the trimming process easier and produce the best visually appealing results.
Remember, consistency is key in this step. The edges of your lawn serve as its boundary and provide the frame to your garden’s masterpiece. If you change mind midway through the trimming process and decide to adjust the borders, it could negatively impact the overall aesthetics.
If you’re unsure about how to shape your edges, check out some garden design ideas on the internet, in books, or even at your local botanic garden for inspiration.
Step-3: Holding Your Trimmer Correctly
Knowing how to hold your trimmer correctly is an essential part of learning how to trim lawn edges with a trimmer. Holding your trimmer with the right posture will save you from unnecessary fatigue and promise greater efficiency. Grasp the trimmer’s handles firmly, one handle in each hand. Your arms should be slightly bent at the elbows. Keep the trimmer at waist level, and it should be tilted to the side slightly.
Remember, the trimmer should be allowed to hover over the grass rather than being pressed down into it. The movements should be smooth and controlled. Never force the trimmer into the turf; the power of the rotating line is what does the cutting, not manual force.
Another crucial point to remember is to hold the trimmer so that the line cuts from right to left. This direction ensures the grass cuttings are thrown onto the lawn and not onto the pavement or flower beds, ensuring a clean job.
Lastly, it’s important to change your position and rotate the trimmer as you move around the edges, keeping the line’s rotation consistent with the cutting path.
Step-4: Trimming the Edges
With your lawn edges marked and trimmer ready, it’s time to commence the actual trimming. Start the trimmer, holding it as discussed in the previous step. Start trimming from one end of a marked edge, following the marked line carefully. Move the trimmer back and forth across the grass edge to cut it down to desirable height.
Don’t rush; maintain a slow, steady pace. It’s better to go over an area twice, at different angles, than hurriedly doing it once.
Also, remember that the size of your lawn and the condition of your edges will determine how long the trimming process will take. Patience and consistency will yield the best results.
Keep a safe distance from objects, people, or pets while trimming. The trimmer can eject debris at high speed, which can cause accidents. After trimming one segment of your edge, move on to the next until you’ve completely trimmed the entire lawn border.
Step-5: Finishing touches and Cleanup
After you’ve finished trimming the edges, review your work. Check if there are uneven spots or areas that you might have missed and correct them. It’s often best to do this immediately, while you can still see all the borders clearly.
The finishing touches often involve sweeping or blowing away the cut grass from the edges onto the lawn or into a grass collection bag. This leaves your edges looking neat. Also, rinse the trimmer, particularly the cutting head, to remove any stuck grass bits. It prolongs your trimmer’s life and keeps it ready for the next use.
Occasionally, you’ll need to edge deeply to remove overgrown grass creeping onto the pavements or garden beds. A garden spade may be helpful in such cases to produce deep clean-cut edges.
Lastly, water your lawn after trimming, especially during the hot seasons. Trimming can stress your lawn; thus, watering it helps in its recovery and encourages a lush green look.
Now that you’ve mastered how to trim lawn edges with a trimmer, stunning neighbors and passersby with your well-mastered landscape skills should be easy. Remember, the beauty lies in the details, and keeping a neat and trimmed lawn edge is one such detail. As you get more comfortable with your edger, you might begin to see mowing the yard is not just another chore but a form of artistry, a skill that’s both rewarding and satisfying.
5 Tips to Edge a Lawn with a String Trimmer Like a Pro
Frequently Asked Questions
Here we have compiled some of the most commonly asked questions about how to trim lawn edges with a trimmer. We aim to provide comprehensive and practical answers to ensure you achieve a well-manicured lawn.
1. What type of trimmer is best for edging lawns?
There are several types of trimmers that you can use to edge your lawn. The best one for you depends on the size and layout of your yard. For smaller yards, a simple electric trimmer or a battery-powered trimmer could be enough. These devices are lightweight, easy to use, and require minimal maintenance.
For larger yards or for professional landscaping jobs, a gas-powered trimmer offers more power and precision. However, they are heavier, louder, and require more maintenance than their electric counterparts. Whichever type you choose, ensure it has a rotating head or built-in edging wheel for more precise edging.
2. How do I maintain straight lines while trimming lawn edges?
Keeping a straight line while trimming can be challenging, especially for beginners. One technique I use is to visualize or mark the line before I start trimming. This can be done using string, garden hoses, or landscape marking paint. The key is to go slow and steady, letting the trimmer do the work, and focus on maintaining the line.
Another tip is to look ahead of where you’re trimming rather than at the trimmer or the line directly beneath it. This can help you to maintain a consistent line. Also, consider taking breaks to step back and check your work from a distance, as perspective can often make straight lines seem wavy.
3. How often should I trim my lawn edges?
The frequency of lawn edging varies depending on the growth rate of your grass and your desired aesthetic. Generally, we recommend edging your lawn every time you mow it for the best results. This not only enhances the appearance of your lawn but aids in its overall health and vitality.
Edging after mowing helps to trim down any grass that the mower couldn’t reach. However, if the growth is not very significant and you desire a less manicured appearance, you can extend the period between edging to once every few weeks or once a month.
4. Is it necessary to wear protective gear while trimming lawn edges?
Yes, wearing protective gear is absolutely necessary while using a lawn trimmer. Regardless of its power source or size, a trimmer can kick up debris and stones which can injure you. That’s why it’s important to wear safety goggles or glasses for eye protection.
Additionally, I recommend wearing gloves to protect your hands from blisters or cuts, sturdy footwear, and long pants to shelter your legs. It would be beneficial if you could wear ear protection too, especially when using a gas-powered trimmer that could be noisier.
5. Why doesn’t my trimmer cut the grass evenly?
Several factors could lead to uneven cutting with a trimmer. It could be due to worn-out cutting lines. Trimmer lines degrade with use and need regular replacement. You might not be holding the trimmer at the correct angle, which should usually be parallel to the ground.
In addition, if the grass is too wet or too tall, the trimmer may not be able to cut it evenly. Always ensure to mow your lawn before edging for the best results. If the problem persists, it might be time to service your trimmer or consider investing in a new one.
#1 EASIEST Way To Edge A Sidewalk (How The Pros Do It)
Conclusion
We’ve gone over the basics of trimming lawn edges with a trimmer. We’ve discussed selecting the right trimmer, wearing appropriate safety gear, and the trimming process itself. Remember, patience is key and take your time to ensure a neat finish. With practice, you’ll create clean, sharp lawn edges that elevate the overall appearance of your lawn.
Additionally, learning to maintain your trimmer will extend its life and performance. Regularly clean the trimming blade and replace it if needed. Tightening loose parts and properly storing your trimmer will also prevent unnecessary wear and tear. With these steps in mind, we are confident you’ll master the art of trimming your lawn’s edges in no time.

I’m Patricia D. Johnson, an affiliate marketer and blogger specializing in trimmers and grooming tools. I create honest reviews, buying guides, and practical tips to help readers choose the right trimmer for their needs. With a focus on quality, performance, and value, I simplify the decision-making process so consumers can make confident purchases.