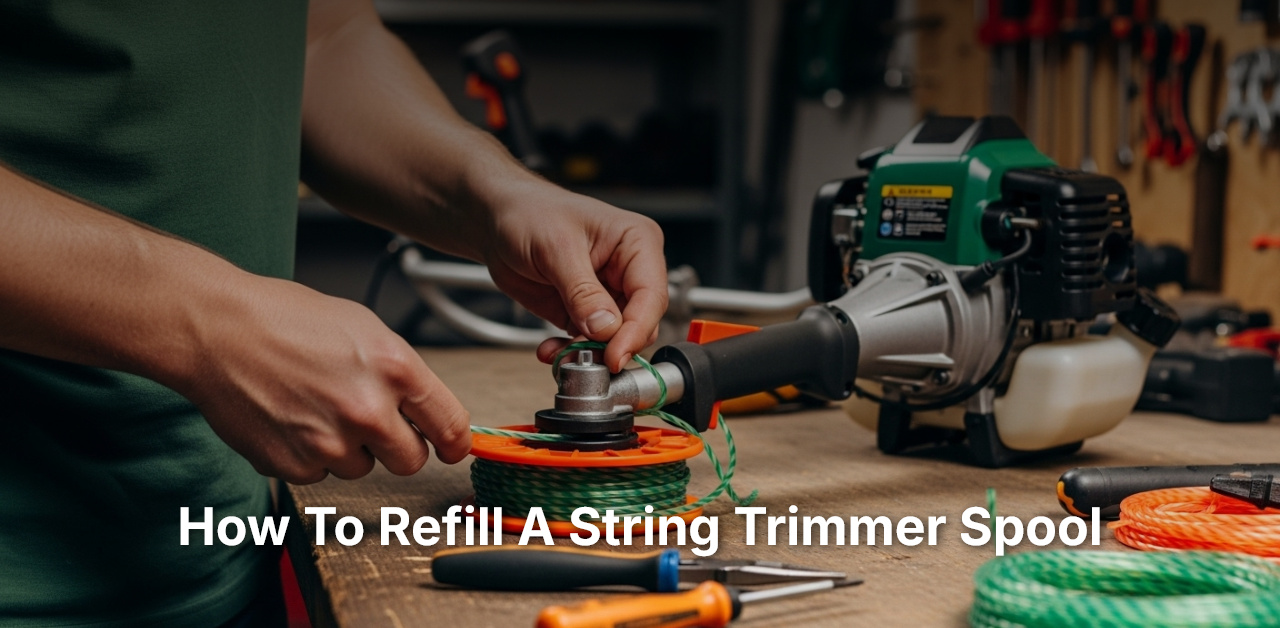
- Turn off and unplug your string trimmer.
- Remove the empty spool from the string trimmer head.
- Take your new trimmer line and thread it into the holes on the spool, winding it carefully in the direction of the arrows.
- Once it’s tightly wound, secure the ends of the string in the notches.
- Replace the spool inside the trimmer head, making sure it’s snug and secure.
Did you know that the right technique to refilling a string trimmer spool can greatly enhance your trimming experience and prolong the life of your equipment? I’ve found that many new (or even some experienced) gardeners and lawn enthusiasts struggle with this seemingly simple task, but once you master it, everything changes.
When we get down to refilling a trimmer spool, it drives us back to its inception in the 1970s, which was, in fact, an innovation that has undoubtedly revolutionized the world of gardening. Believe it or not, over 80% of professional gardeners recommend learning proper spool refilling techniques, according to a recent survey. If I can handle my string trimmer spool with an understanding of its operation and maintenance background, so can you!
 Source:
Mastering the Art of Refilling Your String Trimmer Spool
One of the essential skills for anyone with a yard or garden to maintain is learning how to refill a string trimmer spool. It is a simple maintenance task that you can easily master with some guidance and practice. This step-by-step guide is designed to provide you with everything you need to refill your string trimmer spool efficiently and safely.
Step-1: Select the Right Trimmer Line
The first step in refilling your string trimmer spool is to ensure you have the correct trimmer line for your specific model. The diameter and shape of your trimmer line will impact the effectiveness and performance of your string trimmer. Refer to your user’s manual for precise specs or consult with a professional at your local garden center if you’re unsure.
The line material is another critical factor to consider. Commercial-grade nylon is the most common material, known for its durability and cutting efficiency. However, for denser vegetation, you might need stronger line materials like reinforced polymer or multi-sided lines.
The line shape is also crucial, with options ranging from round, square, or star-shaped lines. Round lines are well-suited for light-duty trimming, while multi-sided lines are ideal for a clean cut on heavier vegetation.
Finally, ensure you have the right amount of line. Refills typically come in 25 to 100-foot increments. To refill a basic spool, you will need around 10 to 25 feet of line, but confirm the exact length by referring to your model’s manual.
Step-2: Remove the Trimmer Spool
The next step is removing the trimmer spool from the trimmer head. Start by switching off your string trimmer and unplugging it from the power source to avoid accidental starting or injuries. If you have a battery-operated trimmer, ensure to remove the battery.
Then, locate the retaining cap or bump knob on the bottom of the trimmer head. This cap holds the spool and line inside the trimmer head. Depending on your model, you may need to unscrew or press in tabs to remove this cap. Always refer to your user’s manual to understand how to remove the spool and cap on your specific model properly.
With the cap removed, you can now remove the spool from the trimmer head. Make sure to take out any left-over line in the spool and inspect it for any damage or wear that could affect performance.
While the spool is out, it’s a good idea to clean the inside of the trimmer head and spool area to ensure optimal trimmer operation. You could use a brush or compressed air to remove any debris or clippings lodged in those areas.
Step-3: Wind the Trimmer Line
Once you have the right type of line and your spool is ready, it’s time to wind the line onto your spool. Start by inserting one end of the line into the hole or slot in the spool. Hold this end firmly and begin to wind the line around the spool in the direction indicated by the arrows on the spool.
Ensure to wind the line neatly and evenly, with each layer of line lying snugly next to the previous layer. Avoid crisscrossing or overlapping lines, as this can prevent the line from feeding properly when in use.
Keep winding until you have about 6 inches of line left. On dual-line models, insert the remaining line into the retainer slots on each side of the spool. This will hold the line in place as you replace the spool in the trimmer head.
For single-line models, there will be just one retainer slot. Clip the remaining line in that slot and confirm that it comes off the spool in the direction the cutter will spin.
Step-4: Replace the Spool and Cap
After winding the line, it’s time to replace the spool back into the trimmer head. Make sure the end of the line is fed through the eyelet(s) located on the side or bottom of the trimmer head before replacing the spool. For dual-line models, confirm if both ends feed through separate eyelets.
Place the spool back in the trimmer head and ensure it seats securely. For trimmers with a spring under the spool, make sure it compresses properly and doesn’t obstruct the spool’s seating.
Once the spool is in place, unclip the remaining line from the retainer slot(s) and allow it to load into the cutter. Make sure they extend out of the trimmer head through the eyelet(s).
Finally, replace the cap or retaining knob onto the trimmer head. Confirm that it’s secure and that the line(s) freely feeds from the hole in the cap when pulled lightly.
Step-5: Test the Trimmer
The final step in refilling your string trimmer spool is testing the trimmer. Plug your trimmer back into the outlet or reinsert the battery and start it. Try feeding the line a few meters and verify that it’s cutting correctly. The line should feed with each tap of the trimmer’s head on the ground (bump-feed models), or when you release the trigger (automatic-feed models).
If the line does not feed properly or the trimmer vibrates excessively during operation, stop the trimmer immediately. Examine your winding technique or check for any obstructions or damage to the spool or trimmer head.
If the problem persists, refer to your user’s manual or contact a professional or manufacturer for assistance. Never use a string trimmer if the line isn’t feeding properly, as it can be dangerous and cause damage to your trimmer.
If everything is working correctly, congratulations on learning how to refill a string trimmer spool! Regular maintenance of your string trimmer ensures its optimal performance and extends its lifespan. Now that you know how to refill a string trimmer spool, keeping your yard or garden neat and tidy will be a breeze!
Investing a little time to understand and appropriately perform this task will save you both time and money in the long run. It also ensures the tool’s longevity and helps maintain the beauty and tidiness of your outdoor spaces. After all, the purpose of our outdoor areas is to provide enjoyment for ourselves and those whom we invite into our spaces. Now, go forth and trim with confidence and experience the satisfaction of a well-maintained yard!
How To Tips for Easy Restring of Weed Eater with 2 strings
Frequently Asked Questions
When it comes to maintaining your yard or garden, knowing how to refill a string trimmer spool can make the process easier. Let’s dive into some common questions related to this topic.
1. What are the signs that my string trimmer spool needs refilling?
Typically, a string trimmer gives several signs that indicate it needs a refill. The most obvious one is when the string becomes too short or is entirely used up. A short string will provide less coverage and can make the trimming process inefficient. Apart from inefficiency, a worn-out string may also cause the trimmer to vibrate more than usual.
Additionally, if you notice that the trimmer is not cutting as well as it should or it’s struggling to sever even light vegetation, it might be time to refill the spool. These signs are usually an indication that the string is either frayed or worn out.
2. How often do I need to refill my string trimmer spool?
The frequency of refilling a string trimmer spool depends largely on how often you use the tool and the toughness of the vegetation you’re cutting. For example, if you’re trimming heavy-duty vegetation regularly, you might need to refill the spool more frequently because the string will wear out faster.
It is a good practice to always have a backup spool ready, so when it’s time to refill, you won’t have to pause your work. Ultimately, it comes down to the rigors of your yard work and how well your string trimmer is maintained.
3. What type of string should I use for refilling?
The type of string you need to use depends on the make and model of your string trimmer. It’s crucial to use the right kind of string to avoid any potential damage to the trimmer. Most manufacturers recommend using a specific size and type of string for their trimmers.
You can typically find this information in the user manual that comes with the trimmer. Some common types of string include round, square, star-shaped, and twisted string. Each type has its benefits and is suited to different kinds of jobs.
4. Can I refill the string trimmer spool on my own?
Yes, refilling a string trimmer spool is a fairly straightforward task that you can accomplish by yourself. You only need to follow the specific steps provided in the user’s manual of your specific model. The process usually involves removing the empty spool, winding the new string around it, and then reassembling the trimmer.
However, keep in mind to always disconnect the trimmer from any power source before you begin. This is a crucial safety measure to prevent any accidental startups while you’re working on the trimmer.
5. Does the length of the string matter when refilling?
Yes, the length does matter when refilling a string trimmer spool. If you wind too much string onto the spool, it could potentially jam or fail to feed properly. On the other hand, if the string is too short, it might not have a large enough cutting radius, making your job more difficult and time-consuming.
Typically, the user manual will specify the right length of string to use for your particular model. But as a general rule of thumb, a length of 15 to 20 feet is often sufficient for most basic string trimmers.
How to Change the Line | Weed Eater String | Replace Weed Wacker [2021]
Conclusion
Refilling a string trimmer spool isn’t as difficult as it seems. All you need to do is take out the old, used-up spool, get the correct size and length of the replacement string, and follow the arrow markers for winding. Remember, the goal is to maintain the balance to avoid any potential difficulties while trimming. It’s crucial to follow these steps for a seamless trimming experience.
Practice makes perfect, so don’t be discouraged by initial difficulties. Over time, you’ll find the process becoming second nature. Always refer to your user manual if you’re unsure of any steps in the process or need specific guidance related to your string trimmer model. Here’s to a well-maintained lawn adorned with your hard work and patience.

I’m Patricia D. Johnson, an affiliate marketer and blogger specializing in trimmers and grooming tools. I create honest reviews, buying guides, and practical tips to help readers choose the right trimmer for their needs. With a focus on quality, performance, and value, I simplify the decision-making process so consumers can make confident purchases.