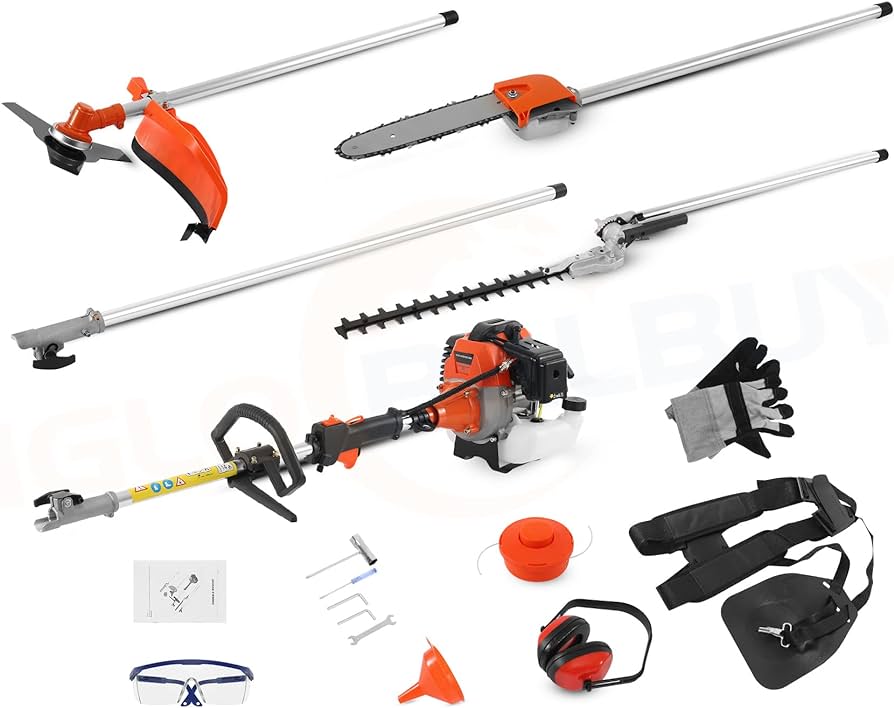
Yes, you can replace hedge trimmer blades. Replacing hedge trimmer blades is a straightforward process that can be done with the right tools and safety precautions.
By following simple steps, such as removing the blade guard, removing the old blades, and installing the new ones, you can easily replace the blades on your hedge trimmer. Taking care when handling sharp blades is important to ensure safety.
Whether your blades have become dull or damaged, replacing them can restore the cutting efficiency of your hedge trimmer and prolong its lifespan. With proper maintenance and blade replacement, you can keep your hedge trimmer in optimal condition for effective trimming.

Credit: www.amazon.com
Safety Warnings
When it comes to maintaining your hedge trimmer, replacing the blades is an essential task. Over time, the blades can become dull or damaged, affecting the trimmer’s performance. But before you take on this DIY project, it’s crucial to be aware of the safety warnings and precautions involved. Let’s explore the importance of safety and the protective gear you should use while replacing hedge trimmer blades.
Importance Of Safety
Safety should always be a top priority when working with any power tool, including hedge trimmers. Here are a few safety warnings to keep in mind:
- Before starting the blade replacement process, make sure the trimmer is turned off and unplugged. This helps prevent accidental starting or electric shock.
- Keep your work area clean and well-lit. Remove any obstacles that may cause tripping hazards.
- Wear appropriate protective gear, including safety goggles or glasses to protect your eyes from flying debris.
- Use sturdy work gloves to safeguard your hands from cuts and scratches.
- Avoid wearing loose-fitting clothing that could potentially get caught in the trimmer blades.
- Always work on a stable surface, such as a workbench or sturdy table.
- Keep children and pets away from the work area to prevent injuries.
Protective Gear
When replacing hedge trimmer blades, it’s crucial to wear the proper protective gear to ensure your safety. Here are the essential items you should have:
- Safety goggles or glasses: Protect your eyes from debris and sharp objects.
- Work gloves: Choose sturdy gloves that provide good grip and protect your hands from cuts and scratches.
- Long-sleeved shirt and pants: Wear clothing that covers your limbs to minimize the risk of injury from the trimmer blades.
- Closed-toe shoes: Opt for sturdy footwear that protects your feet from accidental cuts or impact.
Remember, safety precautions are essential to prevent accidents and injuries. By following these safety warnings and wearing the appropriate protective gear, you can confidently replace hedge trimmer blades without compromising your well-being.
Preparation
Before you begin replacing the blades on your hedge trimmer, it is important to properly prepare for the task at hand. This includes gathering all the necessary tools and referring to the equipment manual for specific instructions. By following these steps, you can ensure a smooth and successful blade replacement process.
Gather Required Tools
First and foremost, make sure you have all the tools you need for the job. To replace hedge trimmer blades, you will typically require the following:
- Screwdriver: Depending on your trimmer model, you may need either a flathead or Phillips screwdriver to remove screws holding the blade in place.
- Wrench: A wrench may be necessary to loosen and tighten bolts during the blade replacement process.
- Gloves: It is always a good idea to wear protective gloves to prevent any accidental injuries while handling the blades.
- Replacement Blades: Ensure you have the correct replacement blades that are compatible with your specific hedge trimmer model. Refer to the equipment manual or consult with a professional if you are unsure.
Check Equipment Manual
It is crucial to consult the equipment manual provided by the manufacturer before attempting to replace the hedge trimmer blades. The manual will contain important instructions and guidelines specific to your trimmer model. These instructions may vary depending on the brand and model, so it is essential to adhere to the manufacturer’s recommendations for a safe and effective blade replacement process. The manual will also provide information on any additional tools or steps required for replacing the blades.
By properly preparing and gathering the necessary tools, as well as referring to the equipment manual, you can confidently proceed with replacing the blades on your hedge trimmer. Taking these precautions ensures that the blade replacement process is carried out correctly and minimizes the risk of damaging your equipment. Stay safe and enjoy the improved performance of your hedge trimmer with new, sharp blades!
Blade Replacement Process
When it comes to hedge trimmer maintenance, you might wonder if you can replace the blades yourself. The process involves removing the blade guard, gearcase cover, and mounting bolts, and then installing the new blades. With the right tools and careful steps, you can successfully replace your hedge trimmer blades.
Removing Blade Guard
When replacing hedge trimmer blades, the first step is to remove the blade guard. This can usually be done by loosening the screws or clips that secure the guard in place. Once it’s removed, set it aside in a safe place for reinstallation later. —
Disassembling Gearbox
Next, it’s time to disassemble the gearbox. This involves carefully removing the gearbox cover to access the internal components. Once the cover is off, you may need to remove the blade mounting bolts and washers in order to free the old blade from the trimmer. —
Reinstalling New Blade
After the old blade has been removed, it’s time to install the new one. Start by ensuring the spacer plate is in place, then carefully fit the new blade into position. Once the blade is secured, it’s important to reinstall the gearbox cover to protect the internal components. — In summary, replacing hedge trimmer blades involves a few key steps: removing the blade guard, disassembling the gearbox, and reinstalling the new blade. By following these steps carefully, you can ensure that your hedge trimmer is equipped with sharp, effective blades for the task at hand.

Credit: www.makitatools.com
Types Of Hedge Trimmer Blades
You can replace hedge trimmer blades by following a few simple steps, including removing the blade guard, gearcase cover, and mounting bolts. Once the old blades are removed, you can easily install new ones to ensure the performance and effectiveness of your hedge trimmer.
Understanding Blade Variations
When it comes to hedge trimmers, understanding the different types of blades available is crucial in order to make the right choice for your trimming needs. Hedge trimmer blades come in various shapes and sizes, each designed for specific purposes. By familiarizing yourself with these blade variations, you can ensure that you have the right tool for the job.
Choosing The Right Blade
Choosing the right blade for your hedge trimmer depends on a few factors, including the type of hedge you are trimming and the desired cutting technique. Here are some common types of hedge trimmer blades:
| Blade Type | Description |
|---|---|
| Single-sided Blades | These blades have cutting teeth on only one side, making them ideal for vertical or horizontal cuts. They provide precision trimming and are often longer in length. |
| Double-sided Blades | Double-sided blades have cutting teeth on both sides, allowing for more versatility and efficiency in trimming tasks. They are suitable for shaping hedges and performing intricate cuts. |
| Toothed Blades | Toothed blades have serrated teeth, which are designed for tackling thicker branches and tougher vegetation. They offer enhanced cutting power and are suitable for heavy-duty trimming. |
| Smooth Blades | Smooth blades have no teeth and provide a cleaner, neater cut on smaller branches. They are often used for light trimming and creating precise edges. |
When choosing the right blade for your hedge trimmer, consider the thickness of the branches you will be cutting, the density of the hedge, and your desired level of precision. It’s also important to ensure that the blade you choose is compatible with your hedge trimmer model.
Maintaining Hedge Trimmer Blades
To maintain hedge trimmer blades, it is essential to know if you can replace them. By following specific steps and using proper tools, you can remove old blades and install new ones, ensuring that your hedge trimmer stays sharp and efficient for a long time.
Regular maintenance and blade replacement can enhance the overall performance of your hedge trimmer.
Sharpening Techniques
When it comes to maintaining hedge trimmer blades, one of the essential tasks you should perform is sharpening them regularly. Sharpening the blades ensures that they stay in prime condition and continue to cut efficiently. To sharpen your hedge trimmer blades, you can use a flat file, which is a versatile tool for this purpose. Before starting the sharpening process, make sure to clean the blades and moisten them with water. This will help remove any debris and prevent the blades from overheating.
To sharpen the blades, hold the flat file at a 20-degree angle and slowly run it along the cutting edge of the blade. Make sure to move the file in the same direction as the bevel of the blade. Repeat this process on each tooth of the blade until you have achieved a sharp edge. Once the sharpening is complete, use a whetstone to remove any burrs from the blade. Burrs can cause the blades to snag or tear the branches, so it’s crucial to eliminate them.
After sharpening the blades, carefully wipe them clean and apply a thin layer of lubricant. This will help protect the blades and prevent rusting. Regularly sharpening your hedge trimmer blades will ensure that your trimmer continues to cut with precision and efficiency, giving you a clean and neat hedge every time.
Blade Replacement Frequency
While sharpening your hedge trimmer blades is important, there will come a time when they will need to be replaced. The frequency of blade replacement depends on various factors, including the quality of the blades, the frequency of use, and the type of vegetation you are cutting. As a general guideline, it’s recommended to replace hedge trimmer blades every 1 to 2 years if you are using the trimmer regularly. However, if you notice that the blades are damaged, worn out, or no longer cutting efficiently, it may be time to replace them sooner.
When replacing hedge trimmer blades, it’s crucial to use the correct replacement blades that are compatible with your specific trimmer model. Consult the manufacturer’s manual or contact their customer support for guidance on finding the appropriate replacement blades for your hedge trimmer. Properly installing the new blades is also essential to ensure safe and efficient operation.
By maintaining your hedge trimmer blades and replacing them when necessary, you can ensure that your trimmer continues to perform optimally, allowing you to achieve beautifully manicured hedges with ease.

Credit: m.youtube.com
Common Questions And Concerns
When it comes to maintaining your hedge trimmer, it’s natural to have certain questions and concerns about replacing the blades. It’s important to understand when to replace blades and the availability of replacement parts. Below are some common inquiries that may arise when it comes to hedge trimmer blade replacement.
When To Replace Blades
Knowing when to replace blades is crucial for maintaining the efficiency and safety of your hedge trimmer. Over time, blades can become dull, which can result in ragged cuts and increased effort to trim hedges. As a general rule of thumb, hedge trimmer blades should be replaced when they are damaged, excessively worn, or consistently fail to produce clean cuts even after sharpening. Inspecting the blades for any signs of damage, such as nicks, cracks, or significant dullness, can help determine if they need replacement. Additionally, if the blades are losing their cutting edge despite regular maintenance, it may be time to consider replacing them.
Availability Of Replacement Parts
Availability of replacement parts, including hedge trimmer blades, is an essential consideration for hedge trimmer owners. It’s crucial to have access to genuine replacement blades that are compatible with a specific hedge trimmer model. It’s recommended to check with the manufacturer or authorized dealers for the availability of original replacement blades. Ensuring the availability of replacement parts before purchasing a hedge trimmer can provide peace of mind and assurance that maintenance and repairs can be managed effectively without delays.
Frequently Asked Questions Of Can You Replace Hedge Trimmer Blades
How Long Do Hedge Trimmer Blades Last?
Hedge trimmer blades typically last for a long time, especially when used correctly. However, if they become dull or damaged, you can replace them to ensure optimal cutting performance. Proper maintenance and sharpening can also extend the lifespan of the blades.
Is It Worth Sharpening Hedge Trimmers?
Yes, it is worth sharpening hedge trimmers as it is part of routine maintenance. Clean the blades before sharpening and moisten them. Use a flat file or whetstone to sharpen and remove burrs. Sharpening ensures optimal performance.
How Often Do You Need To Replace Trimmer Blades?
You should replace trimmer blades when they become dull or damaged, typically every 1-2 years with regular use. Regular maintenance and sharpening can extend their lifespan.
Can You Replace The Blades On A Ryobi Hedge Trimmer?
Yes, you can replace the blades on a Ryobi hedge trimmer. Separate the two blades and remove the gear. Install the new blade assembly with caution, using gloves or a blade cover for protection. Make sure to handle the sharp blades carefully.
Conclusion
Replacing hedge trimmer blades is a feasible task that can prolong the life and efficiency of your equipment. With proper tools and guidance, you can easily replace the blades yourself. Regular maintenance and blade replacement are essential for safe and effective hedge trimming.
By following the right steps, you can ensure a smooth and successful blade replacement process.

I’m Patricia D. Johnson, an affiliate marketer and blogger specializing in trimmers and grooming tools. I create honest reviews, buying guides, and practical tips to help readers choose the right trimmer for their needs. With a focus on quality, performance, and value, I simplify the decision-making process so consumers can make confident purchases.