Are you tired of the unruly grass and weeds that ruin the neat appearance of your lawn edges? Look no further, as we unveil the secrets to achieving perfectly manicured edges using a string trimmer. Whether you’re a seasoned gardener or a beginner, this comprehensive guide will walk you through the step-by-step process of using a string trimmer for edging, ensuring a professional-looking finish every time.
Edging with a string trimmer not only enhances the aesthetic appeal of your lawn but also serves as a practical solution to keep your garden beds and pathways tidy. In this guide, we will delve into the essential techniques and tips for mastering this art. From choosing the right trimmer and string to executing precise cuts and achieving clean lines, we’ll cover it all.
So, get ready to transform your outdoor space into a picture-perfect haven with the help of your trusty string trimmer. Let’s dive in and unlock the secrets to achieving flawlessly edged lawns that will make your neighbors green with envy!

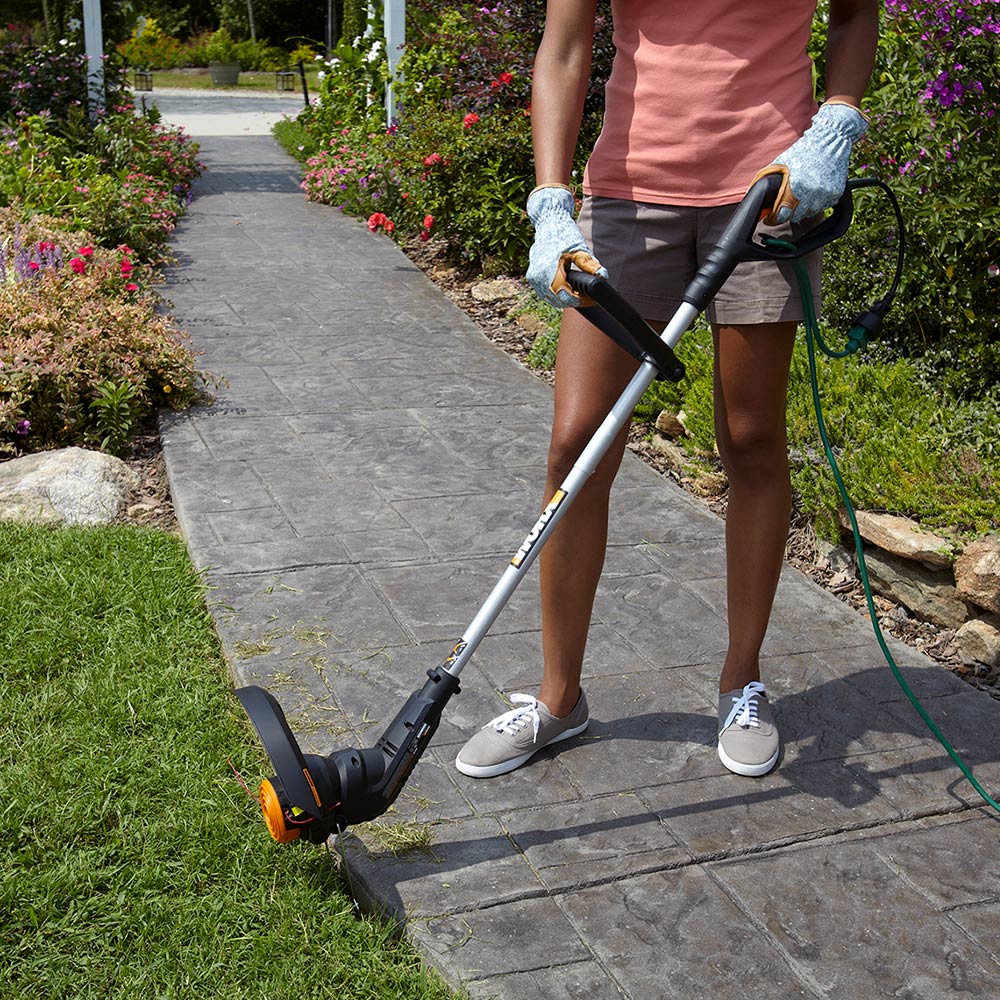
Source: homedepot-static.com
What is a string trimmer?
A string trimmer, also known as a weed eater or weed whacker, is a handheld gardening tool used for cutting grass and trimming edges. It consists of a motor, a spinning head with a nylon string, and a handle for easy maneuverability. The motor powers the spinning head, causing the nylon string to rotate rapidly and cut through grass and weeds.
How to Use a String Trimmer for Edging: A Step-by-Step Guide
A string trimmer, also known as a weed eater or weed whacker, is a versatile tool that can be used for various gardening tasks. One of its primary functions is edging, which involves creating clean lines along pathways, flower beds, and other areas. In this article, we will provide step-by-step instructions on how to use a string trimmer for edging effectively.
Step 1: Prepare the Area
Before you begin edging with a string trimmer, it’s important to prepare the area properly. Remove any obstacles such as rocks, sticks, or debris that may hinder your progress. Additionally, mark the desired edge line using a temporary marker or spray paint. This will serve as a guide for a neat and straight edge.
Next, put on the necessary safety gear, including safety goggles, gloves, and closed-toe shoes. String trimmers produce high-speed rotations that can kick up debris, so it’s crucial to protect yourself while working.
Step 2: Adjust the Trimmer
Before starting the engine, adjust the cutting line to the appropriate length. Most string trimmers have a cutting line adjustment knob or button that allows you to extend or retract the line. Refer to the manufacturer’s instructions to determine the optimal line length for edging.
Additionally, check the trimmer head to ensure it is securely attached and in good condition. Replace the head if it shows signs of wear or damage. A properly functioning trimmer head will ensure efficient and clean cuts.
Step 3: Start the Trimmer
With the trimmer properly adjusted, it’s time to start the engine. If your trimmer has a pull cord, firmly grasp the handle and give it a quick, smooth pull. For electric trimmers, simply press the power button or switch. Let the engine warm up for a few moments before proceeding.
Once the engine is running smoothly, hold the trimmer with both hands, maintaining a firm grip on the handles. Position the cutting line near the edge line you marked earlier, ensuring that the line is parallel to the ground.
Step 4: Edge in a Controlled Manner
When edging with a string trimmer, it’s crucial to maintain control and precision. Slowly guide the trimmer along the edge line, moving in a smooth, steady motion. Allow the cutting line to make clean contact with the grass or soil, cutting away any excess growth.
For best results, keep the trimmer head at a slight angle, with the cutting line facing away from the area you want to keep neat. This will ensure that the trimmer only cuts the excess growth, without damaging the desired edge line.
Step 5: Clean Up and Maintenance
Once you have completed the edging process, take a moment to clean up any clippings or debris that may have accumulated. Use a broom or leaf blower to remove the excess grass or soil particles from the area.
Finally, remember to perform regular maintenance on your string trimmer to ensure its longevity and optimal performance. This includes cleaning the cutting head, inspecting the cutting line for wear, and regularly checking the engine oil levels (if applicable).
Step 6: Safety Precautions
While using a string trimmer for edging, it’s essential to follow safety precautions to prevent accidents or injuries. Always wear the appropriate safety gear, including eye protection, gloves, and sturdy footwear.
Additionally, be mindful of your surroundings and avoid using the trimmer near people, animals, or fragile objects. Keep a safe distance from structures such as fences or walls to prevent accidental damage.
Step 7: Practice and Patience
Mastering the art of edging with a string trimmer may take some practice and patience. It’s important to start with small, manageable sections before tackling larger areas. With time, you will develop the necessary skills and techniques to create precise and professional-looking edges.
Remember to take breaks as needed and stay hydrated during extended periods of trimming. Pace yourself to avoid fatigue, as this can impact your control and accuracy.
Step 8: Troubleshooting
If you encounter any issues while using a string trimmer for edging, refer to the manufacturer’s instructions or seek professional assistance. Common problems may include line breakage, engine stalling, or uneven cuts. Proper maintenance and troubleshooting will help ensure a smooth and efficient trimming experience.
Step 9: Experiment and Enhance
Once you have mastered the basic technique of using a string trimmer for edging, feel free to experiment with different designs and patterns. Create curved edges, intricate shapes, or even unique patterns to enhance the overall aesthetics of your garden or landscape.
Remember to always maintain the edges regularly to keep them looking neat and well-defined. A well-maintained edge can significantly enhance the overall appearance of your outdoor space.
Step 10: Share Your Knowledge
If you find success and satisfaction in using a string trimmer for edging, consider sharing your knowledge and techniques with others. Help fellow gardening enthusiasts or beginners who may be struggling with their edging tasks. Sharing information and experiences can contribute to a stronger gardening community.
Frequently Asked Questions
Here are some commonly asked questions about how to use a string trimmer for edging:
How do I prepare the area for edging with a string trimmer?
Prior to using a string trimmer for edging, it’s important to prepare the area to ensure a clean and efficient cut. Start by removing any debris or obstacles from the edge, such as rocks, sticks, or toys. This will prevent the trimmer’s string from getting tangled or damaged during operation.
Additionally, you may want to consider using a garden hose or string to mark the desired edge line. This will serve as a guide for the trimmer, helping you maintain a straight and consistent edge along the lawn or garden beds.
What safety precautions should I take when using a string trimmer for edging?
When using a string trimmer for edging, it’s important to prioritize safety. Always wear protective gear, including safety glasses or goggles to protect your eyes from debris, and ear protection to guard against the loud noise produced by the trimmer.
Ensure that the trimmer is turned off and unplugged when not in use, and never leave it unattended. It’s also crucial to keep a safe distance from people, pets, and objects while operating the trimmer to avoid any accidents or injuries.
How can I achieve a clean and precise edge with a string trimmer?
To achieve a clean and precise edge with a string trimmer, it’s important to maintain a steady hand and a consistent speed. Start with the trimmer’s string positioned vertically, and slowly guide it along the edge, moving in a smooth and controlled motion.
Keep your eye on the edge line and make any necessary adjustments as you go. If the trimmer’s string is not cutting through the grass or weeds effectively, you may need to adjust the line length or replace the string altogether. Regular maintenance of the trimmer, such as cleaning and sharpening the cutting string, can also help ensure optimal performance.
Are there any tips for maintaining the string trimmer for edging?
Proper maintenance of your string trimmer is essential for optimal performance and longevity. After each use, clean the trimmer by removing any grass or debris from the cutting head and surrounding areas. This will prevent clogs and ensure smooth operation during your next edging session.
Regularly inspect the trimmer’s cutting string and replace it if it’s worn out or damaged. Lubricate the moving parts as recommended by the manufacturer, and store the trimmer in a clean and dry place to prevent rust or damage. Following these maintenance tips will help prolong the life of your string trimmer and ensure consistent results when edging.
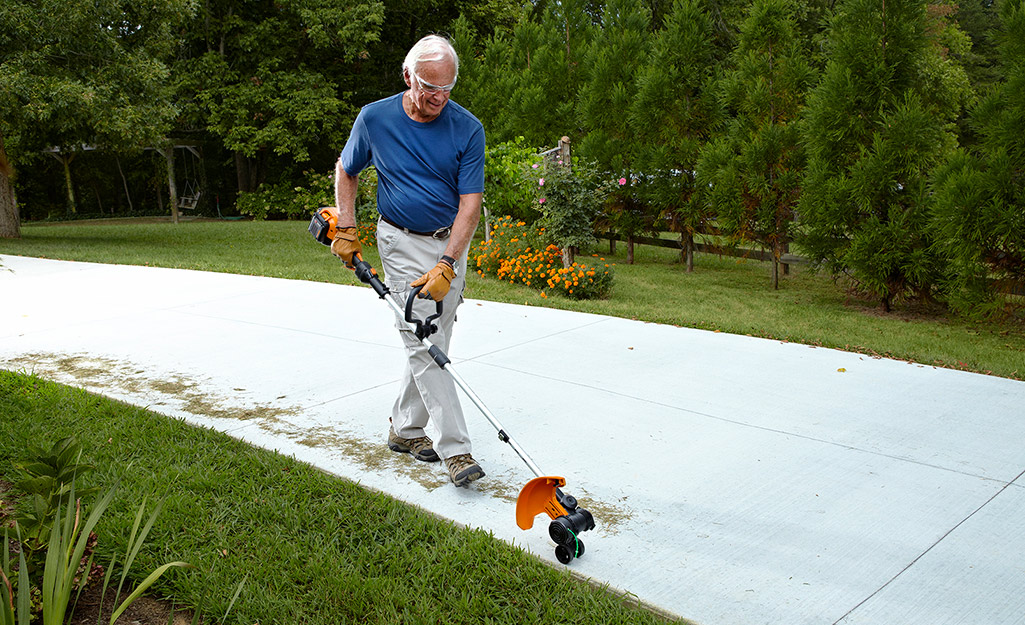
Source: homedepot-static.com
Final Words:
In conclusion, mastering the art of using a string trimmer for edging can truly transform the look of your lawn. By following the steps outlined in this guide, you can achieve a clean and professional-looking edge that will make your neighbors green with envy.
Remember to start with the proper equipment and safety precautions, and always take your time to ensure precision and accuracy. With practice, patience, and a little bit of effort, you will soon be able to create sharp, defined edges that will enhance the overall aesthetics of your outdoor space.
Furthermore, using a string trimmer for edging not only improves the appearance of your lawn, but it also helps to maintain the health and longevity of your grass. By creating neat edges, you prevent grass from encroaching onto your pathways, flowerbeds, or driveways, reducing the need for constant maintenance and reducing the risk of weed growth.
Additionally, a well-defined edge promotes better airflow and allows for proper water drainage, contributing to a healthier lawn overall. So, don’t hesitate to embrace the power of a string trimmer and take your lawn care game to the next level. Your beautifully manicured edges will be the envy of the neighborhood, while your grass thrives in a more organized and well-maintained environment.
