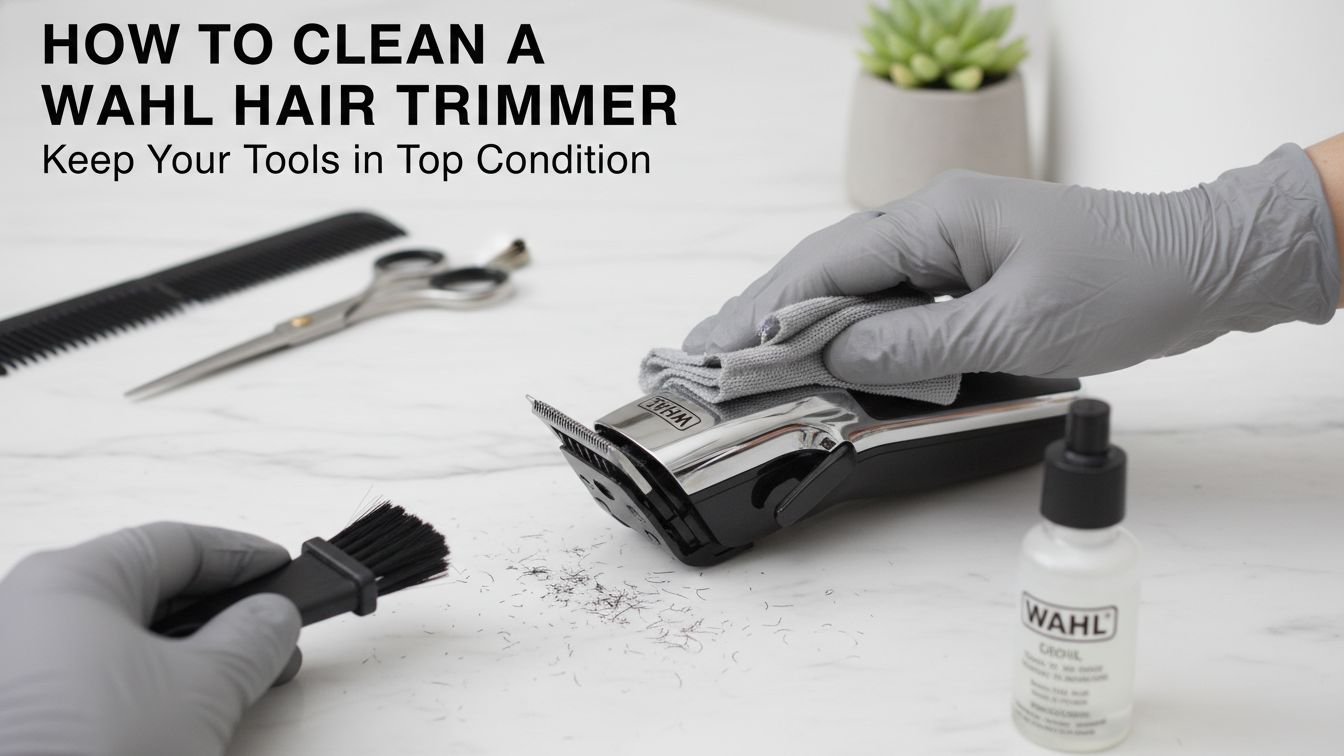

Gather Your Wahl Hair Trimmer Supplies
Preparation is essential. You need the right tools to clean a Wahl hair trimmer. Proper supplies prevent damage to the blades. Gather everything before you begin. This saves time. It also ensures a smooth process. Professionals never skip this step. You must respect the equipment. High-quality tools demand high-quality care.
Essential Cleaning Tools
Use a specialized cleaning brush. You can also use a new toothbrush. Stiff bristles remove hair easily. You will need a Phillips-head screwdriver. This removes the blade safely. Keep a clean microfiber cloth nearby. Microfiber prevents lint buildup. Avoid paper towels. They leave residue on the sensitive metal blades.
Choosing the Right Oil
Always use official Wahl blade oil. Never use sewing machine oil. Mineral oil will permanently damage the motor. Specialized clipper oils handle high-speed blades and resist heat [1.2.1]. It reduces friction perfectly. This extends the lifespan of the device. Keep an approved disinfectant spray handy. Clipper sprays kill harmful bacteria. They also provide cooling properties.
- Small cleaning brush
- Official Wahl clipper oil
- Phillips-head screwdriver
- Professional disinfectant spray
Professional Tip
Pro Tip: Keep your supplies in a dedicated grooming box for fast and easy access.

Unplug and Prep Your Wahl Clipper
Safety is the top priority. You must disconnect the device. This prevents electrical accidents. Prepping the machine takes seconds. It protects you from sudden motor starts. It also protects the battery. Never clean a plugged-in device. Water and electricity are a deadly combination. Always prioritize your physical safety.
Disconnect the Power
Unplug corded models from the wall immediately. Turn off cordless models. Check the power switch twice. This protects the internal battery. Lithium-ion cells degrade after 300 to 500 charge cycles [1.1.4]. Turn the trimmer off immediately after use. Handle the cord gently. Never pull the cord from a distance. Grip the plug firmly.
Remove the Attachments
Take off the guide combs. Set them aside carefully. You will wash them separately. Removing attachments exposes the main blade. This allows for a deeper clean. It reveals trapped hair. Inspect the plastic clips on the combs. Look for stress fractures. Replace any broken guide combs immediately.
- Unplug corded models
- Power off cordless models
- Remove plastic guide combs
- Isolate the main unit
Professional Tip
Pro Tip: Do not wrap the power cord tightly around the device. This causes internal wire breakage.

Brush Away Surface Hair from the Blades
Hair builds up incredibly fast. You must remove it regularly. This improves overall cutting performance. Excess hair dulls the blade. It strains the internal motor. It causes the machine to overheat. Brushing is your first line of defense. It removes bulk debris quickly. It prepares the blade for liquid cleaning.
Use a Stiff Brush
Take your small cleaning brush. Sweep it across the top of the blades. Remove all visible hair. Brush parallel to the metal teeth. Do not brush horizontally. Horizontal brushing pushes hair deeper inside. Pay attention to the taper lever. Hair gathers behind this switch. Clear it out completely.
Clean the Combs
Wash the plastic guide combs separately. Use warm soapy water. Scrub them thoroughly. Dry them completely before next use. Moisture breeds bacteria. Wet combs can rust your metal blades. Store them in a breathable bag. Air circulation keeps them fresh. Avoid airtight containers for damp plastics.
- Use a stiff bristle brush
- Sweep parallel to the teeth
- Clear the lever area
- Wash plastic combs separately
Professional Tip
Pro Tip: Clean your blade after every three to four uses to maintain peak efficiency [1.1.4].

Unscrew and Remove the Trimmer Blades
Deep cleaning requires blade removal. This exposes hidden hair. It ensures a highly thorough wash. Hair gets trapped beneath the cutting plates. This restricts blade movement. It causes severe motor strain. You must remove the blades safely. Follow the manufacturer instructions carefully. Do not rush this delicate process.
Loosen the Mounting Screws
Use a standard Phillips screwdriver. Turn the screws counterclockwise gently. Apply steady downward pressure. Do not strip the screw heads. Keep the screws in a safe place. A magnetic tray is highly recommended. Lost screws are hard to replace. Handle them with extreme care. Professionals always stay highly organized.
Separate the Cutting Blades
Lift the top blade carefully. Remove the bottom blade next. Do not drop them on hard surfaces. Dropping the blades will chip the metal. Chipped blades pull hair painfully. They cannot be repaired. Place the blades on a soft microfiber cloth. Inspect them for rust. Replace them if you see severe corrosion.
- Use a Phillips screwdriver
- Turn screws counterclockwise gently
- Lift top blade off
- Remove bottom blade carefully
Professional Tip
Pro Tip: Place the small screws in a magnetic bowl so you do not lose them during maintenance.

Disinfect the Wahl Clipper Blades
Hygiene is absolutely critical. Bacteria grow on dirty blades. Disinfecting keeps your skin completely safe. Professional barbers sanitize after every client. You should adopt this mindset. It prevents serious fungal infections. Disinfectants break down natural skin oils. They dissolve stubborn hair product residue. They leave the metal sterile.
Apply Disinfectant Spray
Spray the blades with a professional clipper cleaner. Coat both sides evenly. Let it sit for one full minute. The solution needs time to work. It kills germs effectively. It also acts as a mild degreaser. Never use harsh household bleach. Bleach destroys the metal finish. It causes rapid, irreversible corrosion.
Wipe Them Dry
Use a clean microfiber cloth. Wipe the blades completely dry. Ensure no moisture remains. Moisture accelerates rust and degrades magnetic alignment in high-end blades [1.1.4]. You must be meticulous. Never rinse metal blades under tap water unless the manual specifies they are waterproof. Water is the enemy of steel.
- Use professional clipper spray
- Let the spray sit
- Wipe dry with microfiber
- Avoid tap water
Professional Tip
Pro Tip: Clipper sprays often contain anti-rust properties. Use them generously during deep cleans.

Wipe Down the Wahl Trimmer Body
The body collects oils and dirt. You must wipe it down thoroughly. This keeps your grip secure. A slippery trimmer is dangerous. It can slide out of your hand. Dropping the unit destroys the internal motor. Cleaning the casing improves aesthetics. It makes the tool look brand new. It reflects your personal grooming standards.
Clean the Casing
Dampen a soft cloth slightly. Wipe the plastic body gently. Do not let liquid seep inside. Clean around the power switch carefully. Grime builds up in the crevices. Use a dry cotton swab for tight spaces. Avoid harsh chemical solvents. Acetone will melt the plastic. Stick to mild soapy water.
Clear the Motor Area
Look inside the exposed motor space. Brush out any trapped hair. This prevents sudden overheating. Hair around the drive cam causes friction. Friction drains the battery fast. Keep this area spotless. Do not poke sharp metal tools inside. You might damage the internal wiring. Use only soft brushes.
- Dampen a soft cloth
- Wipe the plastic casing
- Clean the power switch
- Brush the exposed motor compartment
Professional Tip
Pro Tip: A clean, oil-free grip prevents the heavy trimmer from slipping out of your hand mid-cut.

Reattach and Align the Hair Trimmer Blades
Proper alignment is highly crucial. Crooked blades cut human skin. They also pull hair painfully. You must reassemble the unit correctly. Take your time with this step. Precision matters greatly here. Incorrect alignment ruins a good haircut. It causes severe razor burn. It makes the trimmer dangerous to use.
Seat the Blades
Place the bottom blade onto the housing first. Add the top cutting blade. Insert the two screws loosely. Do not tighten the screws yet. The blades must remain movable. You need room to adjust them. Ensure the drive cam sits properly within the top blade. This allows lateral movement.
Adjust the Alignment
Ensure the top blade sits slightly below the bottom blade. The gap should be one millimeter. Tighten the screws fully. Check the alignment again visually. The teeth must be perfectly parallel. If they are slanted, loosen and retry. Test the alignment on your forearm. If it scratches the skin, readjust immediately. Never use a scratching blade.
- Seat the bottom blade
- Position the top blade
- Insert screws loosely
- Align the blade teeth
Professional Tip
Pro Tip: The top moving blade must never extend past the stationary bottom blade. This prevents deep cuts.

Apply Wahl Blade Oil to the Blades
Lubrication is strictly mandatory. It reduces metal friction. It keeps the blades razor sharp. Unlubricated blades heat up quickly. Heat destroys the metal temper. It creates a highly uncomfortable shave. Oil repels moisture naturally. It creates a protective barrier. This prevents atmospheric rust from forming.
The Five-Point Method
Apply three tiny drops across the top teeth. Apply one drop to each back corner. Use exactly five drops total. This method ensures even distribution. It covers all friction points. It is the industry standard technique. Only use Wahl blade oil [1.1.1]. Non-approved oils cause sticky buildup. They attract dirt rapidly.
Avoid Over-Oiling
Do not use too much oil. Excess oil is highly detrimental. It drips into the motor housing. Oil in the motor causes electrical shorts. It ruins the internal components. Less is always more. If you apply too much, stop immediately. Wipe it away with a dry cloth. Start the process over.
- Use the five-point method
- Apply to blade teeth
- Apply to blade corners
- Do not over-oil
Professional Tip
Pro Tip: In 90 percent of cases involving sudden shutdowns, the culprit is simply a dirty, unlubricated blade [1.1.4].

Run the Motor to Distribute the Oil
The oil must spread perfectly evenly. Running the motor achieves this. It coats the entire blade assembly. Static oil does not protect the metal. Motion works the lubricant into the tight spaces. It ensures full coverage. This step takes only ten seconds. Do not skip it. It finalizes the internal lubrication process.
Turn the Trimmer On
Switch the power on immediately. Let it run for ten full seconds. Listen for a smooth, quiet hum. A well-lubricated clipper operates quieter and with less resistance [1.2.7]. This drastically improves the overall user experience. Move the taper lever up and down. This works the oil into the bracket. It ensures seamless lever operation.
Wipe Away Excess Oil
Turn the power completely off. Take a dry microfiber cloth. Wipe off any visible oil drips. The metal should look slightly glossy. It should not look wet. Wipe the plastic casing as well. Excess oil on the outside attracts loose hair. It makes the next haircut messy. Keep the exterior dry.
- Turn the trimmer power on
- Run for ten seconds
- Listen to the motor pitch
- Wipe away excess lubricant
Professional Tip
Pro Tip: If the motor sounds loud or rattles, the blades are aligned poorly. Unscrew and realign them.
Store Your Clean Wahl Hair Trimmer Properly
Storage truly matters. A safe spot protects your expensive tool. It extends the trimmer lifespan significantly. Improper storage undoes all your hard work. Humidity is a silent killer. Physical impacts ruin internal motors. Treat the clipper like a professional instrument. Secure it safely. It will be ready for the next perfect cut.
Use a Storage Case
Place the trimmer in its original protective case. Keep it away from moisture. A bathroom drawer is often too humid. Store it in a bedroom closet instead. Climate control prevents rust. Foam-lined cases protect against accidental drops.</p><p>Store the trimmer completely dry. Replace foil heads every six months to prevent severe skin irritation [1.1.1].
Protect the Cord
Do not wrap the cord tightly around the device. Loop it very loosely. Use a velcro tie to secure it. Tight wrapping breaks internal copper wires. This causes the clipper to fail. A broken cord requires a complete replacement. Keep the plug prongs straight. Do not crush them inside the bag. Treat the electronics gently.
- Use a hard storage case
- Avoid humid environments
- Loop the power cord loosely
- Keep away from water
Professional Tip
Pro Tip: Remove the battery from cordless trimmers if you plan to store them for several months.
Frequently Asked Questions
How often should I clean my Wahl hair trimmer?
You should clean it after every single use. Brush away loose hairs immediately. This prevents hair from entering the motor. Perform a deep cleaning once a month. Remove the blades completely. Disinfect all metal parts. Regular daily cleaning takes one minute. Monthly deep cleaning takes ten minutes. Both are absolutely mandatory for optimal performance.
Can I wash my Wahl trimmer blades with water?
No. You should never use water on metal blades. Moisture accelerates rust and ruins the magnetic alignment [1.1.4]. Water destroys the high-carbon steel. It creates pitting on the blade edge. This ruins the cutting capability. Always use a proper disinfectant clipper spray. Use a dry towel to wipe them clean. Keep liquids away from the device.
What oil should I use for a Wahl hair trimmer?
Always use official Wahl blade oil. Never use mineral oil or sewing machine oil. Those alternatives lack heat resistance. The official oil resists high temperatures and protects the motor. It provides the exact viscosity required. Household oils become sticky over time. They trap dirt and hair. This creates a gummy residue that destroys the clipper.
Why does my Wahl trimmer pull hair?
Dirty blades pull hair aggressively. Dull or dry blades also cause severe pulling. Friction prevents a clean slice. Clean and oil the blades to fix this issue. Follow the five-point oiling method. Ensure the blades are perfectly aligned. If cleaning fails, the blades are permanently dull. You must buy replacement blades. Do not use dull equipment on skin.
When should I replace my Wahl hair trimmer blades?
Replace them when they become noticeably dull or rusty. Professional barbers replace them every six months. They demand peak sharpness. Home users can replace them every one to two years. It depends on your usage frequency.
Always use Wahl-approved replacement parts. Knockoff blades ruin the mounting bracket. They cause extreme motor strain. Genuine parts guarantee safe operation.
Conclusion
You now know how to clean a Wahl hair trimmer perfectly. Regular maintenance is never optional. It is a strict requirement for excellent grooming. our blades will remain incredibly sharp. Your internal motor will run efficiently. You will absolutely avoid painful hair pulling. You will also prevent severe skin irritation. Make this strict cleaning routine a permanent habit. Protect your financial investment. Enjoy a perfect, professional trim every single time.

I’m Patricia D. Johnson, an affiliate marketer and blogger specializing in trimmers and grooming tools. I create honest reviews, buying guides, and practical tips to help readers choose the right trimmer for their needs. With a focus on quality, performance, and value, I simplify the decision-making process so consumers can make confident purchases.