
Are you tired of the hassle and discomfort that comes with using a manual razor to trim your facial hair? Look no further than the electric razor with a built-in trimmer. With its precision and versatility, this grooming tool is a game-changer for anyone looking to achieve a well-groomed appearance effortlessly. In this guide, we will walk you through the ins and outs of using the trimmer on an electric razor, helping you unlock its full potential and achieve the perfect shave.
Whether you’re a seasoned grooming enthusiast or new to the world of electric razors, understanding how to use the trimmer effectively is essential. Gone are the days of multiple tools and complicated routines. The trimmer on an electric razor allows you to control your facial hair length with ease, giving you the freedom to experiment with different styles and maintain a polished look. From shaping your beard to tidying up your sideburns, this versatile attachment will become your go-to tool for achieving a precise and well-defined appearance. So, let’s dive in and discover the tips and techniques that will help you make the most of your electric razor’s trimmer, elevating your grooming routine to the next level.
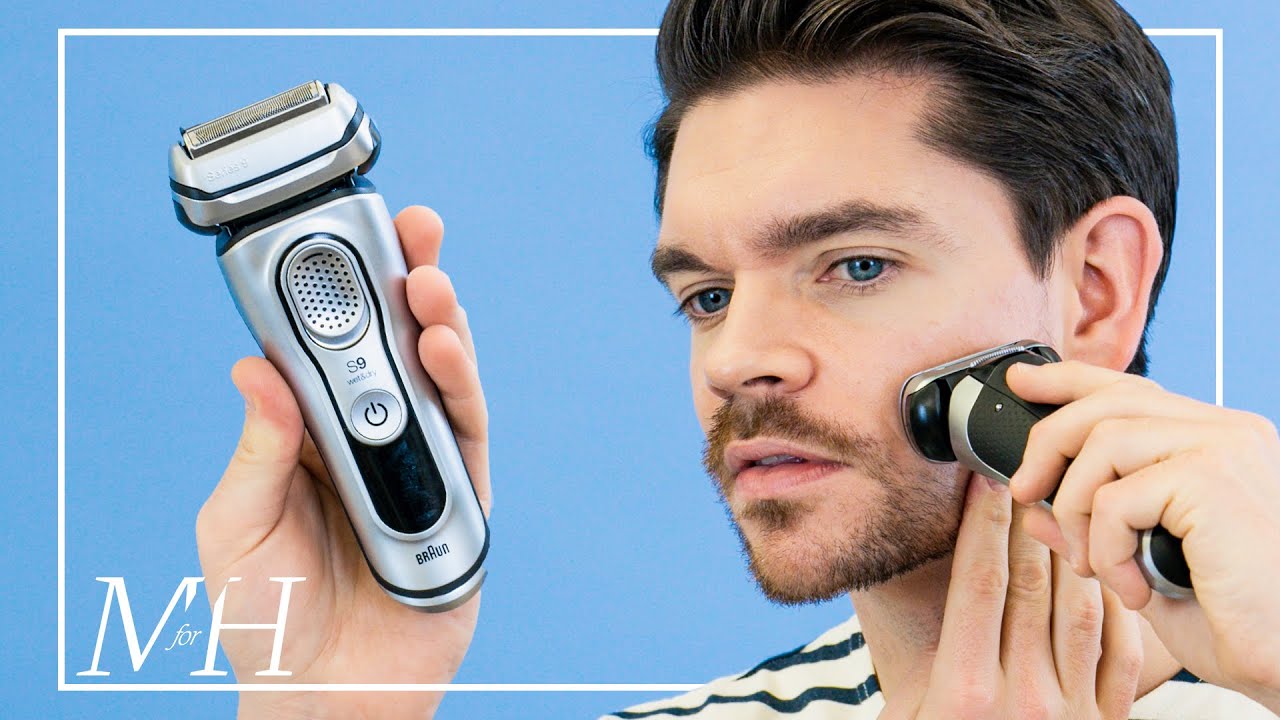
How to Use the Trimmer on an Electric Razor:
- Make sure your electric razor is charged and turned on.
- Locate the trimmer attachment, usually found at the back of the razor.
- Attach the trimmer by sliding it onto the razor head until it clicks into place.
- Decide on the desired length and adjust the trimmer settings accordingly.
- Gently move the trimmer against the direction of hair growth, making short strokes to trim or shape the desired area.
- After use, remove the trimmer attachment and clean it according to the manufacturer’s instructions.

Source: wikihow.com
How To Use The Trimmer On An Electric Razor? A Complete Guide
In this article, we will provide you with step-by-step instructions on how to effectively use the trimmer on an electric razor. By following these simple guidelines, you will be able to achieve a neat and precise shave every time. Let’s get started!
Step 1: Preparing the Electric Razor
Before using the trimmer, it is important to ensure that your electric razor is clean and fully charged. Begin by removing any excess hair or debris from the blades and the trimmer head. This can be done using a small brush or by rinsing the blades under running water, as per the manufacturer’s instructions.
Next, check the battery level of your electric razor. If it is running low, connect it to the charger and wait until it is fully charged. This will ensure that the trimmer operates at its optimal performance and guarantees a smooth and effortless shave.
Step 2: Selecting the Trimming Length
Most electric razors come with adjustable trimming settings, allowing you to choose the desired length for your beard or stubble. Depending on your preference, set the trimmer to the desired length by adjusting the trimmer head or using the designated length adjustment buttons.
For a closer shave, select a shorter trimming length, while a longer length will leave more hair intact. It is recommended to start with a longer length and gradually decrease it until you achieve the desired result. Remember, you can always trim more, but you cannot undo an excessive trim!
Step 3: Trimming the Beard
When you are ready to trim your beard, hold the electric razor at a 90-degree angle to your face. Start by trimming the sides of your beard, moving the trimmer in an upward motion against the direction of hair growth. This will help in achieving a closer and more even trim.
Continue trimming the rest of your beard, paying attention to the areas around your chin and neck. Take your time and make small, controlled movements to ensure precision. Always remember to go against the direction of hair growth for a cleaner and more professional look.
Step 4: Cleaning and Maintenance
After each use, it is essential to clean your electric razor thoroughly to maintain its performance and longevity. Start by turning off the razor and removing the trimmer head. Rinse both the head and the blades under running water, making sure to remove any hair or residue.
Allow the parts to air dry completely before reassembling the electric razor. You may also want to apply a few drops of lubricating oil to the blades to keep them in optimal condition. Remember to follow the manufacturer’s instructions for proper cleaning and maintenance.
Step 5: Final Touches
Once you have finished trimming your beard, take a moment to inspect your work in a well-lit area. If you notice any uneven spots or stray hairs, use the trimmer to make any necessary adjustments. Pay close attention to the areas around your jawline and neckline to achieve a clean and polished look.
After making the final touches, rinse your face with cold water to close the pores and apply an aftershave or moisturizer to soothe the skin. Congratulations, you have successfully learned how to use the trimmer on an electric razor!
Source: ytimg.com
Frequently Asked Questions
Here are some common questions about how to use the trimmer on an electric razor:
How do I turn on the trimmer on my electric razor?
To turn on the trimmer on your electric razor, locate the power button on the razor handle. Press and hold the power button for a few seconds until the trimmer turns on. Once the trimmer is activated, you can start using it to trim your facial hair or other areas that require grooming.
It’s important to note that different electric razors may have slightly different power button designs, so refer to your razor’s user manual for specific instructions if you are unsure.
How do I adjust the length settings on the trimmer?
Most electric razors with trimmer attachments offer adjustable length settings to customize your grooming experience. Look for a dial or switch near the trimmer head or on the razor handle that allows you to change the length settings.
Typically, you can rotate the dial or slide the switch to select your desired length. Make sure to start with a longer setting and gradually decrease the length if you want a shorter trim. Experiment with different settings to find the one that suits your preferences best.
How do I clean the trimmer after use?
Proper cleaning is essential to maintain the performance and longevity of your electric razor’s trimmer. After using the trimmer, detach it from the razor if possible and rinse it under running water to remove any hair or debris.
You can also use a small brush, usually included with the razor, to gently clean the trimmer blades and remove any stubborn residue. Be sure to follow the manufacturer’s instructions regarding the specific cleaning recommendations for your particular razor model.
How often should I replace the trimmer blades?
The frequency of replacing trimmer blades depends on various factors, including how frequently you use the trimmer, the thickness of your hair, and the overall maintenance and care you provide to your electric razor.
As a general guideline, it is recommended to replace the trimmer blades every 6 to 12 months to ensure optimal performance. However, if you notice a decrease in the trimmer’s effectiveness or if the blades become dull or damaged, it’s advisable to replace them sooner.
A Step-By-Step Guide To Shaving With An Electric Beard Trimmer | Fatherly
Final Words:
In conclusion, mastering the art of using the trimmer on an electric razor is crucial for achieving a precise and polished look. By following the step-by-step guide outlined above, you can confidently navigate the various features and functions of your electric razor’s trimmer. Remember to choose the appropriate comb length or adjustment setting, and take your time to carefully trim and shape your facial hair or hairstyle. With practice, you will become more adept at using the trimmer to create clean lines, define your style, and maintain a well-groomed appearance.
Furthermore, understanding the different techniques for using the trimmer on an electric razor can greatly enhance your grooming routine. Whether you are looking to maintain a well-trimmed beard, shape your sideburns, or detail your neckline, the trimmer is a versatile tool that can help you achieve your desired look. Experiment with different angles and strokes to find what works best for you, and don’t be afraid to make adjustments along the way.
With patience and practice, the trimmer on your electric razor will become an invaluable tool in your grooming arsenal, allowing you to effortlessly maintain a neat and stylish appearance. So, go ahead and unleash your creativity while using the trimmer, and enjoy the confidence that comes with a well-groomed and perfectly trimmed look.
