Are you tired of struggling to put your eyebrow trimmer back together after cleaning? Don’t worry, we’ve got you covered! In this guide, we will take you through step-by-step instructions on how to easily reassemble your eyebrow trimmer, ensuring that you can achieve perfectly groomed eyebrows without any hassle. Whether you’re a beginner or an experienced user, this comprehensive tutorial in English will provide you with the knowledge and expertise to confidently tackle this task. So, let’s dive in and discover the secrets to effortlessly putting your eyebrow trimmer back together!
Maintaining well-groomed eyebrows is an essential part of many people’s beauty routine, but it can be frustrating when your trimmer falls apart during cleaning. It’s not uncommon to find yourself staring at an array of disconnected pieces, unsure of where each one belongs. That’s where this guide comes in. By following our clear and concise instructions, you’ll be able to easily reassemble your eyebrow trimmer and have it ready for your next grooming session in no time.
Whether you prefer a sleek and arched shape or a more natural look, our step-by-step approach will ensure that you can achieve your desired eyebrow style effortlessly. So, let’s get started on this journey to perfectly groomed eyebrows with our simple and practical guide to putting an eyebrow trimmer back together.
How to Put an Eyebrow Trimmer Back Together:
- First, gather all the parts of your eyebrow trimmer.
- Identify the main body, blade, and any additional attachments.
- Next, align the blade with the designated slot on the main body.
- Ensure that the blade is securely in place.
- If there are any attachments, attach them according to the manufacturer’s instructions.
- Finally, test the trimmer to make sure it is working properly.

Source: ytimg.com
How to Put an Eyebrow Trimmer Back Together
In this article, we will guide you through the step-by-step process of putting an eyebrow trimmer back together. Whether you have disassembled it for cleaning or maintenance purposes, or accidentally took it apart, this article will help you reassemble it correctly. Follow the instructions carefully to ensure your trimmer functions properly.
Step 1: Gather the Parts
Before you begin reassembling your eyebrow trimmer, make sure you have all the necessary parts. Look for the trimmer body, the trimmer head, any attachment combs, and the screws that hold the trimmer together. Lay them out on a clean, flat surface so that they are easily accessible.
Check each part for any dirt or debris. If you notice any, clean them thoroughly using a soft cloth or a cotton swab moistened with rubbing alcohol. This will ensure that the trimmer operates smoothly and efficiently.
Step 2: Align the Trimmer Head
Start by aligning the trimmer head with the trimmer body. Look for the corresponding grooves or notches on both parts that will help you fit them together. Gently press the head onto the body, making sure it fits snugly.
Once the trimmer head is aligned, check if there are any screws that need to be inserted to secure the head in place. Refer to the manufacturer’s instructions or the diagram provided to determine the correct screw placement. Use a screwdriver to tighten the screws, but be careful not to overtighten as it may damage the trimmer.
Step 3: Attach the Comb
If your eyebrow trimmer came with attachment combs for different lengths, now is the time to attach them. Take the desired comb and slide it onto the trimmer head. Ensure that it fits securely and does not wobble.
Some combs may have a locking mechanism or a clip that needs to be engaged to keep them in place. Follow the manufacturer’s instructions to properly secure the comb. Once attached, gently tug on the comb to ensure it is firmly in place.
Step 4: Secure the Trimmer Body
With the trimmer head and comb in place, it’s time to secure the trimmer body. Locate the screw holes on the body and align them with the corresponding holes on the head. Insert the screws and tighten them using a screwdriver.
Again, be cautious not to overtighten the screws. Tighten them just enough to hold the trimmer securely together without causing any damage. Check all the screws to ensure they are tightened evenly.
Step 5: Test the Trimmer
Now that you have put the eyebrow trimmer back together, it’s time to test it. Turn on the trimmer and check if it is functioning properly. If you notice any issues or irregularities, disassemble the trimmer again and repeat the steps to ensure everything is correctly aligned and secured.
Once you are satisfied with the performance of your reassembled eyebrow trimmer, you can start using it again for precise and effortless eyebrow grooming.
Putting an eyebrow trimmer back together may seem daunting at first, but by following these step-by-step instructions, you can easily reassemble it correctly. Remember to gather all the necessary parts, align the trimmer head, attach any combs, secure the trimmer body, and test the trimmer before use. With proper care and maintenance, your eyebrow trimmer will continue to provide you with precise and efficient grooming for a long time.
Frequently Asked Questions
Here are some common questions about how to put an eyebrow trimmer back together:
How do I disassemble an eyebrow trimmer?
To disassemble an eyebrow trimmer, start by removing any attachments or accessories that may be attached to the device. Then, carefully remove the trimmer head by twisting it counter-clockwise or following the instructions provided by the manufacturer. Once the trimmer head is removed, you may also need to detach the battery compartment or any other removable parts. Take note of the order in which you remove the parts, as this will help you during reassembly.
When disassembling an eyebrow trimmer, it is important to handle the parts with care and avoid using excessive force. If you encounter any difficulties, consult the user manual or contact the manufacturer for assistance.
How do I clean the parts of an eyebrow trimmer?
Before putting an eyebrow trimmer back together, it is essential to clean the individual parts. Begin by rinsing the trimmer head under warm water to remove any hair or debris. You can also use a small brush or toothbrush to gently scrub the blades and remove any stubborn residues.
For other removable parts, such as the battery compartment or attachments, wipe them down with a damp cloth or mild soapy water if necessary. Make sure to dry all the parts thoroughly before reassembling the trimmer to prevent any damage or malfunction.
How do I align the trimmer head correctly?
When putting an eyebrow trimmer back together, it is crucial to align the trimmer head correctly. Look for any notches, grooves, or arrows on both the trimmer head and the main body of the device. These indicators usually serve as alignment guides to ensure that the trimmer head is placed in the correct position.
Carefully insert the trimmer head into the designated slot on the body of the trimmer, making sure to align the indicators. Once properly aligned, twist the trimmer head clockwise to secure it in place. Be cautious not to overtighten, as this may cause damage to the device.
How do I reattach the battery compartment?
If you have detached the battery compartment of your eyebrow trimmer, follow these steps to reattach it correctly. First, locate the corresponding slot or compartment for the batteries on the main body of the trimmer. Make sure the battery contacts are clean and free from any debris.
Insert the batteries into the compartment, ensuring they are correctly aligned with the polarity markings (+ and -). Then, carefully slide the battery compartment back into its slot, making sure it fits snugly. If there is a latch or locking mechanism, secure it in place. Finally, test the trimmer to ensure the batteries are properly connected and functioning.
Do I need any special tools to put an eyebrow trimmer back together?
No, you generally do not need any special tools to put an eyebrow trimmer back together. Most trimmers are designed for easy disassembly and reassembly without requiring additional tools. However, it is always a good idea to consult the user manual or manufacturer’s instructions for specific guidance.
In some cases, a small screwdriver may be needed to remove or tighten screws holding certain parts in place. If you encounter any difficulties during the reassembly process, it is recommended to reach out to the manufacturer or seek professional assistance to prevent any damage to the trimmer.
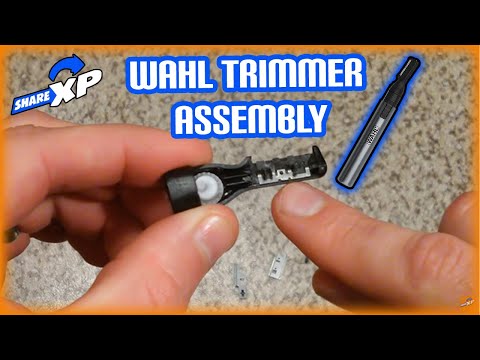
Wahl Body Hair Trimmer Assembly
Final Words:
In conclusion, mastering the art of putting an eyebrow trimmer back together is an essential skill for anyone who wants to maintain well-groomed and perfectly shaped eyebrows. By following the step-by-step instructions provided in this guide, you can confidently disassemble and reassemble your trimmer with ease. Remember to always start by carefully examining the parts and understanding their functionality, as this will greatly assist you in the reassembly process. Additionally, taking the time to clean and lubricate the trimmer regularly will ensure its longevity and optimal performance.
Furthermore, it’s crucial to exercise patience and precision throughout the process. Rushing or skipping steps can lead to frustration and potential damage to your trimmer. By approaching this task with a calm and focused mindset, you will be able to successfully navigate the intricacies of putting an eyebrow trimmer back together.
However, with practice and attention to detail, you can become proficient in this skill. So, next time you find yourself in need of disassembling and reassembling your eyebrow trimmer, fear not. Armed with the knowledge and techniques outlined in this guide, you can confidently tackle this task and achieve professional-looking results. Remember, practice makes perfect, and soon enough, you will be able to effortlessly maintain perfectly groomed eyebrows, all thanks to your mastery of putting an eyebrow trimmer back together.
