Are you tired of struggling with a dull or broken blade on your Babyliss trimmer? Well, you’re in luck! In this comprehensive guide, we will walk you through the step-by-step process of replacing your Babyliss trimmer blade, ensuring that your grooming routine is always on point. Whether you’re a professional barber or a DIY enthusiast, this tutorial will equip you with the knowledge and skills needed to effortlessly replace the blade on your Babyliss trimmer, saving you time, money, and potential frustration.
Replacing the blade on your Babyliss trimmer may seem like a daunting task, but fear not! With the right tools and a little patience, you’ll be able to achieve salon-quality results from the comfort of your own home. From removing the old blade to properly installing the new one, we will guide you through each step, providing clear instructions and helpful tips along the way.
So, grab your Babyliss trimmer and join us on this journey to a sharper, more precise grooming experience. Get ready to say goodbye to those pesky, uneven trims and hello to a blade that will leave you looking your best – every time.

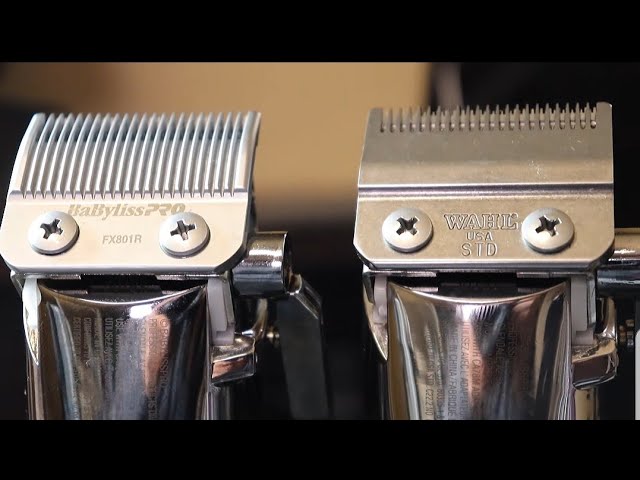
Source: ytimg.com
How to Replace a Babyliss Trimmer Blade: Easy Step-by-Step Guide
In this blog section, we will guide you through the step-by-step process of replacing the blade on your Babyliss trimmer. Whether you are a professional barber or someone who likes to groom their own hair at home, knowing how to replace the trimmer blade is an essential skill. By following these instructions carefully, you will be able to maintain the performance and longevity of your Babyliss trimmer.
Gather the Necessary Tools
Before you begin the blade replacement process, it is important to gather all the necessary tools. This will ensure that you have everything you need within reach, making the process smoother and more efficient. To replace the Babyliss trimmer blade, you will need:
- Replacement blade
- Screwdriver (specific to your trimmer model)
- Lint-free cloth
- Lubricating oil
Make sure you have these tools ready before proceeding to the next step.
Step 1: Turn Off and Unplug the Trimmer
Safety should always be your top priority when working with any electrical device. Before you begin replacing the blade, make sure that the trimmer is turned off and unplugged from the power source. This will prevent any accidental injuries and ensure your safety throughout the process.
Once you have confirmed that the trimmer is turned off and unplugged, you can proceed to the next step.
Step 2: Remove the Old Blade
Using the screwdriver, carefully remove the screws that hold the old blade in place. Keep the screws in a safe place to avoid losing them. Once the screws are removed, gently lift the old blade from the trimmer. Take this opportunity to clean any hair or debris that may have accumulated around the blade area using a lint-free cloth.
It is recommended to clean the trimmer thoroughly before installing the new blade to ensure optimal performance.
Step 3: Install the New Blade
Take the replacement blade and align it with the designated slots on the trimmer. Once aligned, carefully insert the blade into the trimmer until it fits snugly. Make sure the blade is positioned correctly and securely in place.
Once the new blade is securely inserted, use the screwdriver to tighten the screws back into place. Make sure not to overtighten the screws, as this may cause damage to the trimmer.
Step 4: Lubricate the Blade
Proper lubrication is vital for the smooth operation of the trimmer blade. Apply a few drops of lubricating oil to the blade, ensuring that it is evenly distributed. This will help reduce friction and prolong the life of the blade.
After applying the oil, turn on the trimmer briefly to allow the oil to spread and coat the blade evenly. Wipe off any excess oil with a lint-free cloth.
Step 5: Test the Trimmer
Now that you have successfully replaced the blade, it is time to test the trimmer. Turn on the trimmer and check if the new blade is functioning properly. Ensure that the trimmer is cutting smoothly and without any issues.
If everything looks and sounds good, congratulations! You have successfully replaced the blade on your Babyliss trimmer.
Step 6: Clean up and Maintenance
After completing the blade replacement, it is important to clean up any remaining debris and store your tools properly. Use a lint-free cloth to wipe the trimmer and remove any excess oil or dirt. Store your tools in a safe place, ready for future use.
Regular maintenance is key to keeping your Babyliss trimmer in optimal condition. Clean the trimmer after each use, oil the blade regularly, and replace the blade as needed to maintain its performance.
Step 7: Seek Professional Help if Needed
If you encounter any difficulties during the blade replacement process or if you are unsure about any step, it is best to seek professional help. Contact the Babyliss customer support or take your trimmer to an authorized service center for assistance. They will be able to guide you through the process or carry out the blade replacement for you.
Replacing the blade on your Babyliss trimmer is a simple yet essential task for maintaining its performance. By following the steps outlined in this guide and taking proper care of your trimmer, you can ensure that it stays in top shape and provides you with precise and efficient grooming results.
Frequently Asked Questions
Here are some commonly asked questions about how to replace the blade on a Babyliss trimmer:
How do I remove the old blade from my Babyliss trimmer?
Replacing the blade on a Babyliss trimmer is a straightforward process. First, make sure the trimmer is turned off and unplugged. Locate the release button or lever on the trimmer, which is usually located near the blade area. Press or slide the release button/lever to unlock the blade mechanism.
Once the blade is unlocked, carefully lift it off the trimmer unit. Be cautious of the sharp edges. If the blade is stuck, you may need to apply gentle pressure or wiggle it slightly to remove it. Ensure that you do not force or bend the blade, as this can cause damage to both the blade and trimmer unit.
Where can I purchase a replacement blade for my Babyliss trimmer?
You can purchase a replacement blade for your Babyliss trimmer from various sources. One option is to visit a local beauty supply store or salon that carries Babyliss products. They may have the replacement blade in stock or be able to order it for you.
Alternatively, you can also look for replacement blades online. Many reputable websites specialize in selling grooming and hair care products, including replacement parts for trimmers and clippers. Make sure to verify the compatibility of the replacement blade with your specific Babyliss trimmer model before making a purchase.
Are there any special tools required to replace the blade?
No, you typically do not need any special tools to replace the blade on a Babyliss trimmer. The process usually involves manually unlocking and removing the old blade, then attaching the new blade in its place. However, it’s always a good idea to consult the user manual or instructions provided by Babyliss for your specific trimmer model, as there may be slight variations in the process.
Having a clean cloth or tissue handy to wipe away any hair or debris from the trimmer unit and blade area can be helpful. This ensures a clean and smooth replacement process and prevents any potential damage to the new blade.
How often should I replace the blade on my Babyliss trimmer?
The frequency of blade replacement for your Babyliss trimmer depends on various factors, including usage and maintenance. As a general guideline, it is recommended to replace the blade every 6 to 12 months, or sooner if you notice a decline in cutting performance or any signs of damage.
If you frequently use the trimmer or use it for professional purposes, you may need to replace the blade more often. Regular cleaning and oiling of the blade can help prolong its lifespan and maintain optimal cutting performance.
Can I clean and sharpen the blade instead of replacing it?
While it is possible to clean and sharpen the blade on your Babyliss trimmer, it is generally recommended to replace it instead. The blades on trimmers are designed to be sharp and precise, and attempting to sharpen them yourself can be challenging and may result in damage to the blade.
Cleaning the blade regularly is important to remove any hair or debris buildup, which can affect cutting performance. However, if you notice that the blade is dull or damaged, it is best to replace it with a new one to ensure efficient and safe trimming.

Source:
Final Verdicts:
In conclusion, learning how to replace the blade on your Babyliss trimmer is a valuable skill that can save you time and money. By following the step-by-step guide outlined in this article, you can confidently tackle this task on your own. Remember to always prioritize safety, ensuring that the trimmer is unplugged and your hands are protected throughout the process.
By mastering this skill, you can maintain the efficiency and performance of your trimmer, ensuring it continues to deliver precise and professional results. Don’t be intimidated by the idea of replacing the blade – with a little practice and patience, you’ll become proficient in no time. So, go ahead and give it a try, and experience the satisfaction of successfully replacing the blade on your Babyliss trimmer.
