Are you tired of struggling with dull or misaligned trimmer blades? Look no further, as we bring you a comprehensive guide on how to adjust Oster trimmer blades. Whether you’re a professional groomer or a DIY enthusiast, keeping your trimmer blades in optimal condition is crucial for achieving precise and efficient haircuts. By following our step-by-step instructions, you’ll gain the knowledge and confidence to fine-tune your Oster trimmer blades like a pro, saving you time, money, and frustration.
The Oster trimmer is a popular choice among barbers and pet groomers for its durability and precision. However, even the best blades can lose their edge over time, resulting in uneven cuts or discomfort for your clients or pets. Fear not! In this guide, we will cover everything you need to know about adjusting Oster trimmer blades, from identifying common issues to implementing the right techniques.
So, whether you’re a beginner or an experienced user, get ready to unlock the secrets of maintaining your Oster trimmer blades for a seamless and enjoyable cutting experience.

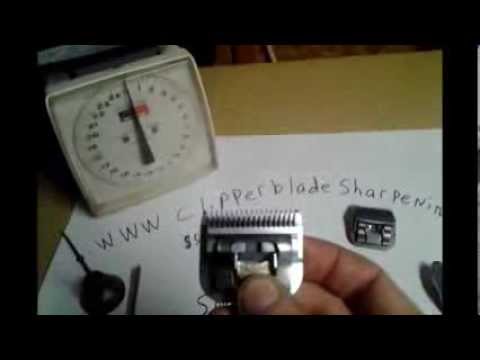
Source: ytimg.com
How to Adjust Oster Trimmer Blades? User’s Guide
In this informative guide, we will walk you through the step-by-step process of adjusting the blades on your Oster trimmer. Properly adjusting the blades is essential for maintaining the trimmer’s performance and ensuring a clean, precise cut. Follow these instructions carefully to achieve the best results.
Step 1: Gather the Necessary Tools
Before you begin adjusting the Oster trimmer blades, gather the following tools: a small flathead screwdriver, a cleaning brush, and a soft cloth. These tools will help you in the adjustment process and ensure that the blades are clean and free of any debris.
Start by turning off the trimmer and unplugging it from the power source. This step is crucial to ensure your safety during the adjustment process.
Step 2: Loosen the Blade Screws
Locate the blade screws on the trimmer head. Using the small flathead screwdriver, carefully loosen the screws by turning them counterclockwise. Make sure to loosen the screws enough to allow for blade adjustment but not too much that they come off completely.
Once the screws are loosened, gently lift the blade away from the trimmer head. Take extra care not to touch the sharp edges of the blade to avoid any injuries.
Step 3: Adjust the Blade Alignment
Inspect the blade alignment to ensure it is properly aligned with the cutting surface. If the blade is misaligned, use the flathead screwdriver to make the necessary adjustments. Slowly rotate the blade until it aligns perfectly with the cutting surface.
Once the alignment is correct, gently tighten the screws by turning them clockwise. Be careful not to overtighten the screws as it may affect the blade’s movement and performance.
Step 4: Clean and Lubricate the Blades
After adjusting the blade alignment, it is essential to clean any hair or debris that may have accumulated on the blades. Use the cleaning brush to remove any buildup, and then wipe the blades with a soft cloth to ensure they are clean and ready for use.
Additionally, apply a small amount of blade oil or lubricant to the blades to ensure smooth operation. This will help reduce friction and extend the lifespan of the blades.
Step 5: Test the Trimmer
Once you have completed the adjustment and cleaning process, plug in the trimmer and turn it on to test the blades. Check for any unusual noises or vibrations, as these may indicate a problem with the adjustment.
If everything seems to be working correctly, you can proceed to use the trimmer for your desired grooming tasks. Remember to periodically check and readjust the blades as needed to maintain optimal performance.
Step 6: Proper Maintenance
To ensure the longevity and performance of your Oster trimmer, it is essential to follow a regular maintenance routine. This includes cleaning the blades after each use, lubricating them regularly, and storing the trimmer in a dry and safe place.
Regularly inspect the blades for any signs of wear or damage and replace them if necessary. Additionally, refer to the trimmer’s user manual for any specific maintenance guidelines provided by the manufacturer.
Frequently Asked Questions
Here are some common questions about how to adjust Oster trimmer blades:
How do I adjust the tension on my Oster trimmer blades?
Adjusting the tension on your Oster trimmer blades is a simple process. Start by turning off the trimmer and unplugging it from the power source. Locate the tension screw on the side of the blade and use a screwdriver to loosen or tighten it. To increase tension, turn the screw clockwise; to decrease tension, turn it counterclockwise. Make small adjustments and test the blade’s movement after each adjustment until you achieve the desired tension. Remember to tighten the screw securely once you are satisfied with the tension.
It’s important to regularly check the tension of your Oster trimmer blades, as improper tension can affect cutting performance and may even cause injury. Adjust the tension as needed to ensure smooth and precise trimming.
How often should I adjust the blades on my Oster trimmer?
The frequency of adjusting the blades on your Oster trimmer depends on the usage and the condition of the blades. As a general guideline, it is recommended to check and adjust the blades every 3 to 4 weeks or sooner if you notice any issues with the trimmer’s performance. Regular maintenance and blade adjustments help to ensure optimal cutting performance and prolong the lifespan of your trimmer.
If you frequently use the trimmer in a professional setting or for heavy-duty tasks, you may need to adjust the blades more frequently. Pay attention to any signs of dullness, uneven cutting, or increased vibration, as these can indicate the need for blade adjustment or replacement.
Can I adjust the blade alignment on my Oster trimmer?
Yes, you can adjust the blade alignment on your Oster trimmer. Incorrect blade alignment can lead to uneven cutting and discomfort for both the user and the pet being groomed. To adjust the alignment, start by removing the blade from the trimmer. Inspect the blade and trimmer housing for any debris or hair buildup and clean them if necessary. Reattach the blade and tighten it securely. If the blade is still misaligned, you can adjust it by slightly loosening the screws that hold the blade in place and carefully repositioning it until it is aligned properly. Once aligned, tighten the screws securely.
It’s important to note that if you are unsure about adjusting the blade alignment yourself, it is recommended to seek professional assistance or consult the Oster trimmer’s user manual for specific instructions.
What should I do if my Oster trimmer blades are not cutting properly?
If your Oster trimmer blades are not cutting properly, there are a few troubleshooting steps you can take. First, check the tension of the blades and adjust it if necessary, as improper tension can affect cutting performance. Clean the blades and trimmer housing thoroughly to remove any debris or hair buildup that may be interfering with the cutting action. Lubricate the blades with clipper oil to ensure smooth operation. If these steps do not resolve the issue, it may be time to replace the blades or seek professional assistance to diagnose and fix the problem.
Regular maintenance, including blade adjustment, cleaning, and lubrication, is essential for optimal cutting performance and the longevity of your Oster trimmer.
Can I use any type of oil to lubricate my Oster trimmer blades?
No, it is recommended to use clipper oil or a specifically formulated lubricant for Oster trimmer blades. Clipper oil is designed to provide the right amount of lubrication for the blades, reducing friction and heat during operation. Using other types of oil, such as motor oil or cooking oil, may not provide the same level of lubrication and can potentially damage the blades or affect their cutting performance. Always refer to the manufacturer’s instructions or the Oster trimmer’s user manual for the recommended type of oil to use for lubricating the blades.
Remember to apply the lubricant sparingly and wipe off any excess oil before using the trimmer to prevent it from getting on the pet’s fur or skin.

Source: ytimg.com
Final Verdict
In conclusion, learning how to adjust Oster trimmer blades is a valuable skill for any professional groomer or pet owner. By following the steps outlined in this guide, you can ensure that your trimmer blades are properly aligned and ready for use. Remember to always prioritize safety by turning off and unplugging the trimmer before making any adjustments.
Mastering the art of blade adjustment will not only enhance the performance of your Oster trimmer, but also contribute to a more comfortable and efficient grooming experience for your pets. Regular maintenance and care of your trimmer blades will extend their lifespan and prevent any potential issues or accidents.
So, take the time to familiarize yourself with the process and make it a regular part of your grooming routine. With these skills in your toolbox, you’ll be well-equipped to achieve professional-looking results every time you use your Oster trimmer.
